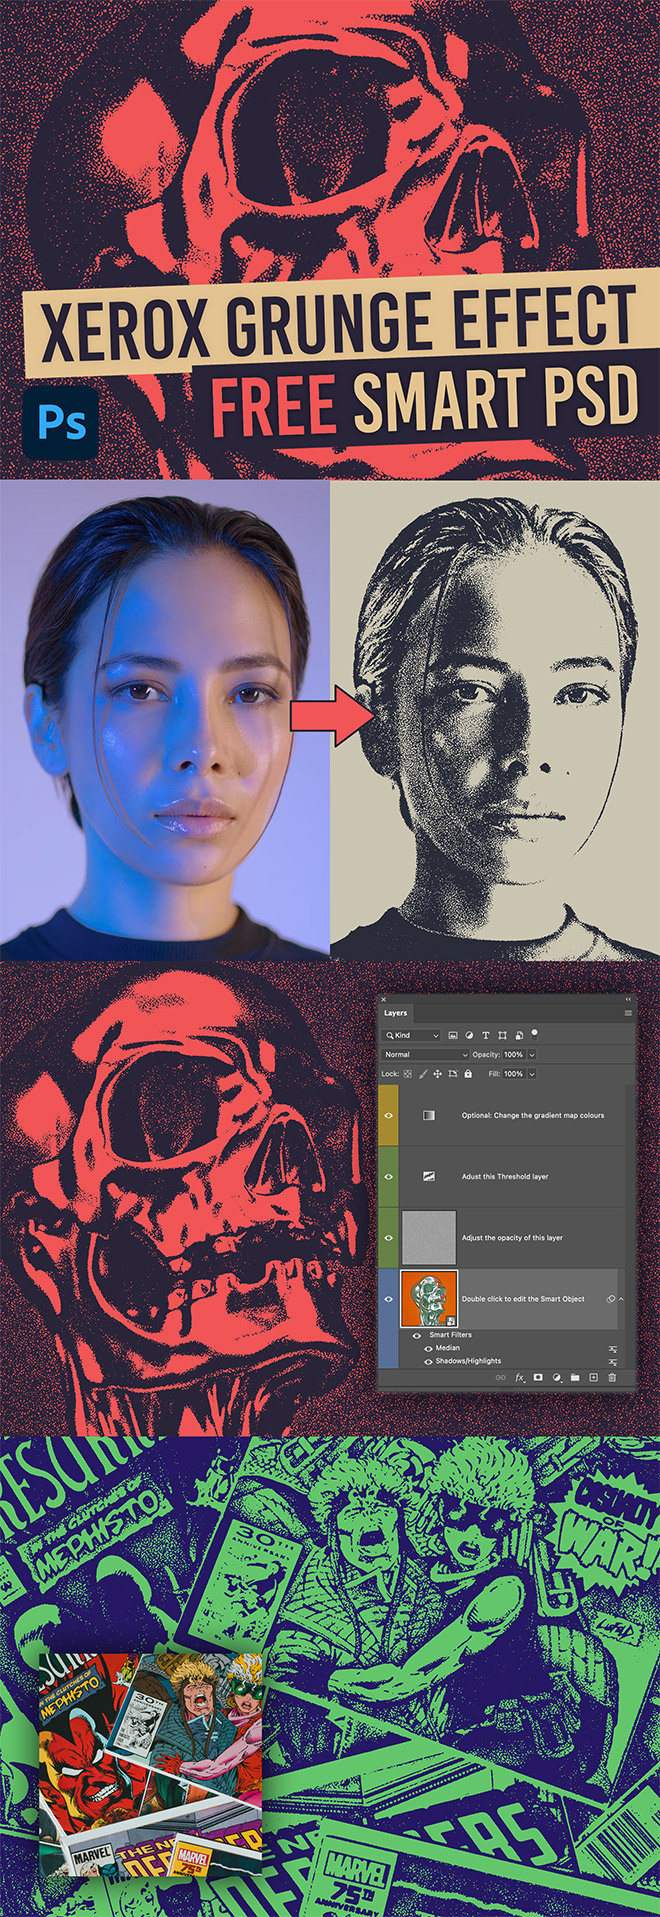
In one of my recent tutorials I showed how to create a Grainy Xerox Grunge Effect in Photoshop, named after its similarity to old photocopied images. Download this FREE Smart PSD to easily recreate the effect with your own images by replacing the contents of the Smart Object. The artwork is given a high-contrast appearance with shading generated by large grainy noise textures, all customisable by altering the layers within the PSD file.
Double-click the Smart Object to replace the contents with your own image or artwork. The effect will be automatically updated to apply the grainy xerox grunge effect. Fine tune the appearance by adjusting the Threshold layer, which will determine the overall contrast of the image, along with the opacity of the grain layer, which will alter the amount of grain that is applied to the image. At the top of the layer stack is a gradient map that can be configured to add a colourful duotone effect to the final result.
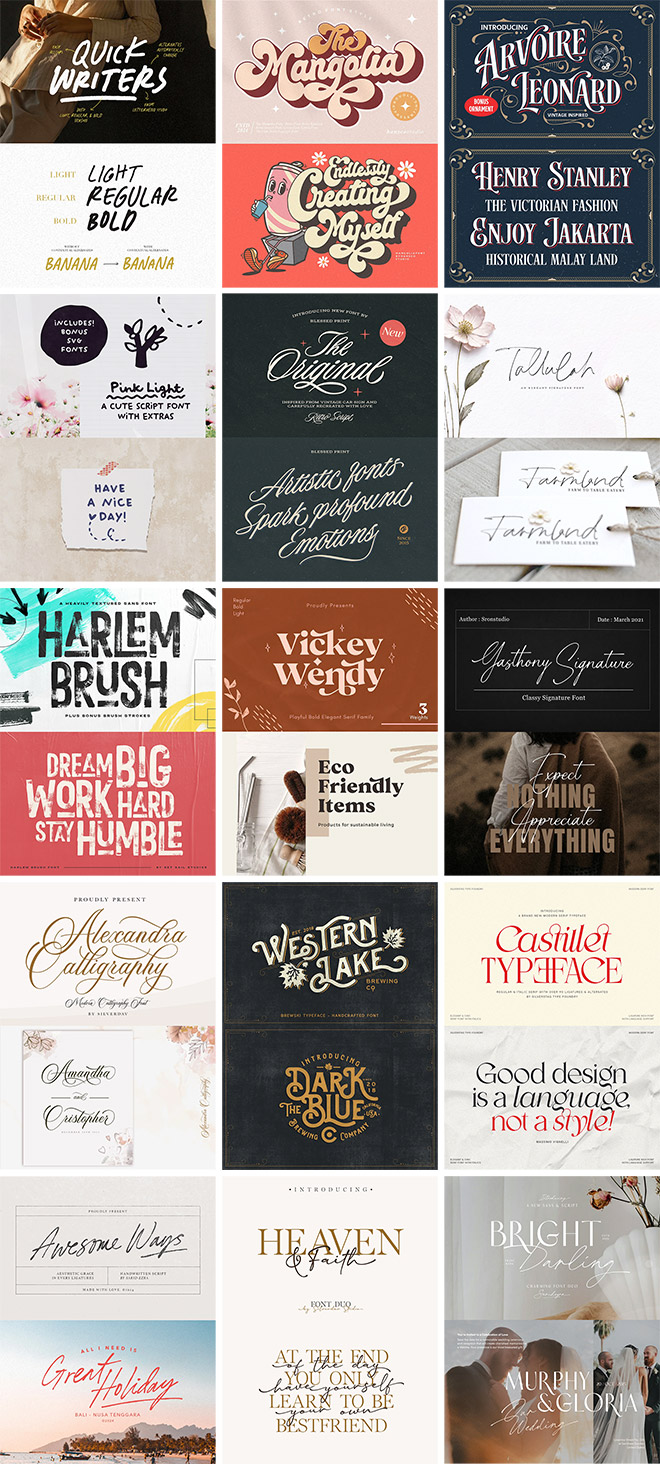
Just snagged this ‘Fontastic’ Fonts Bundle at 90% off!
Do you need some new fonts? Of course you do! I’ve just picked up this new fonts bundle at 90% off, reducing the $304 price to just $29 for all 17 typefaces. This is a great opportunity to upgrade your own font library with a range of new typefaces that you can call upon in your design projects for years to come. There’s a variety of font styles included, which makes the collection extremely versatile, providing you with a suitable type choice for whatever design challenge you might face.
$29 would usually only bag you 1 or 2 font families at their full price, so this is a great opportunity to acquire a whole collection while saving hundreds in the process. They’re all professionally designed and come with dozens of weights, stylistic alternates and extensive language support.
Join my mailing list and receive a free design resources bundle!
Stay up to date with Spoon Graphics by having new content delivered to your email inbox. As a way to say thanks, you’ll also gain instant access to my free bundle of design resources.
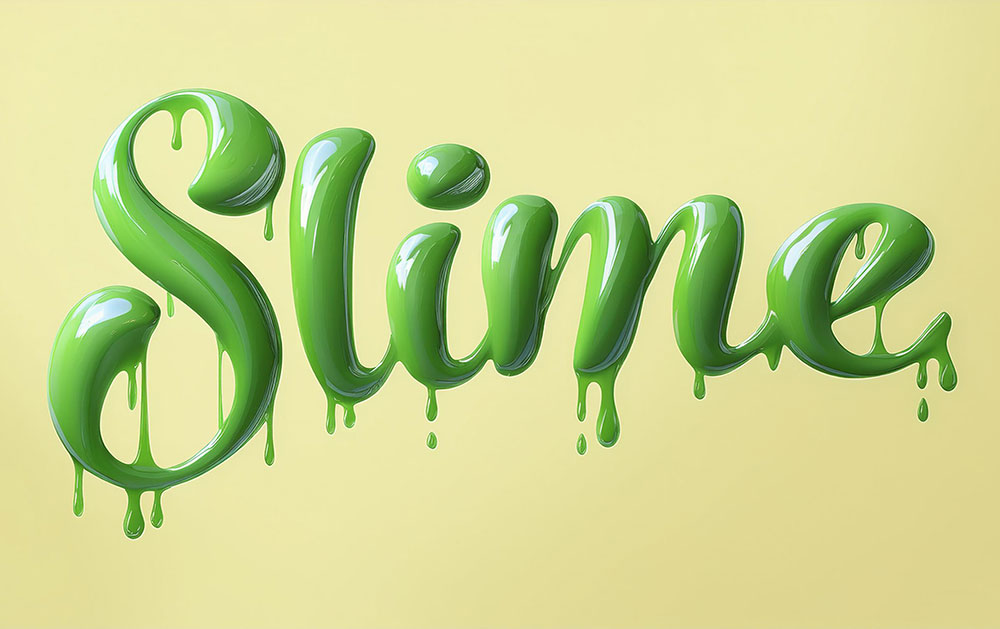
Adobe’s AI tool Firefly is great for quickly creating effects that would otherwise take considerable work in Photoshop. Learn how to generate this oozing slime text effect with ease, along with a bonus tip that helps to fix the common problem of Firefly not isolating your text on a plain background.
Easily Replace Backgrounds in Photos with ON1 by Dan Harlacher
Hello, fellow photographers. I’m Dan Harlacher from ON1, the creators of some amazing photography apps and plugins! I’m excited to show you the new Quick Mask AI tool in ON1 Photo RAW 2024.5. This tool is incredibly powerful and makes background replacements super simple. To illustrate its capabilities, I’ll walk you through three examples, from simple to complex. I also created this short video outlining each of these steps!
Example 1: Simple Background Replacement
Let’s start with a straightforward example—a bird photo. The original background is dull and shot in low light, resulting in a noisy image. Here’s the step-by-step process to enhance and replace the background:
Noise Reduction and Sharpening: First, the photo includes a lot of noise and is a little out of focus. So, I used NoNoise AI and Tack Sharp AI to remove the noise and restore the details.
Brightness Adjustment: Next, I brightened the image using the “Tone and Color” adjustments, increasing the exposure by about a stop and adjusting the blacks to enhance contrast.
Adding a New Background: I selected a new background from the ON1 Extras, specifically a bokeh image, and used the “Transform” tool to fit it perfectly behind the bird.
Masking the Old Background: Using the Quick Mask AI tool, I clicked on the bird to keep it and removed the old background. The result was a clean separation, allowing the new background to shine.
Final Adjustments: Finally, I adjusted the background’s tone and color to complement the bird’s colors, creating a harmonious and vibrant image.
Example 2: Intermediate Background Replacement with Blending
I worked with a studio shot against a neutral backdrop for a more complex scenario.
Here’s the approach:
Initial Adjustments: I cropped out unwanted elements, like a soft box in the corner.
Layering a New Background: I added a new studio backdrop, flipped it to match the lighting, and scaled it to fit.
Blending Backgrounds: Using Quick Mask AI, I masked out the original background but retained the shadows and the floor’s shape by reducing the mask’s opacity. This blended the new backdrop seamlessly with the original, maintaining a realistic look.
Color Adjustments: I tinted the new background using a photo filter to match the subject’s shorts, ensuring a cohesive color scheme.
Edge Refinement: I used the Chisel tool and Refine brush to clean up any remaining halos or edges, particularly around hair, for a polished finish.
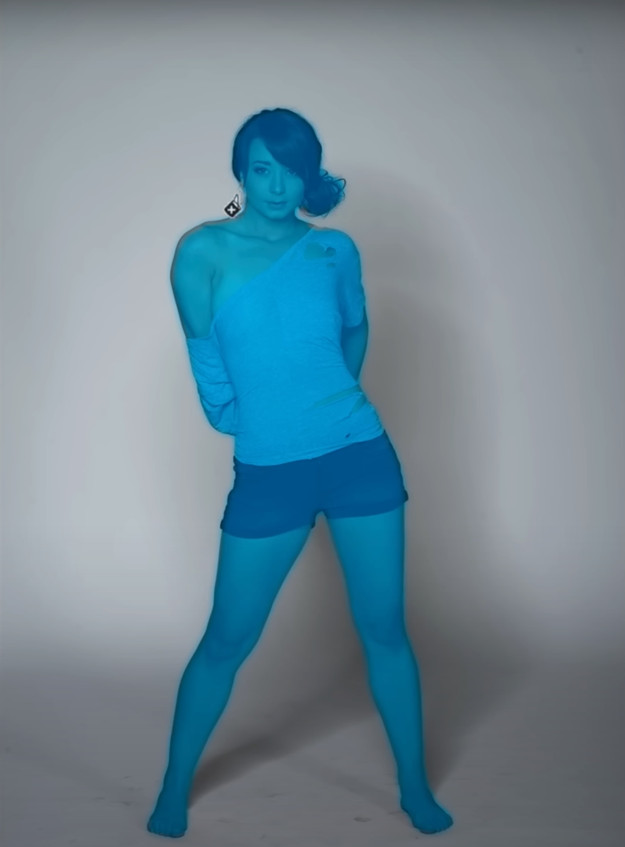
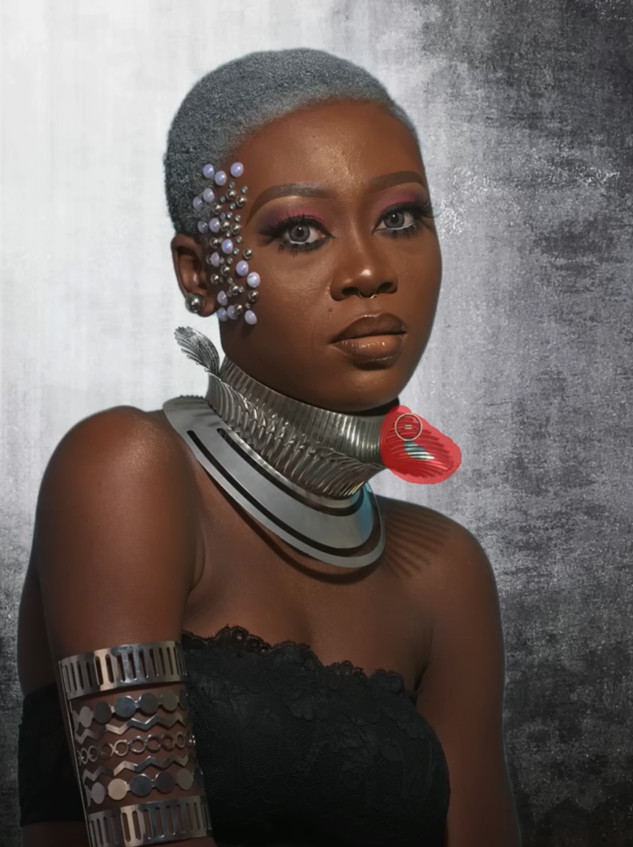
Example 3: Advanced Background Replacement with Color Corrections
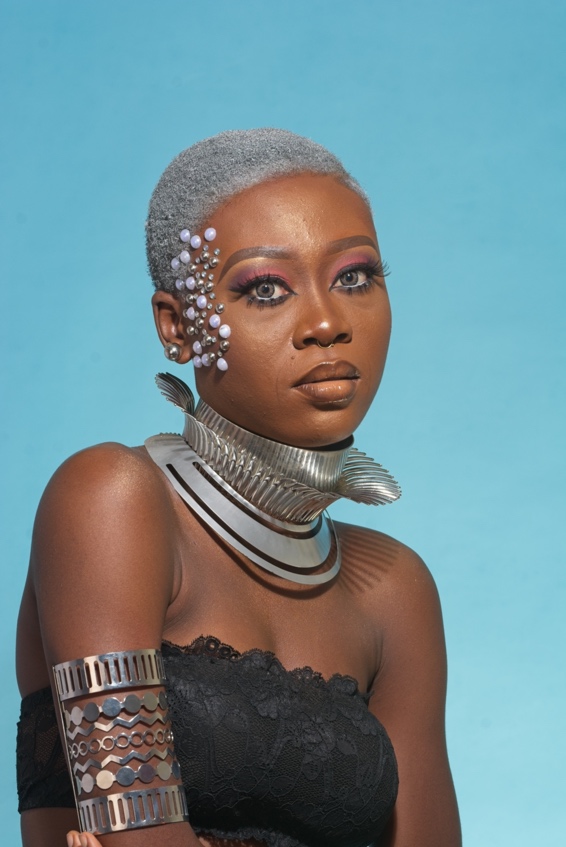
The third example involves a challenging shot with a bright blue background that reflects onto the subject’s metallic necklace and skin.
Here’s how I tackled it:
Exposure Adjustment: I lowered the exposure to correct the image’s brightness.
New Background Addition: I selected a new background and used the Transform tool to scale and position it.
Masking and Cleaning Up: Quick Mask AI helped remove the old background. However, blue reflections remained on the subject, requiring further refinements.
Local Color Adjustments: I used local adjustments to desaturate the necklace’s blue reflections and repainted the skin edges with a flesh color using the paint with color option. This corrected the color cast without altering the luminosity.
Final Touches: The result was a natural-looking edge with the correct colors, eliminating unnatural blue hues.
Conclusion
These examples highlight the incredible versatility and power of the Quick Mask AI tool in ON1 Photo RAW 2024.5. Whether dealing with simple or complex scenarios, this tool makes background replacements and composites much easier.
About ON1 Photo RAW
Elevate your photo editing game with a 30-day free trial of ON1 Photo RAW—no credit card required. Perfect for photographers of all skill levels, ON1 Photo RAW offers an intuitive yet powerful platform that blends speed, versatility, and quality into one AI-powered application. It’s the ultimate AI photo editor and includes everything a photographer needs in one application. Try ON1 Photo RAW for free and experience why it’s the top Lightroom Alternative, giving you the ultimate control to bring your photographic visions to life.
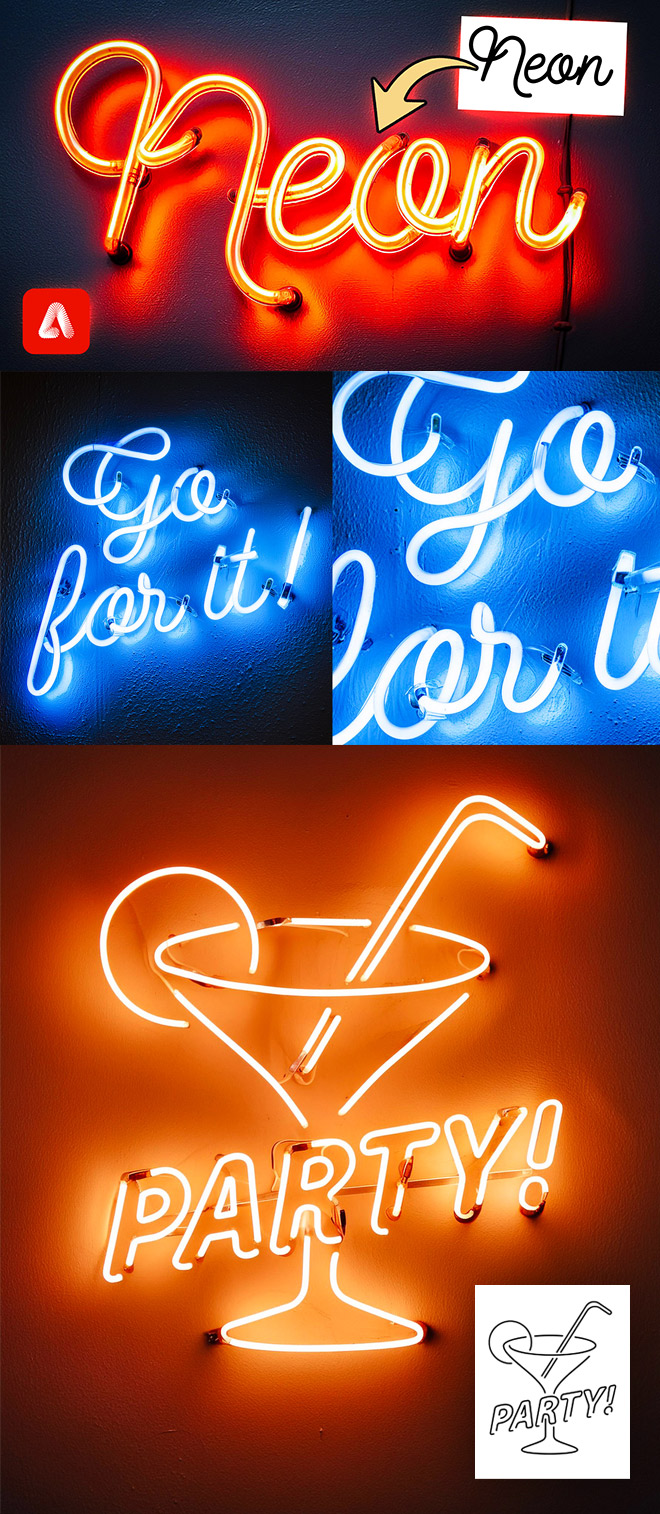
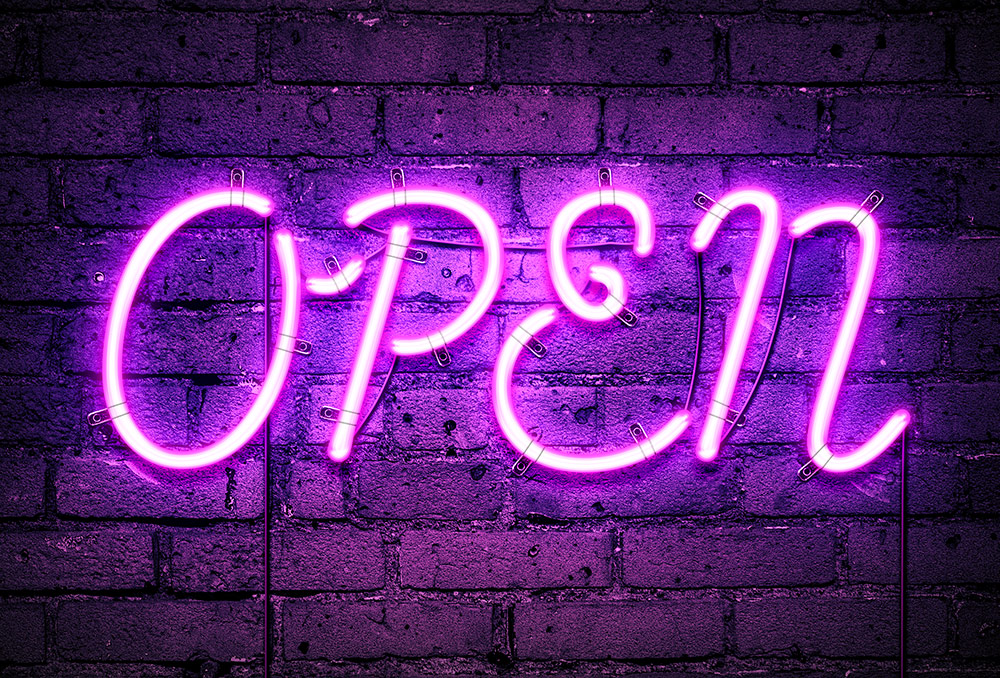
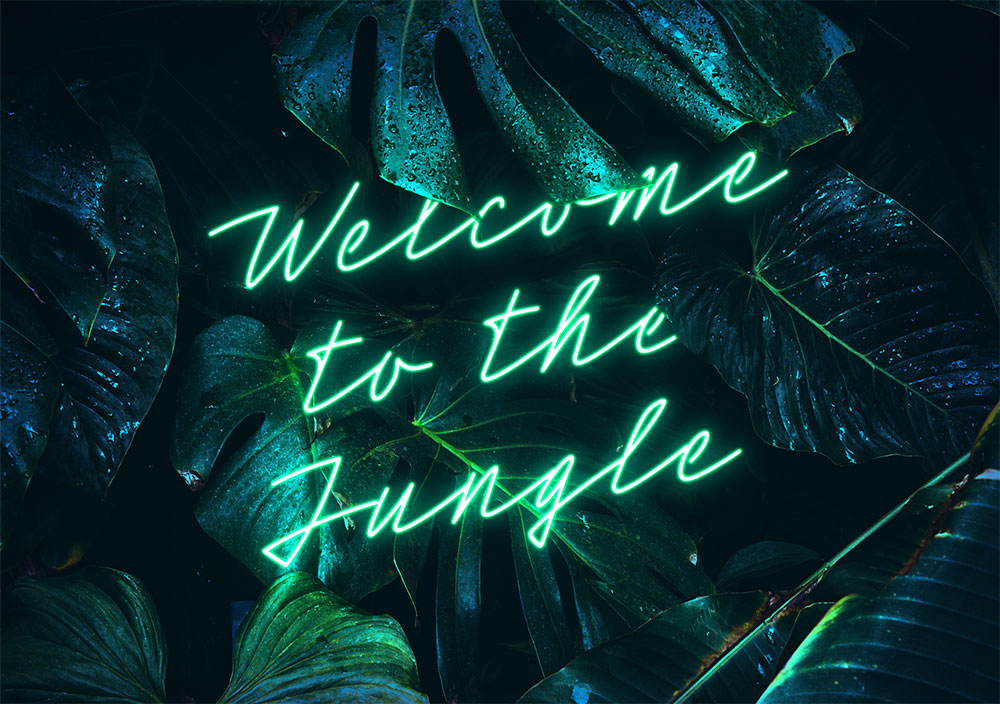
How To Use AI to Easily Create Neon Sign Effects in Adobe Firefly
There are plenty of ways to make neon signs with glow effects in Photoshop, but creating ultra-realistic neon signs usually involves advanced 3D modelling or having a genuine neon sign made in real life. However, the advances in AI technology now make it easy to generate highly realistic neon signs, complete with the intricate details of mounting hardware, cables, texture of the glass tubes, and an illumination with much more depth and vibrancy than a basic Photoshop Outer Glow effect. Follow along with this tutorial to learn how to transform your basic lettering into a realistic neon sign, with the help of the new AI tools in Adobe Firefly.
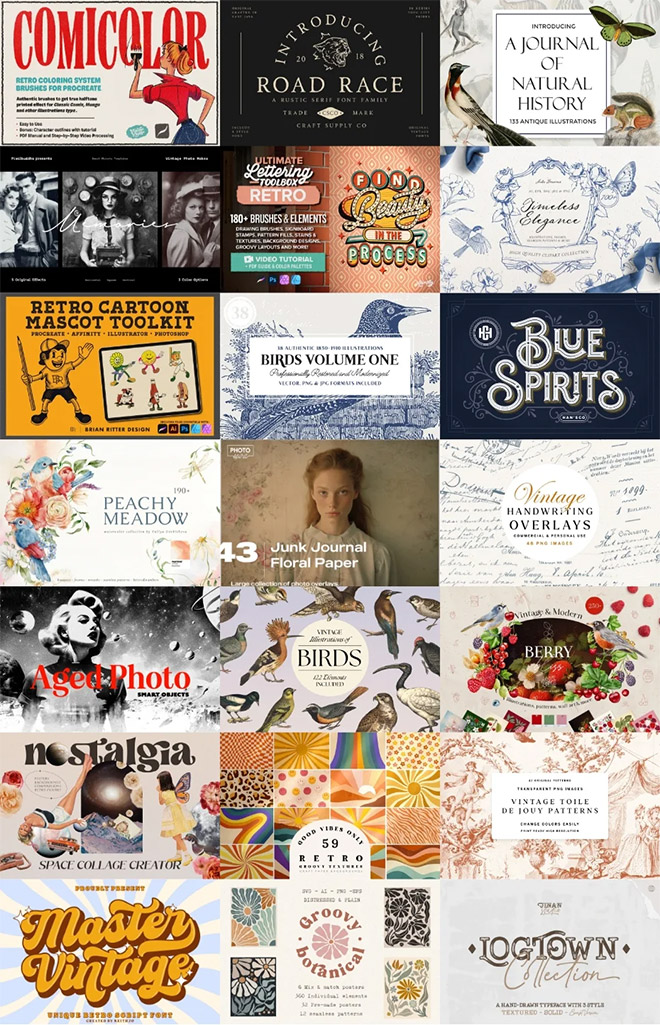
Nail the Vintage Look with This New Bundle of Design Resources
The key to creating authentic looking vintage designs is using the right assets, but genuine vintage tools and resources can be difficult to find! Thankfully this bundle has you covered with a variety of resources that are derived from various authentic sources, so you can inject a piece of history right into your design work for the most realistic results. The Vintage Lover’s Artistic Collection gives you access to a complete toolbox of vintage resources. You’ll find high quality textures, old papers, fonts and illustrations scanned from antique source materials. With a $368 discount reducing the price to just $29 you won’t find better library of vintage tools.
When vintage style designs rely so much on third party assets, it’s important to consider the licensing terms. Every single item in this collection is completely covered with an extended license that allows you to use any of the resources in your commercial and client work, as well as artwork for sale, such as merchandise, posters, or prints.
Join my mailing list and receive a free design resources bundle!
Stay up to date with Spoon Graphics by having new content delivered to your email inbox. As a way to say thanks, you’ll also gain instant access to my free bundle of design resources.
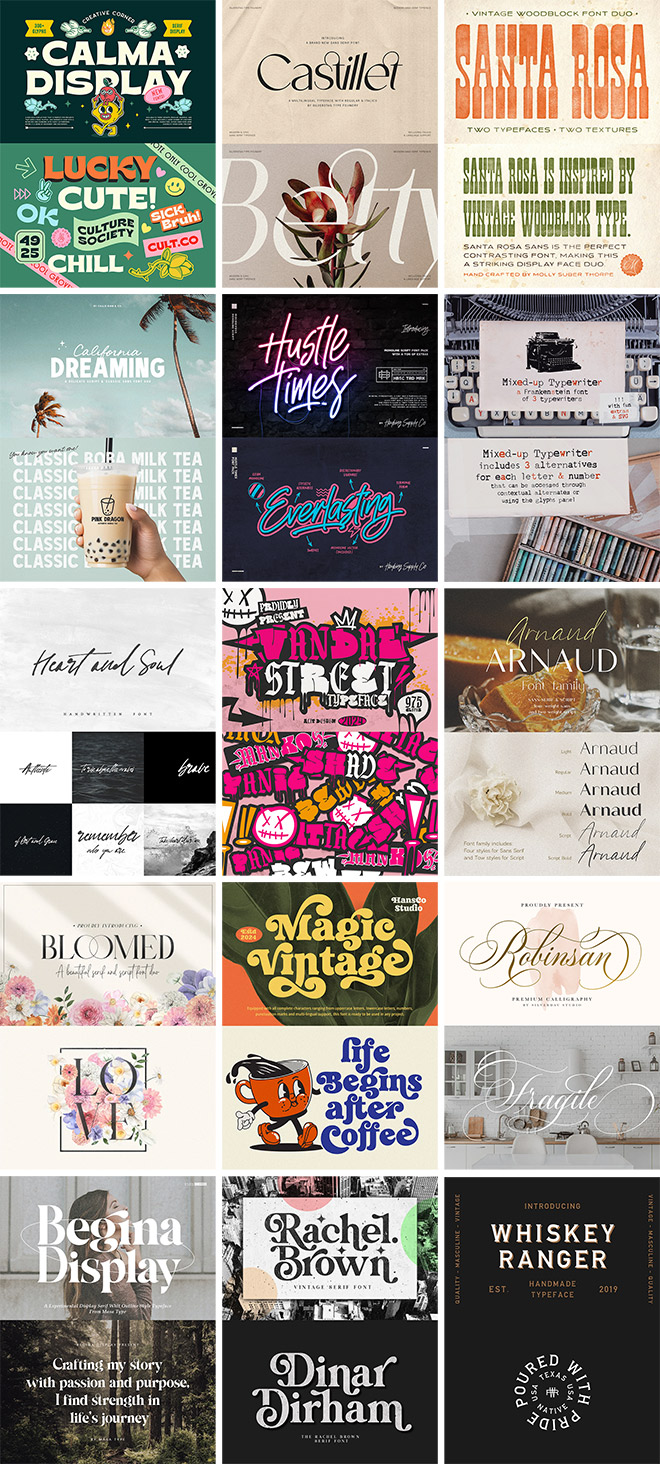
How do you fancy getting your hands on a hand-picked selection of fantastic fonts to take your design projects to the next level? Design Cuts have put together another deal packed full of top quality fonts and squashed the price down by 91%, so much so that there isn’t much left on the price tag! This is a great opportunity to acquire $316 worth of fonts in a variety of styles for just $29.
Every one of these fonts has been expertly crafted by type designers and foundries with a serious passion for typography, which is clear from the pro-grade quality. If you’ve only ever used free fonts in your design work, you’ll see the difference immediately with the wealth of weights and styles, plus the advanced OpenType features that are available when they’re used in professional design software like Photoshop, Illustrator or InDesign. Have a browse through this collection and imagine the kinds of artwork you could create with them.
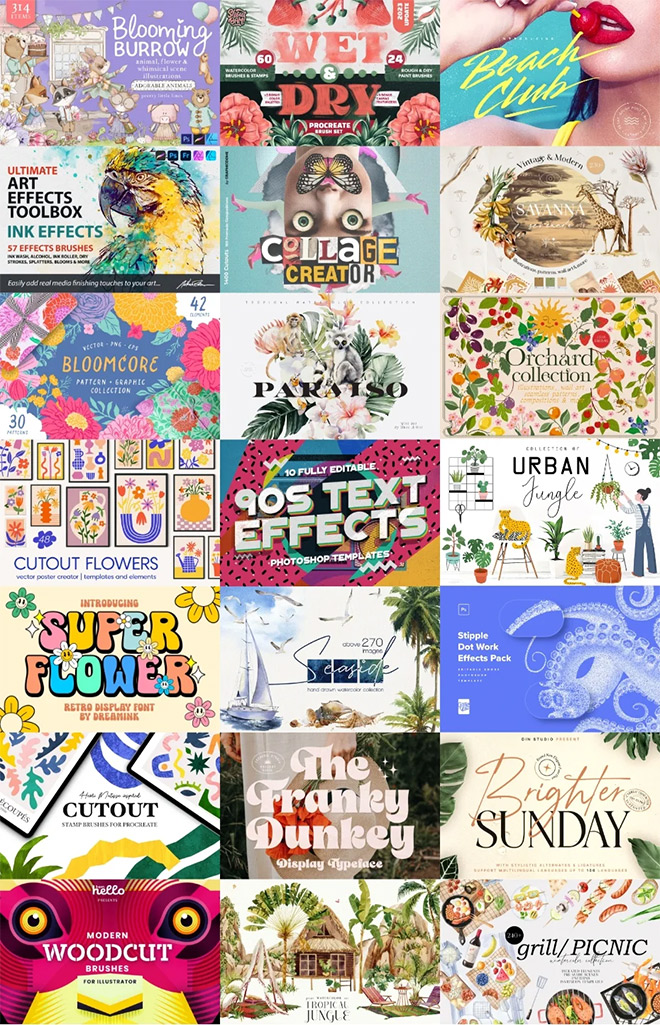
Make Your Designs Shine With This New Summer Themed Bundle
Prepare for any design project that you might face this summer with a huge upgrade to your resources library. This new Creative’s Shining Summery Collection contains a variety of tools that help you create cheeful styles and effects. Improve your illustrations with detailed brushes; add stunning text to your designs with expertly crafted fonts; and easily add watercolour effects to your work with ready-made assets. This bundle includes timeless tools you can rely upon to create hot artwork all year round, but the limited-time discount will expire in just over a week!
All the tools in this bundle are backed by an extended licence so you’re free to use them in all your personal and commercial project work. It’s only available for a limited time with a massive 93% price reduction, so be sure to pick up this unmissable deal at $29 before the discount expires.