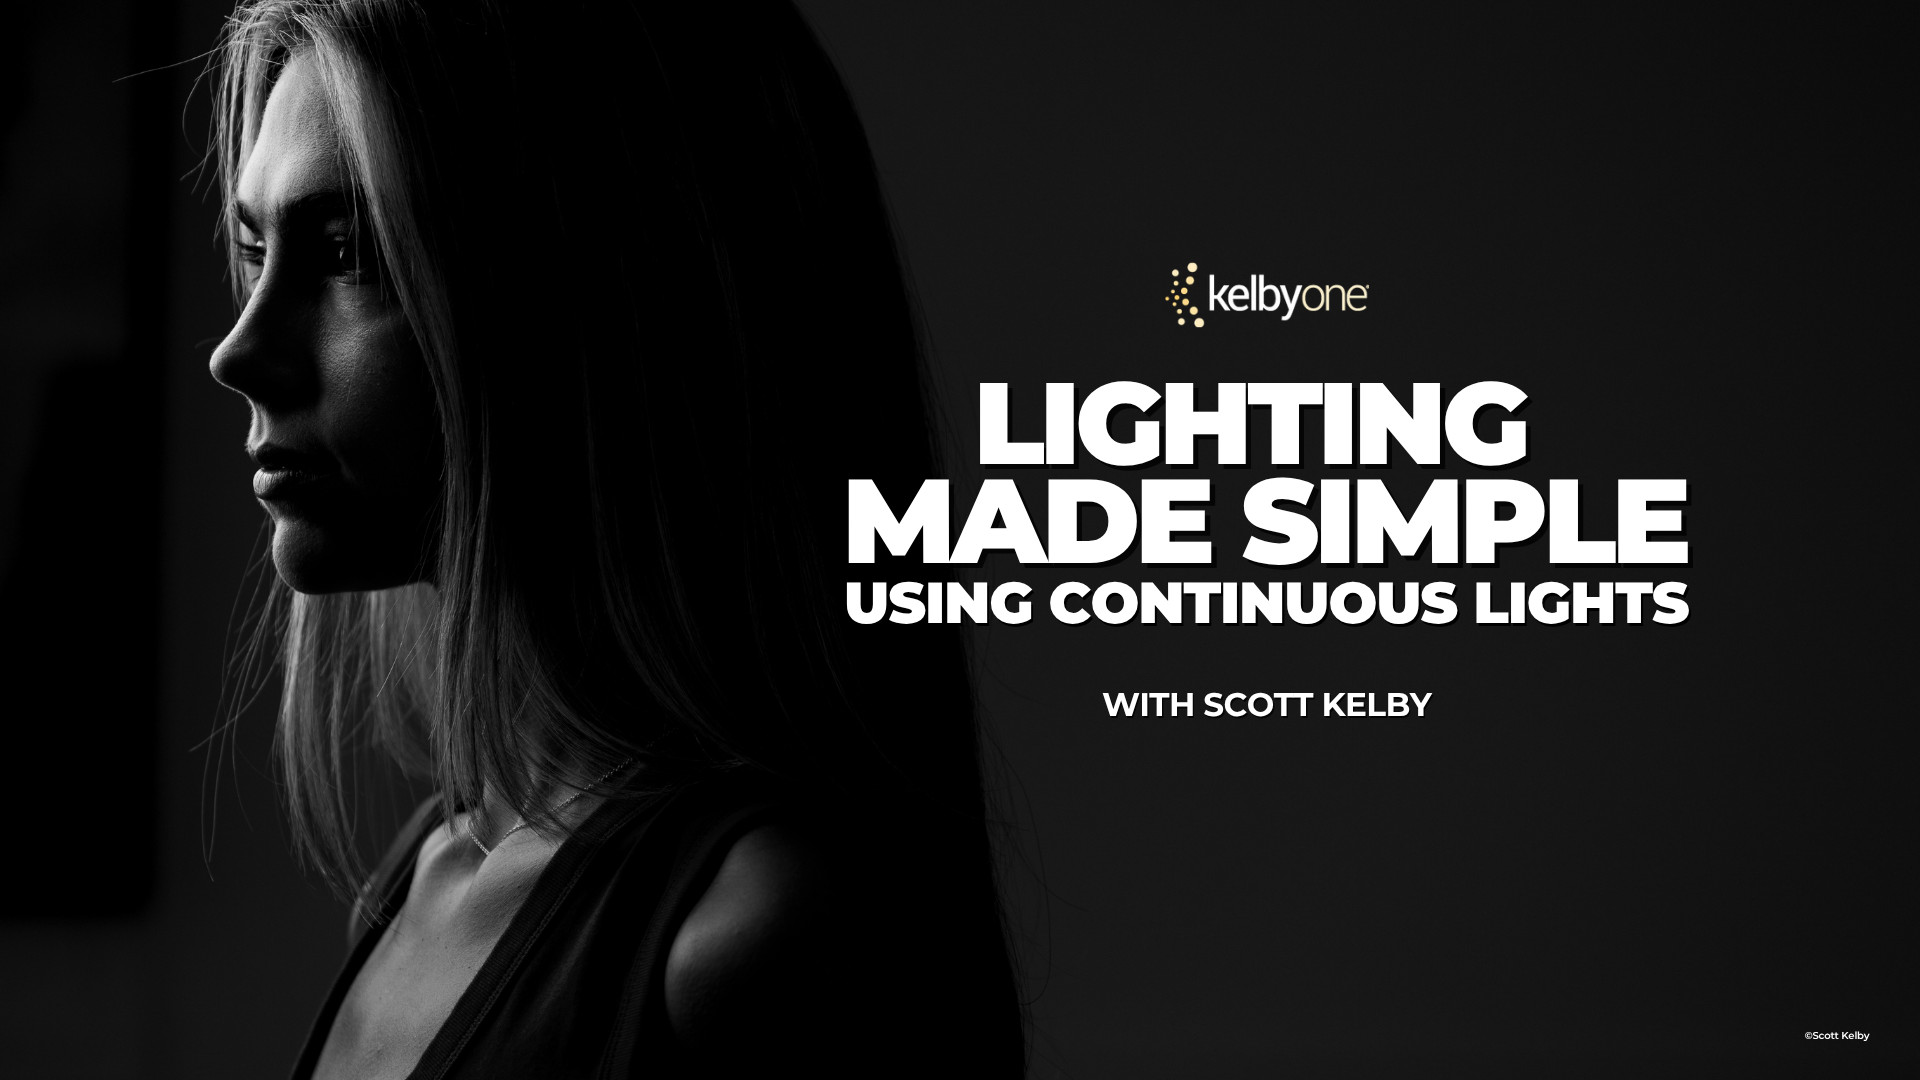
Lighting Made Simple Using Continuous Lights with Scott Kelby
If lighting has ever felt intimidating, you’re definitely not alone.
For many photographers, lighting is where things get complicated. Flash triggers, power settings, test shots, and technical jargon can make it feel harder than it needs to be.
Using continuous lights, Scott demonstrates a simple “what you see is what you get” workflow that makes it easier to understand exactly how light affects your subject. You’ll see how to build a setup in just a few minutes, work through a live portrait session, and create a variety of popular lighting styles, including split lighting, Rembrandt lighting, rim lighting, and more.
The class also covers shooting tethered directly into Lightroom, making it easy to evaluate your images and make adjustments as you work.
Whether you’re brand new to lighting or simply looking for a more straightforward approach, this class offers a practical path to better portraits. Watch Scott tell you more about it below.
Enter the Photographing People Conference Photography Contest
One of our favorite parts of every conference is seeing what attendees create, and the Photographing People Conference Photography Contest is your chance to share your work with the community.
If you’re a paid registered attendee, you’re eligible to enter. Just submit your best people photos, and you’re in. Portraits, family moments, street photography, travel photos, candid moments, posed portraits—whatever your thing is, we want to see it.
Not only will your image be featured in the conference gallery for fellow attendees to enjoy, but you’ll also be entered for a chance to win prizes from our sponsors and be featured on KelbyOne’s social channels.
More Than a Contest
The gallery is one of the most fun parts of the conference experience.
As submissions start rolling in, you’ll be able to browse images from photographers around the world and see the many different ways people approach photographing people. You’ll find everything from creative portraits and family photography to street scenes, travel images, candid moments, and more.
It’s inspiring, educational, and a great reminder that there are countless ways to tell stories with people in front of your camera.
How to Enter
If you’re registered for the Photographing People Conference, simply submit your favorite image using the button below. We can’t wait to see what you’ve been creating!
Submission Deadline: July 21, 2026 at 11:59 PM EDT
There’s something irresistible about photographing waterfalls.
The movement, the sound, the changing light, and the challenge of capturing it all in a single frame keep photographers coming back again and again.
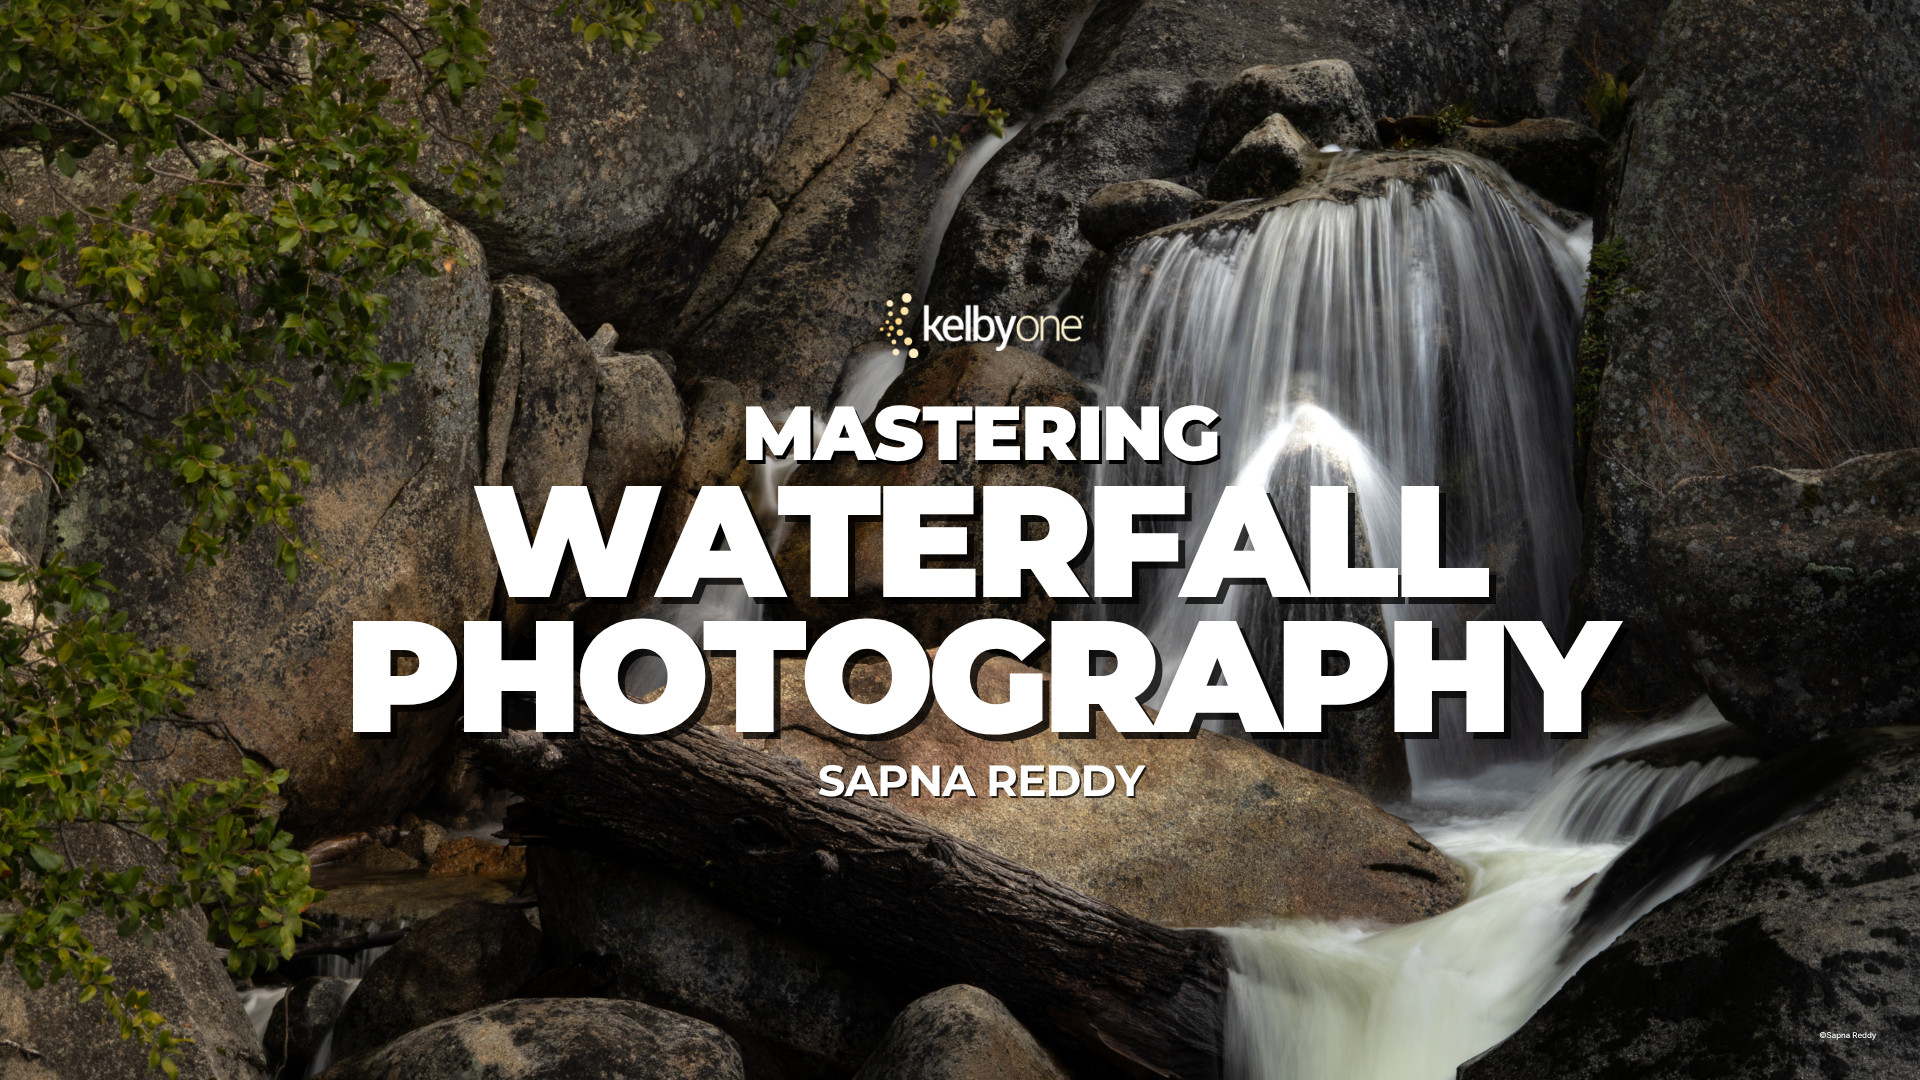
In Mastering Waterfall Photography, Sapna Reddy shares her complete approach to photographing waterfalls in Yosemite, one of the most spectacular locations for moving water photography.
From choosing the right gear and filters to capturing reflections and blending exposures, she walks through the techniques that help create stronger images in the field. She also covers practical considerations like protecting your camera from spray and understanding how changing conditions affect your results.
One of the highlights of the class is Sapna’s discussion of timing, including tips for photographing Bridalveil Fall rainbows and Yosemite’s famous February Firefall.
Whether you’re photographing a world-famous waterfall or a hidden local gem, the lessons in this class will help you approach the scene with greater confidence and creativity.
This Week on The Grid: How Would I Edit Your Photo?
This week’s episode of The Grid was all about editing. Scott Kelby and Erik Kuna walked through a collection of viewer-submitted images and showed how they would approach each one using Lightroom, Camera Raw, and Photoshop.
The images covered a wide range of subjects, from a studio motorcycle portrait and an Outer Banks lighthouse to a challenging church interior and a beautifully captured Milky Way scene. Along the way, Scott and Erik demonstrated techniques for masking, perspective correction, color balancing, distraction removal, noise reduction, and image blending. One standout segment featured a Milky Way composite, where Erik explained how to blend a tracked night sky with a twilight foreground while maintaining natural color and detail. The episode also included several quick edits that highlighted how small changes can make a big difference.
As a bonus, viewers got a preview of an upcoming Lightroom Update webcast featuring Adobe’s Terry White.
Whether you’re looking to improve your editing workflow or simply enjoy seeing how experienced photographers solve problems, this episode offers plenty of useful takeaways. Catch the replay below and see how the edits came together.
Don’t Miss Our Live Webcast: A Look at the June Lightroom Updates
Adobe is releasing its June Lightroom updates this week, and we know you’re probably wondering, “What’s new, and should I be using it?”
That’s exactly what Scott Kelby will be covering in a FREE live webcast tomorrow, Thursday, June 18 at 3:00 pm ET.
Instead of digging through release notes or trying to figure everything out on your own, join Scott as he highlights the newest additions to Lightroom, shares some of his favorite features, and shows how they can fit into your everyday editing and organizing experience. Whether you use Lightroom every day or just occasionally, this is a fun and easy way to catch up on what’s new.
If you’ve been busy making photos instead of keeping up with updates, we’ve got you covered!
Ultimate iPhone Camera Tips and Tricks with Terry White
Your iPhone camera is packed with features that most people never use.
In his latest class, Terry White walks through the settings and tools that can make an immediate difference in your photography, showing not just where they are, but when to use them.
From customizing the Camera Button and choosing the right file format to mastering Night mode, long exposures, focus and exposure lock, and action photography, Terry covers the features that matter most on the iPhone 17 Pro running iOS 26. The result is a practical guide that helps you move beyond point-and-shoot photography and start making intentional creative choices with the device you already carry every day.
Whether you’re photographing family, travel, landscapes, or everyday moments, these tips can help you get more from every shot. Watch the class here.
Meet Your Instructors for the Photographing People Conference
One of the best parts of every KelbyOne conference is the people who make it happen.
The Photographing People Conference brings together 19 instructors with different backgrounds, specialties, and creative approaches, all united by one goal: helping you create stronger photos of people.
And we’re not just talking about traditional portraits.
Throughout three days of live online training, you’ll learn from photographers who specialize in family photography, headshots, street photography, travel, sports portraits, weddings, self-portraits, mobile photography, creative illustration, lighting, editing, and more. Some sessions focus on technical skills like posing and flash. Others explore storytelling, connection, creativity, and finding your own style.
That variety is what makes this conference so special. Every instructor brings a unique perspective, and chances are you’ll discover techniques you never expected to use until you see them in action.
You’ll also be learning alongside an incredible community of photographers from around the world. Ask questions during live sessions, share ideas with fellow attendees, and leave inspired by what others are creating.
Whether you’re photographing clients, family, friends, or strangers on the street, these instructors are ready to help you build confidence behind the camera.
Join us online July 20–22 and learn live, or watch on your own schedule with replay access available for a full year.
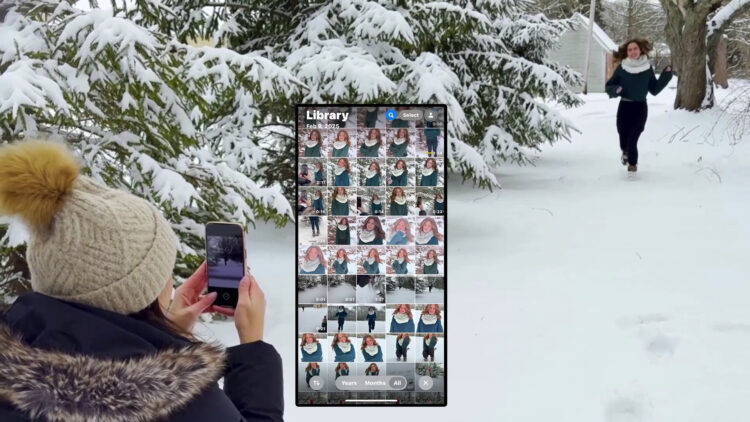
From Tracy Sweeney’s session “Unleash Your iPhone’s Power for Stunning Portraits!” at last year’s iPhone Photography Conference, here’s a behind-the-scenes look at how I use Burst Mode and Live Photos to capture fast-moving kids and real emotion—without missing the moment.
[embedded content]
Capturing Fast Action with Burst Mode
This can be really effective if you’re photographing something like a child’s basketball game. You’re waiting for that perfect anticipatory shot, but you don’t know exactly when the moment is going to happen. That’s where Burst mode comes in. It’s ideal for fast-moving subjects because it gives you several options to choose from. Sometimes it’s a lot of junk, honestly—but the great thing is you can go in afterward and just select the one best image.
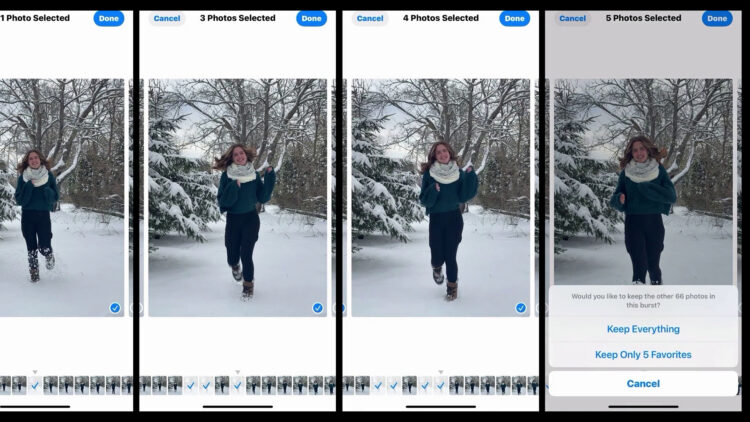
To use burst mode, open the Camera app and make sure you’re in Photo mode—not Video or Portrait. Then you simply swipe the shutter button to the left and hold it there. That starts taking a series of photos. When you lift your finger, it stops, and you’ve captured a whole succession of images in that instant.
Selecting and Managing Burst Photos
Once you’re done, head to your photo library and you’ll see the burst. In the upper left corner, you can see how many photos you captured. In this case, I took 71 images in a very short amount of time just by swiping and holding. When I lifted my finger, the burst completed. Now I can swipe through from the bottom to view all of my options and make selections of the images I like the most.
So for the photos I love, I don’t have to keep all 71 unless I want to. I’ll be prompted to either keep everything or keep only my favorites—maybe five. If you don’t want to miss a moment, and you’ve got tons of storage on your phone, go for it. But if you want to clean things up, you can just keep your top picks.
Now, another really cool feature is Live Photos.
Capturing Fast Action with Live Photos
Live Photos capture a moment in motion. When you take one, it records about one and a half seconds of video before and after you press the shutter button. So it creates this short animation that even includes sound. For someone like me who posts on social a lot for my business, this is really cool. My goal might be to create a still image, but then I can also use that same moment as an Instagram Reel or in a post where the image comes to life.
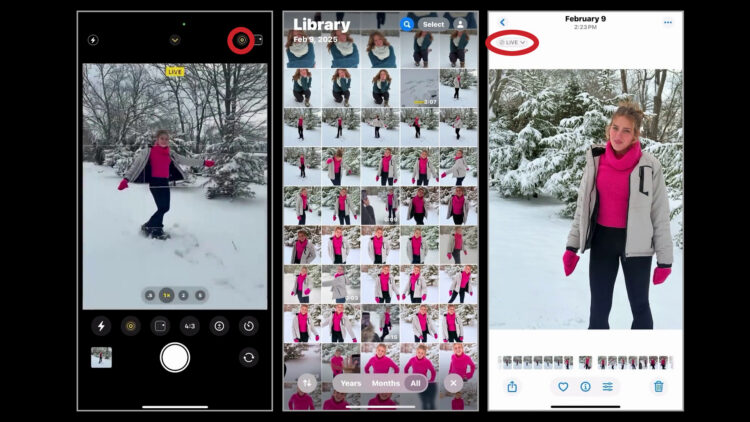
To take a Live Photo, open your camera and make sure you’re in Photo mode. Then check that Live Photo is turned on—you’ll see the icon at the top with the three circles that ascend in size. It’s on by default, but if you’ve tapped it off, just tap it again to activate it. Some people keep it off because the file size is larger, which I totally get.
To capture one, just tap the shutter button or use the camera control on your iPhone 16 or newer. To view it, go to your camera roll. You’ll see “Live” in the top left corner. Hold down on the image and you’ll see the animation play. You get the entire clip from before the shutter to after—it all gets pieced together into this really neat little moment.
This is especially powerful when photographing people. You’re not just capturing the moment—you’re capturing the emotion behind it. That sentiment is beautiful, and it gives us more creative options.
Editing Live Photos
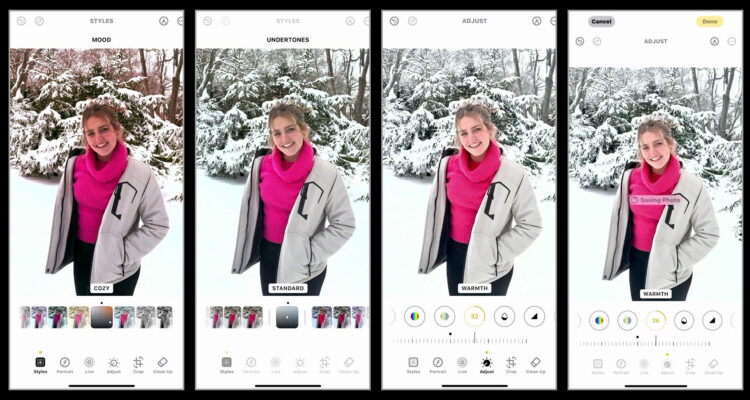
The image itself has the photographic style attached to it. If I don’t love the look, I can edit and apply a different style that feels better. Everything is non-destructive, so I can edit to my heart’s content. Once I click Done, it’s still a Live Photo. If I hold it down, it still animates, which is really cool.
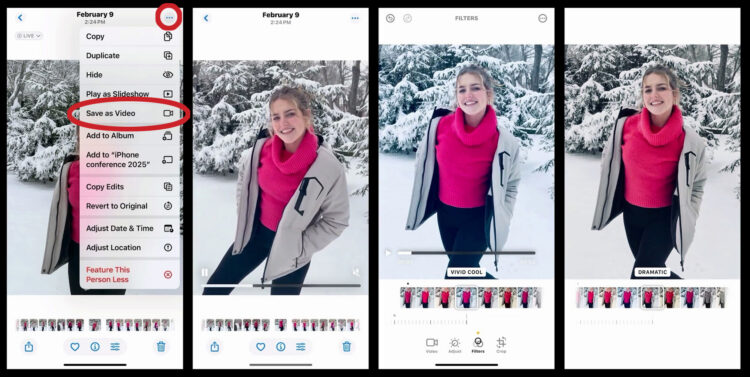
If I want to edit the animation itself, I need to save it as a video. Click the ellipses in the top right and choose Save as Video. Now it appears in my camera roll as a video and I can edit that clip. I won’t have as many options as I do with photographic styles, but I can still use filters like vivid, vivid warm, vivid cool, dramatic—these might already feel familiar since they’ve been on iPhones for a long time. And of course, I can still make individual adjustments throughout.
So between Burst mode and Live Photos, you’ve got some really powerful tools right in your pocket. Whether you’re photographing kids on the move, a game, or just those everyday moments you don’t want to miss, this gives you options. You’re not stuck with one frame—you can choose the best one, or even bring it to life. We’re not just capturing pictures, we’re capturing feeling and story. It helps you hold onto moments that go by way too fast.
Make Every Shot Count
The iPhone Photography Conference is back March 9–11, 2026, featuring three days of hands-on tips, creative approaches, and editing techniques from top industry pros. You’ll walk away ready to capture images you’re truly proud of—anytime, anywhere.
Shooting RAW on the iPhone: When and How to Do It with Scott Kelby
This tip comes straight from Scott Kelby’s “iPhone Tips & Tricks” session at last year’s iPhone Photography Conference, where he broke down exactly when it makes sense to shoot RAW on your iPhone—and when it absolutely does not. If you’ve ever wondered whether those massive file sizes are actually worth it, Scott lays it out in classic no-nonsense fashion.
[embedded content]
RAW Reality Check
First off, it’s important to note that there are two types of RAW files, right? You’ve probably heard of ProRAW. If you’ve got one of the newer cameras, like the iPhone 15 Pro or newer—basically anything from the last couple of years—you’ve got this ProRAW format. It shoots in RAW, but the file sizes are huge. Every time you press the button, it’s 75 megabytes. SEVENTY-FIVE MEGABYTES.
A JPEG is usually around one megabyte. Or Apple uses HEIF compression, which is about one megabyte. That’s nothing. A RAW file is 75 megs. So when in the world would I use that? If I press the button 14 times, that’s a gig. That’s a gig of data for only 14 photos. What if I do a burst and hold it down? Boom—gig. So what I do is I leave my camera set all the time to JPEG.
JPEG looks great. Files look fine. It’s what we’ve been using on our iPhones forever. There’s no real downside. Sure, if you want to edit in Lightroom it’s nice to have the extra data from RAW. There are advantages. But I don’t know if 75 megabytes per click is enough advantage for me.
My Rule for RAW
So I only turn on RAW when I’m somewhere, taking pictures, and I look and go, “Oh man, this looks really, really good.” I might want at least one image at that 75-megabyte, 48-megapixel level. So I switch it to RAW, take the shot, and I’m good. Then I turn it right back off. That’s it. I turn it on for one shot, then turn it off.
Now here’s the second thing you might want to consider. You don’t have to shoot 48-megapixel RAW. You can do 12-megapixel RAW. It’s a third of the size. It’s still RAW. It’s still ProRAW. But now it’s about 25 megabytes each.
12 Megapixels Is Actually Plenty
I know some people are like, “I don’t know, Scott…12 megapixels? Is that enough?”
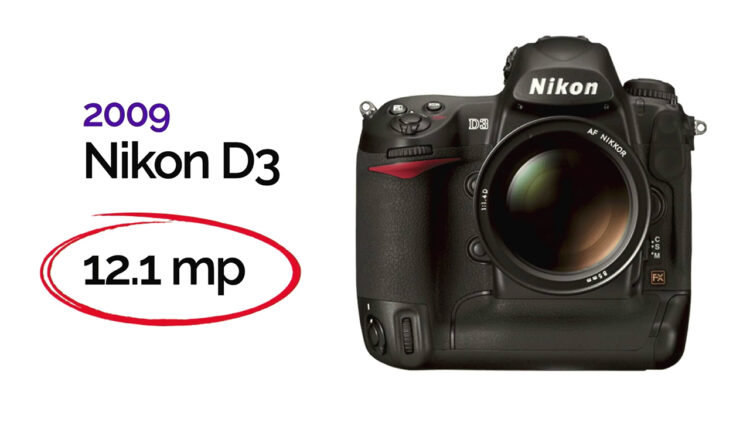
Let me put it this way. In 2009, Nikon came out with a groundbreaking camera. I was shooting Nikon then and I went out and bought the Nikon D3. Revolutionary camera. Incredible quality. Best low noise of any camera at that point in history. Killer camera.
It was 12.1 megapixels.
What were people paying? Five thousand dollars. Body only. No lens. Five grand for a 12-megapixel camera. And today we’re like, “Is 12 megs enough?”
I took an image with that D3 that ended up being used in a campaign for Elinchrom lighting. It was also on the entire side of their booth as a giant print.
Then Nikon licensed the image from me. Here I am speaking at Nikon’s booth in New York, and right under the word “Nikon,” there’s the image as a massive framed print.
That was a 12-megapixel image. How big are you planning to print that you need more than 12? Trust me. Twelve megapixels is plenty.
Change It up on the Fly
Here’s how you set it up so you can toggle RAW on and off when you need it.
Step one: Go to Settings. Then go to Camera. Then go to Formats.
The default is ProRAW Max. Make sure ProRAW is turned on. This is where you decide—do you really need 48 megapixels, or can you get away with ProRAW 12 megapixel?
Now here’s the interesting thing. You’ve chosen 12 RAW, right? But you’re not actually shooting RAW yet. You’ve just told your camera, “I might shoot RAW in the future. Be ready.”
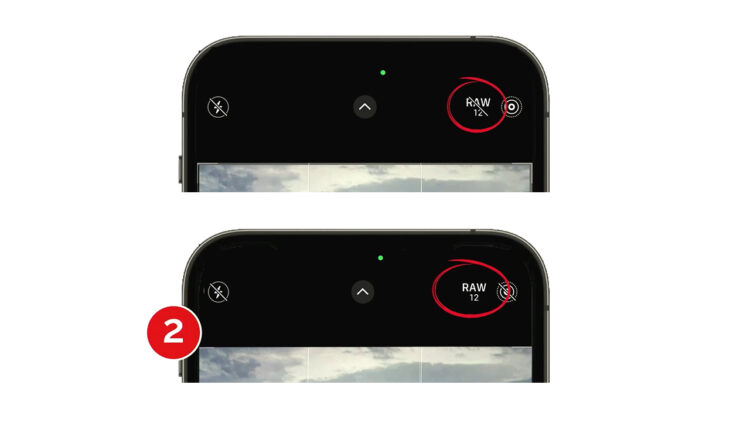
So when you’re ready to shoot RAW, look at the top right corner of your camera screen. You’ll see it says RAW and it says 12. But there’s a line through it. That means you’re still shooting JPEG.
Tap it. Line goes away. Now you’re shooting RAW.
When you’re done? Tap it again. Back to JPEG.
If you tap and hold, you can change it. Like if you suddenly decide, “This image is about to change people’s lives. I need 48 megapixels.” Tap and hold. The pop-up menu appears. You’re good.
There’s also JPEG Max. That’s a 48-megapixel JPEG. Much smaller than RAW, but still high resolution.
No RAW on Your iPhone? Here’s the Workaround
Most iPhones today shoot in RAW. But if you’ve got a model that doesn’t, download Lightroom Mobile. Lightroom Mobile lets you shoot RAW. Just tap up top where it says JPEG. A little file format window pops up. Choose DNG, which is Adobe’s open-source RAW format. Now you’re shooting RAW.
Make Every Shot Count
The iPhone Photography Conference is back March 9–11, 2026, featuring three days of hands-on tips, creative approaches, and editing techniques from top industry pros. You’ll walk away ready to capture images you’re truly proud of—anytime, anywhere.
Learn How the Pros Make Masterpieces With Ultralight Gear
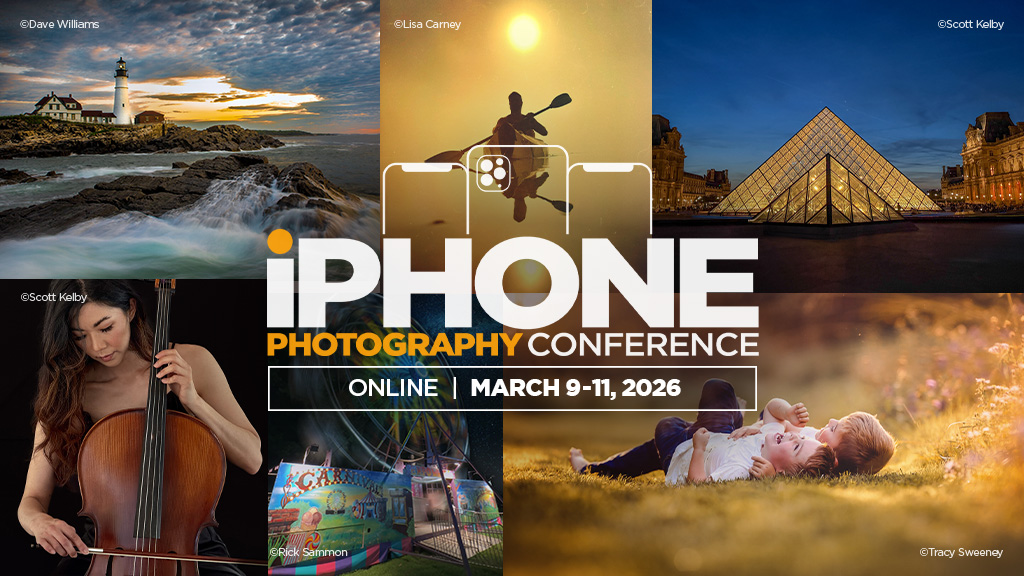
It’s time to rethink what “going pro” really looks like. Hauling a giant camera bag stuffed with bodies and lenses isn’t the only path to professional results anymore. Today’s iPhone cameras are so powerful that photographers are traveling lighter, moving faster, and still creating jaw-dropping images. That’s exactly what the iPhone Photography Conference is about — helping you sharpen your creative eye, elevate your craft, and capture stunning images with intention instead of weight. Join us from anywhere March 9–11, 2026 for three live online days of learning, inspiration, and serious creative momentum.
Your Dream Team Is Assembled
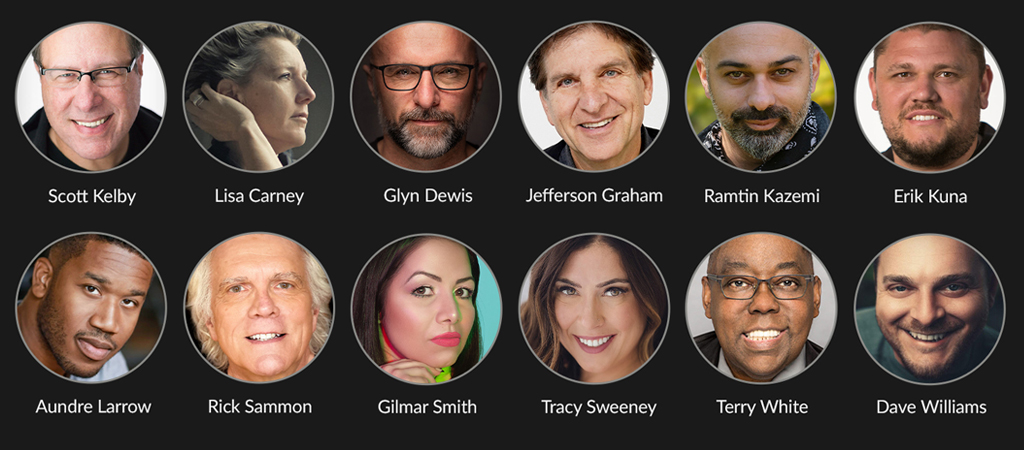
We’ve lined up a dream team of instructors — working pros across travel, street, portrait, landscape, commercial, and even astro photography — ready to show you how they make magic with the camera they carry everywhere. These creatives don’t just talk theory; they walk you through the real workflows they use every day to capture, edit, and deliver images that stop people in their tracks.
Learn to Make Images That Connect
Two high-energy days of live sessions, plus a bonus pre-conference day, will take you from “I want to try this” to “I just nailed it.” You’ll learn how to create expressive portraits with natural or studio light, shoot after dark (yes—even spectacular Milky Way and aurora shots), and capture magazine-quality travel images without lugging a bag full of heavy, expensive gear. We’ll cover composition, storytelling, and the latest editing workflows so your photos don’t just look great—they connect. From sweeping landscapes to macro details to documentary-style stories, our instructors will show you how to see differently, shoot smarter, and finish strong — starting with your iPhone and extending through mobile or desktop post-processing in Lightroom and Photoshop, and their favorite apps.
More Than a Conference — A Creative Leap
Whether you already shoot regularly on your iPhone or are ready to start treating it like a pro-level camera, this conference will push your mobile photography further than you thought possible. You’ll walk away with a skillset that works anywhere — giving you the confidence to capture sharp, striking, and fully realized images every time you pick up your iPhone.
Ready to make every shot count? Click the button below to grab your ticket, see full event details, and join photographers from around the world for three days of inspiration, insight, and serious creative growth.