Masking used to be one of the most frustrating parts of working in Lightroom Classic. Too many tools, too many decisions, and too much time spent trying to get a clean selection.
That’s changed in a big way—but a lot of photographers haven’t noticed yet.
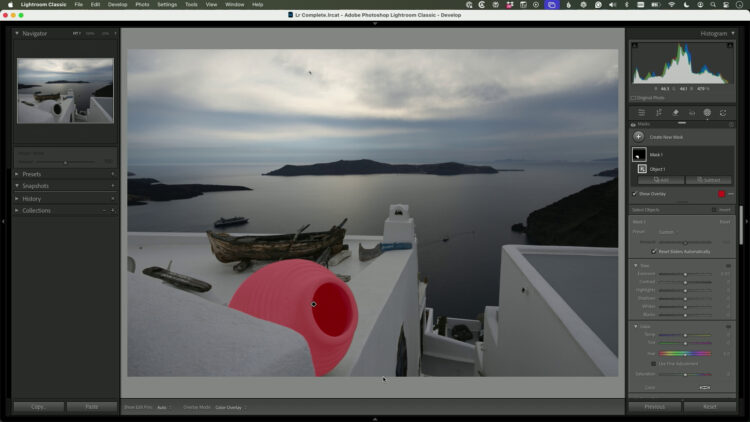
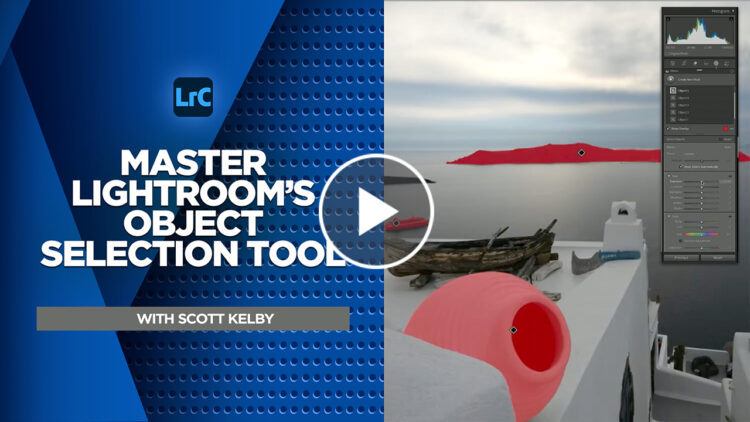
One masking tool that changes everything
There’s one masking tool that fundamentally changes how you target and adjust specific parts of your photo. It’s faster, more intuitive, and eliminates much of the guesswork that used to slow edits down.
Editing Color in Lightroom Doesn’t Need to Be Complicated
Color is one of the most powerful parts of Lightroom Classic—but for many photographers, it’s also where edits start to feel overwhelming. With newer tools and more options than ever, it’s easy to second-guess yourself or feel unsure where to begin.
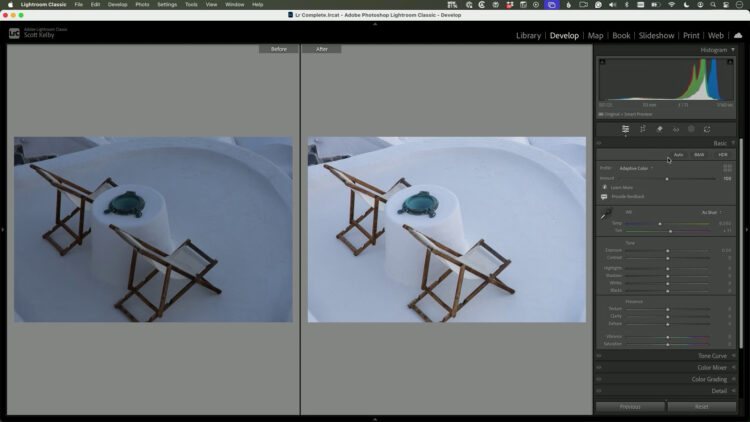
What’s the better launching point for your edit—Auto or Adaptive Color?
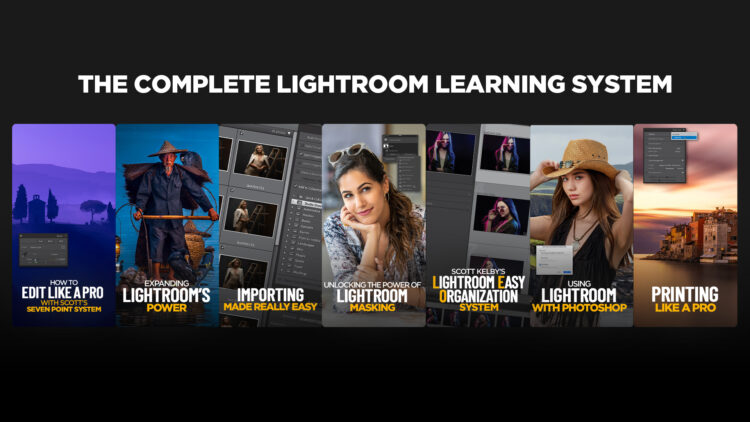
Take the guesswork out of your editing workflow by applying Scott’s 7 Point System to your photography! This is the exact system Scott uses on his own photos, and he’s completely updated it to leverage the latest features in Lightroom Classic. It’s just one part of The Complete Lightroom Learning System—included in a KelbyOne membership. A system designed to make Lightroom feel clear, logical, and predictable again.
The Best Vintage Fonts Every Designer Should Have in Their Toolkit
There are many vintage fonts out there, but not many have been expertly crafted by a talented lettering artist who lives and breathes the vintage aesthetic. The Vintage Font Bundle from Heritage Type Co. contains 6 typefaces designed by Tobias Saul, whose inspirational vintage logos and type designs have been featured many times in showcases on Spoon Graphics. These beautiful fonts authentically capture the style of late 19th to early 20th century lettering and are packed full of features, such as alternate characters, ornamental graphics, and even ready-made logo templates. The bundle is currently on offer with 70% off, but I’ve teamed up with Heritage Type Co. to offer Spoon Graphics readers an extra 10% discount code, making the final price $44 ($149). Use the code SPOONER during checkout to secure the best price around!
The Vintage Font Bundle contains 6 typefaces in a variety of styles that can be used individually or combined to produce perfectly complementing font pairs. It includes the Blackriver font, which is inspired by old packaging designs; Royal Signage, which is based on vintage sign art; the victorian style Old Alfie and its duo Old Erika; Brilon, which is inspired by the Art Deco era; and the elegant Mirosa, which alone has over 400 alternate characters!
Also included in the bundle are 25 ready-made logo templates and type layouts for Adobe Illustrator, plus over 200 ornamental elements and frames so you can easily create your own beautiful vintage style designs.
For an idea of how you could use these fonts and vector assets to create custom artwork, check out this detailed tutorial by Tobias Saul on how to create an ornate logo design, from the initial concept to exporting the final design files. The example design uses the Royal Signage and Old Erika fonts, plus several of the included vector ornaments from the collection to construct a beautiful vintage brand.
Benefit from an additional 10% discount on top of the current sale price with the code SPOONER to purchase The Vintage Font Bundle for $44.
Photoshop Color Adjustments with the New Adjust Colors Tool with Kirk Nelson
Photoshop is full of long-time habits—and sometimes those habits keep us from noticing when a newer tool can make life a lot easier. In this excerpt from Kirk Nelson’s Photoshop World session, “Photoshop Has Changed, So Should You!”, Kirk walks through the new Adjust Colors feature and shows how combining it with Photoshop’s smarter selections can dramatically speed up the color-change workflow. It’s a quick, practical update that fits right into the way photographers already work.
A Faster Way to Change Colors
Color adjustments have always been a big part of working in Photoshop—but Adobe has finally given us a way to handle them that doesn’t involve a dozen steps and a lot of cleanup.
This example starts with a shot I took while working with one of the teams. Let’s say we want to change the color of her jersey.
Now, there are a lot of ways to do this in Photoshop. Too many, honestly. And if you’ve taken my classes before, you know I’ve always gravitated toward Hue/Saturation. From the Contextual Task Bar, that’s accessed by the… what are they calling it now, the New York cookie? Black-and-white cookie? It’s the Create New Adjustment Layer icon.
All this does is click us over to the Adjustments panel. We were on Properties so we were over there anyway. In this instance the Contextual Task Bar doesn’t save us any time, really.
Hue/Sat absolutely works, but it takes a lot of fussing. As soon as you start dragging that hue slider or the Targeted Adjustment Tool (which I used), you’re not just shifting the jersey—you’re also adjusting the ball and anything else Photoshop thinks is in that color family. Then you’re messing with those little color-range brackets, trying to widen or narrow them. Before you know it, you’re cleaning up masks and doing way more work than you meant to.
Let’s delete all that and create our Hue/Saturation adjustment the new way.
Meet the Adjust Colors Tool
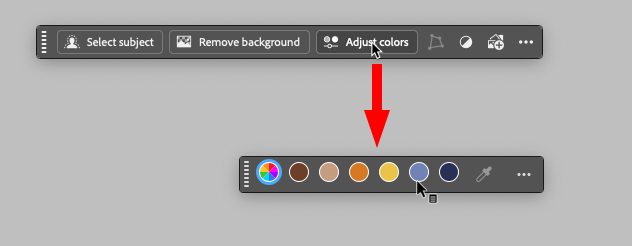
With the new Adjust Colors option in the Contextual Task Bar, Photoshop identifies the prominent colors in the image. Click the blue swatch and it targets the blues instantly.
At first, it still changes everything blue—you start moving sliders around, trying to pull the hue one way or the other, and Photoshop just grabs every blue pixel it can find. And I know what you’re thinking. You’re like, “Ha! Ha! That’s the same issue you had doing it the old way.” As my kids would say… “don’t @ me.“ I get it. But this is where the combination of new tools really clicks.
Use Object Selection to Get Specific
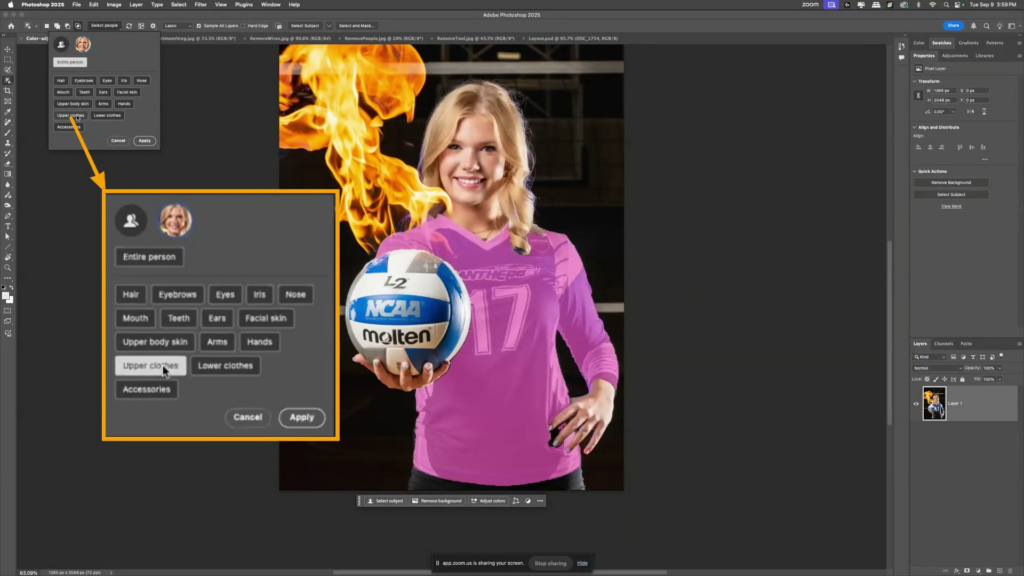
Instead of relying only on color, let Photoshop help. Grab the Object Selection Tool. Let it think for a moment. Then go to Select > Select People—Photoshop recognizes her right away. From there, choose Upper Clothes.
With a few clicks, Photoshop isolates just the jersey.
Could we have done that before? Not in the three clicks that that just took, that’s for sure. So now, the issue would be, now we don’t have that little adjust color thing over here. Where did that go? Why don’t we have that? Where is it? Honestly guys, I expect that in future generations of the program, we’re going to be able to put custom features in that Contextual Task Bar. It’s not there yet.
Here’s a little hack for what I’m going to do here. We’ve already got this selection. I’m going to go ahead and make that a mask. So it’s just there. Okay. Click back on the image. Now look, my Adjust Colors button is back. And when I click it, it just gives me the colors in the area that’s been masked out. So it’s just in this. Now, it’s still going to be applied to the entire image, but we just made a mask telling it where we want it to be, but the mask is just on the wrong layer. It’s on our base layer and not on the adjustment. Simply drag that mask up onto the adjustment layer. Yes, Photoshop warns you it’s replacing the mask. Yes, that’s what we want. Photoshop… relax.
Pick the blue again, shift the hue, and now only the jersey changes. No more collateral damage.
Why This Workflow Works So Well
When you combine Object Selection with Adjust Colors, this becomes one of the fastest ways to target and shift a color in an image. The prominent colors update, the mask keeps things contained, and the whole process feels natural and intuitive.
You can refresh the colors, switch to presets, or even adjust everything at once with the Master option. When I had to mock up different jersey colors for a coach, this literally saved me hours. No more old-school fiddling with hue brackets or cleaning up messy masks. It’s just… easy.
Adobe has changed Photoshop a lot in the last few years, and this is one tool that really shows how those changes can work in your favor.
Unlock the Best of KelbyOne Live 2025
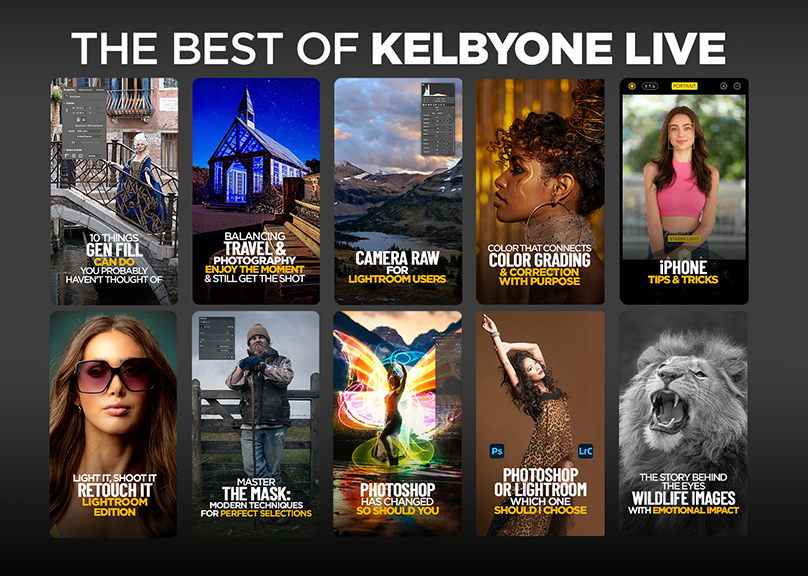
Not a member yet? Join KelbyOne and, along with full membership benefits, you’ll unlock immediate access to The Best of KelbyOne Live 2025. This curated assortment of conference sessions from top photographers and educators is packed with Lightroom, Photoshop, iPhone, and creative workflow tips—everything you need to expand your skills and create your best images in 2026.
Scott and Erik will be walking through everything happening right now at KelbyOne — including an inside look at our brand-new track, The Complete Lightroom Learning System(which is quickly becoming a member favorite).
If you want the full scoop on all things Cyber Monday, make sure you join us live!
Announcing the Landscape Photography Conference 2025! Produced by KelbyOne Live, this online event takes place December 9–10, 2025. Join photographers from around the world for two immersive days designed to help you sharpen your eye, refine your composition, strengthen your portfolio, and push your creative vision. From capturing breathtaking scenes in the field to elevating your work with post-processing, this is your chance to learn from the best and transform the way you shoot.
Learn from Legends Behind the Lens
We’ve gathered an extraordinary lineup of landscape photography experts—artists and educators who know what it takes to bring a scene to life. These are photographers who have braved the elements, chased the light, and crafted award-winning portfolios. Now they’re ready to share their stories, techniques, and field-tested tips with you.
Sessions That Inspire & Challenge
Sessions cover every stage of the process, including:
How to see like a landscape pro and compose more impactful images
In-the-field shooting techniques to make the most of light and weather
Post-processing techniques that help take your shots from “meh” to “masterpiece”
Strategies for building a portfolio that reflects your unique vision
Lightroom and Photoshop workflows for creative finishing, blending exposures, printing, and more
Whether you’re aiming to refine your technical skills, streamline your editing, or find fresh creative inspiration, you’ll find sessions tailored to your journey.
Prepare for Your Journey
This is your chance to join a live-online gathering of landscape lovers, photo storytellers, and people hungry to elevate their craft. Tickets are now available. Claim yours now to guarantee access, get in on all the inspiration, and start forming the vision that’ll define your next great images.
P.S. Why wait? Register now to save big with our Early Bird Special pricing. Get your 2-day conference pass for just $149 (regularly $299). This discounted price is only available until December 9, 2025, at 11:00 a.m. EDT. See you at the conference!
Luminar Neo Fall Upgrade 2025: A Giant Leap Toward Cross-Platform Creativity
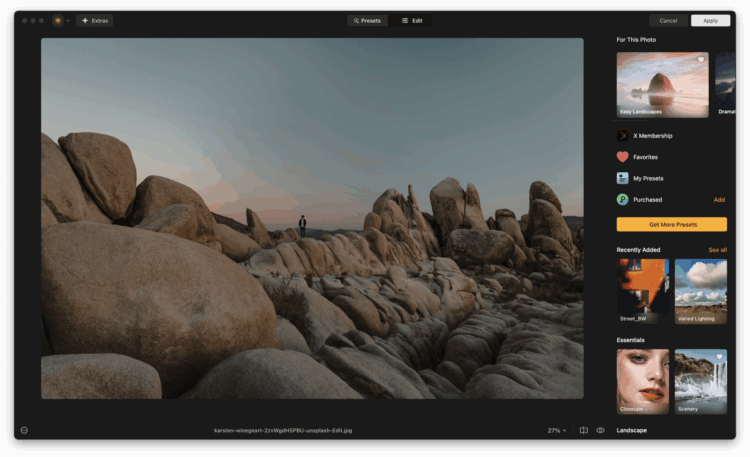
Skylum is raising the bar again. The Fall 2025 upgrade to Luminar Neo isn’t just another update — it’s a reimagining of what photo editing can be in a connected, multi-device world. With a massive rollout of new tools, platform expansions, and an all-new ecosystem, Luminar Neo is now primed to be more than a photo editor. It’s becoming a complete creative environment.
Luminar Neo Is Now Truly Cross-Platform
Earlier this spring, Luminar Neo expanded beyond iOS with the release of Android and ChromeOS apps, completing its reach across all major platforms. Now, whether you’re editing on a tablet, Android phone, Chromebook, or desktop, you get the same powerful tools and unified experience.
No compromises. No stripped-down mobile versions. Just one seamless creative environment that travels with you.
This full-platform integration laid the groundwork for what Skylum is now rolling out: the Luminar Ecosystem, launching this fall.
Coming November 2025: Phase One of the Luminar Ecosystem
Cross-Device Mobile-to-Desktop Editing
Imagine starting a photo edit on your phone while commuting — cropping, adjusting lighting, maybe adding a mask — and then picking up right where you left off on your desktop at home. With real-time sync powered by Luminar Neo’s cloud-based infrastructure, that workflow is now seamless.
As you make edits on your mobile device, every change — sliders, masks, layers, even undos — is automatically saved to the cloud. When you open the same image on your desktop, it appears exactly as you left it, with all edits fully intact and ready to refine further.
There’s no need to export, upload, or transfer files manually. No version mismatches. Just a clean, uninterrupted editing experience across all your devices.
This isn’t just convenient — it’s a true workflow upgrade for creators who need flexibility without compromise, whether you’re working in the field, on the move, or back in the studio.
Web Galleries: Share Stories, Not Just Images
Luminar’s Web Galleries turn finished edits into beautiful, interactive web pages — instantly. No need for a website, coding knowledge, or design tools. Just select your images, pick a style, and publish.
This feature is aimed squarely at creators who want to share stories, not just pictures. Whether it’s a wedding, travel journal, or professional portfolio, Web Galleries help you tell a visual story with ease and elegance.
And for pros? It’s a fast, polished way to deliver work to clients.
New Tools Rolling Out This Fall
Alongside the ecosystem launch, Luminar Neo is introducing three major editing features that make advanced photography more accessible and powerful than ever.
Restoration Tool
Have old family photos collecting dust? With a single click, the new Restoration tool revives faded prints, removes scratches, and brings back lost detail. Whether you’re preserving history or cleaning up an archive, this tool makes photo restoration effortless — and remarkably fast.
AI Assistant
The AI Assistant is your built-in photo editing guide. It intelligently scans your image and suggests precise edits using tools like Develop Raw, Curves, and Color Harmony. It’s perfect for new users who want great results fast, and for seasoned editors looking to speed up their workflow without sacrificing control.
Volume Tool
The new Volume tool adds a rich sense of depth by automatically enhancing light and shadow across the image. With one click, your photos get more drama, contrast, and atmosphere — no manual dodge and burn required.
Limited-Time Deals: Till September 15, 2025
To celebrate the upgrade, Skylum is offering special pricing for new and existing users:
New users can purchase:
Luminar Neo Cross-Device Perpetual License (Neo + Mobile) for $159
Luminar Neo Max Perpetual License (Neo + Mobile + Creative Library) for $179
The Fall 2025 Luminar Neo upgrade marks a turning point. It’s no longer just a powerful editor — it’s a creative ecosystem designed for modern workflows and modern lives.
Skylum is clearly betting on flexibility, intelligence, and storytelling as the future of photo editing. And with mobile apps, cloud-syncing, AI-powered tools, and web-ready galleries all in the same package, it’s hard to argue with that vision.
Whether you’re just starting out or have years behind the lens, Luminar Neo now meets you where you are — on your phone, your desktop, or somewhere in between — and takes your creativity further than ever.
The clock is ticking—get your entry in by next Friday!
The Guru Awards are Photoshop World’s ultimate bragging rights—and the deadline to enter is almost here. If you’re attending PSW 2025, this is your chance to put your best work on display and maybe even walk away with a super cool trophy (and eternal bragging rights).
Deadline: Friday, August 29
You can submit your work in these categories:
Landscape Photography
Creative Photography
Portrait Photography
Macro Photography
Mobile Photography
Wildlife Photography
AI Enhanced
Winners and finalists are celebrated live during Photoshop World, streamed to the entire community of photographers, designers, and creatives tuning in online. It’s your chance to have your work seen and celebrated by the creative community worldwide.
Don’t let the deadline slip by. Hit submit, take your shot, and you could be one of this year’s Guru legends. Read all the details and rules here.
Don’t Have Your Photoshop World Ticket Yet?
Photoshop World 2025 isn’t just about the Guru Awards—it’s about sharpening your skills, exploring new techniques, and connecting with the best creative community around. From Photoshop and Lightroom to photography and beyond, it’s three days packed with inspiration, hands-on learning, and game-changing ideas.
Advantages of Adding Luminar Neo to Your Lightroom Setup
Ever felt like Lightroom’s editing power, while impressive, could use a little creative boost? What if you could access high-level AI editing tools without disrupting your established workflow? If you’re looking to level up your image edits without leaving your favorite environment, it might be time to explore the Luminar Neo plugin for Lightroom.
This article unpacks the seamless integration between Luminar Neo and Lightroom, dives into its most compelling AI tools, and gives you practical steps to bring it into your workflow. If you’re curious about unlocking next-level editing speed and creativity, you’re in the right place.
Best Features of Luminar Neo Plugin for Lightroom
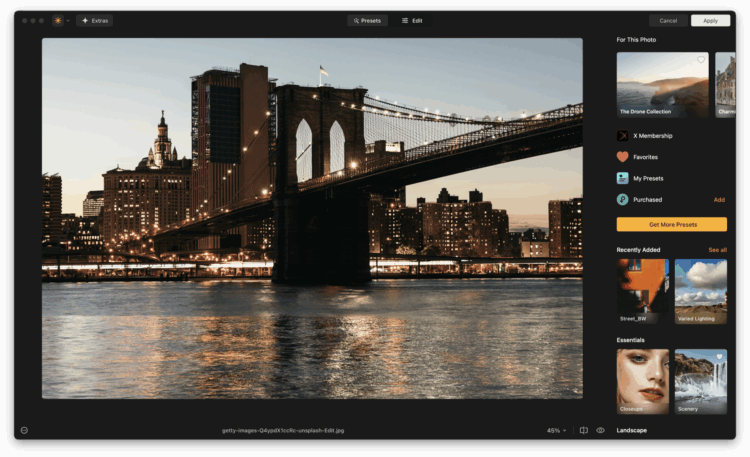
At its core, Luminar Neo is designed to enhance, not replace, your Lightroom experience. Once installed, it acts as a plugin, meaning you can send an image from Lightroom into Luminar Neo, apply edits, then roundtrip it right back. This process keeps your Lightroom catalog intact while opening doors to Luminar’s cutting-edge AI features and creative tools.
1. Seamless Round-Trip Editing One of the most appreciated features is the ability to launch Luminar Neo directly from Lightroom and return edited images right back into your Lightroom catalog. This makes it easy to build Luminar into your regular workflow. You can start your basic edits and color correction in Lightroom, then pass the file to Luminar Neo for more complex or creative enhancements. Once done, Luminar sends a new version of your image back to Lightroom, preserving the original and giving you an easy way to manage variations. It’s a smooth, non-destructive workflow that saves you time and frustration.
2. Creative AI Tools at Your Fingertips Luminar Neo excels in creative enhancement tools, especially those powered by AI. These tools allow you to apply cinematic effects, dynamic lighting, dramatic skies, or subtle portrait touch-ups, all with just a few clicks. What makes this especially useful in a Lightroom workflow is that you can skip the hassle of masking or complex brush work. If you’re a creative editor or someone who loves to push the visual storytelling of an image, Luminar Neo becomes an invaluable extension. It’s particularly helpful for photographers working under tight deadlines who still want to deliver high-quality, polished work.
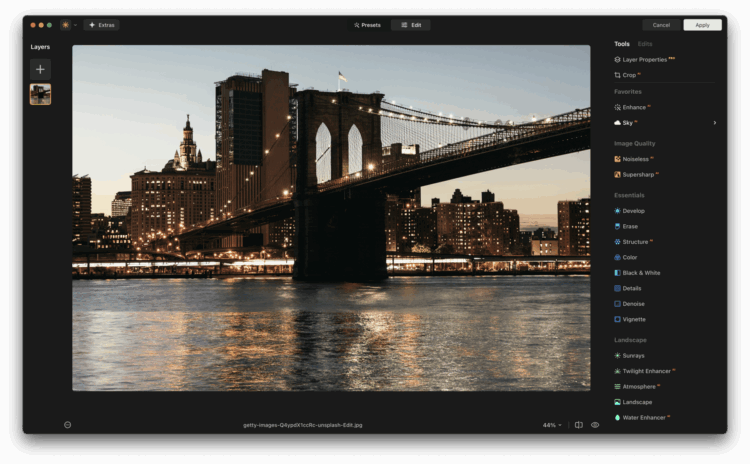
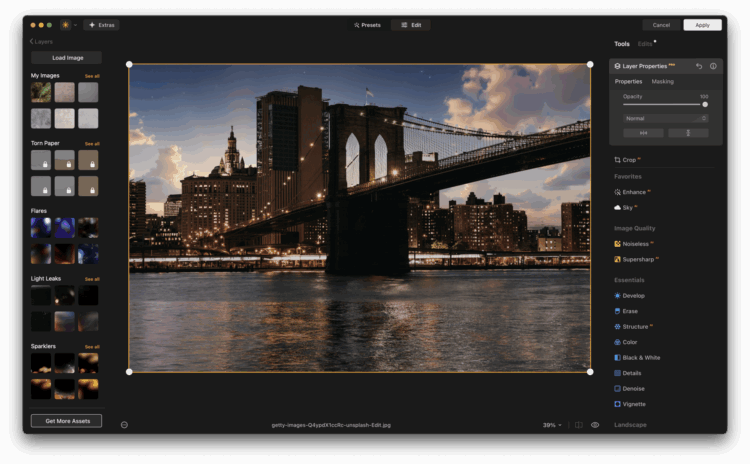
3. Layer Support and Masking Lightroom doesn’t offer traditional layers, which can be limiting for photographers who want to experiment with compositing or blending textures. Luminar Neo fills that gap with full support for layers, giving you the ability to stack images, add elements like fog or light leaks, or insert your own overlays. Each layer can have its own adjustments, blending modes, and masking, giving you Photoshop-style flexibility in a much simpler interface. For creative portraiture or fine art photographers, this opens up a new world of possibilities, no need to leave Lightroom and jump into another heavyweight application.
4. Speed and Simplicity Many photographers are drawn to Luminar Neo because of how fast and easy it is to use. Despite the deep editing power under the hood, the user interface remains uncluttered and intuitive. The tools are grouped logically and labeled clearly, with real-time previews that let you see exactly what you’re doing. For busy professionals, this means getting more done in less time. For hobbyists and enthusiasts, it reduces the learning curve and encourages experimentation. When paired with Lightroom’s batch processing and catalog management, you get a complete system that’s both fast and flexible.
5. Smart Presets and Workflows In addition to standard filters, Luminar Neo includes smart templates and AI-driven presets that adapt to your photo content. This feature can identify the subject, lighting, and type of scene, then recommend a starting look tailored to that image. Whether you’re editing a beach scene, a moody portrait, or a bustling street photo, Luminar gives you a creative head start. When used inside a Lightroom workflow, these presets help you maintain consistency across photo sets while still leaving room for creative tweaks. It’s a perfect companion for event photographers or travel shooters who want to build a signature style quickly.
Which AI Tools Can You Find in Luminar Neo Plugin?
When photographers think of the Luminar Lightroom plugin, what stands out most is Luminar’s AI-driven toolset. These tools are more than just trendy buzzwords, they’re practical, timesaving, and artistically empowering.
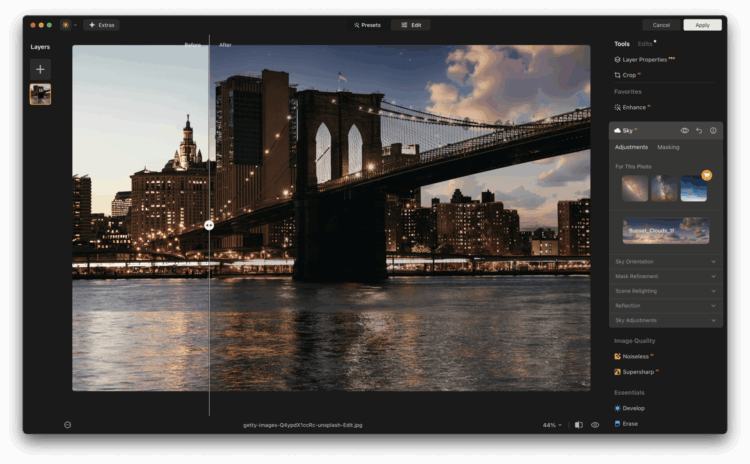
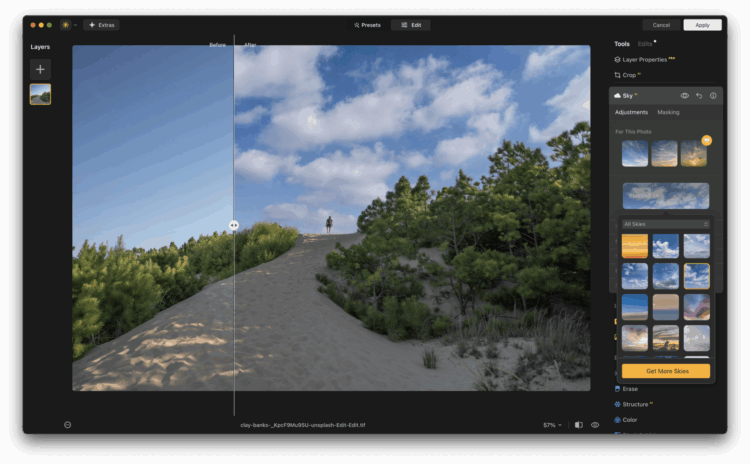
1. Sky AI Sky AI automatically detects the sky in your image and allows you to replace it with one of your choosing. The plugin even adjusts lighting and reflections in the scene to match the new sky, creating believable results that would otherwise take hours to composite manually.
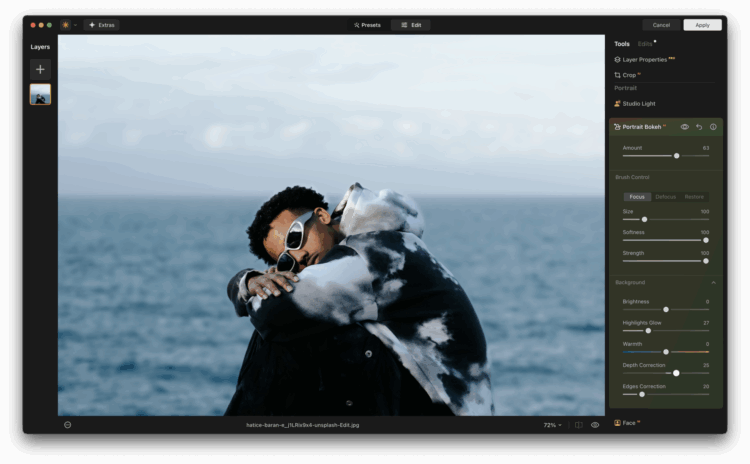
2. Portrait Bokeh AI This tool uses depth mapping to simulate a shallow depth-of-field effect, perfect for portraits shot in distracting environments. You can blur the background and control the strength, edge transitions, and even the focus point with surgical precision.
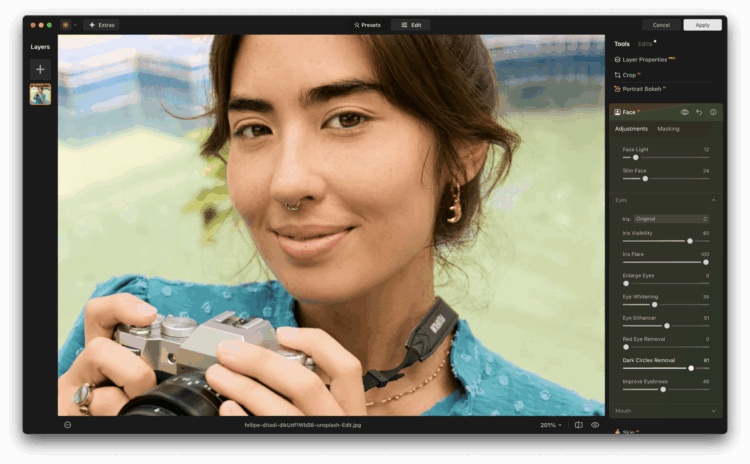
3. Skin AI and Face AI Ideal for photographers who specialize in headshots or lifestyle images, these tools smooth skin, reduce blemishes, and enhance eyes and lips without making subjects look plastic or over-edited. The adjustments are subtle and refined.
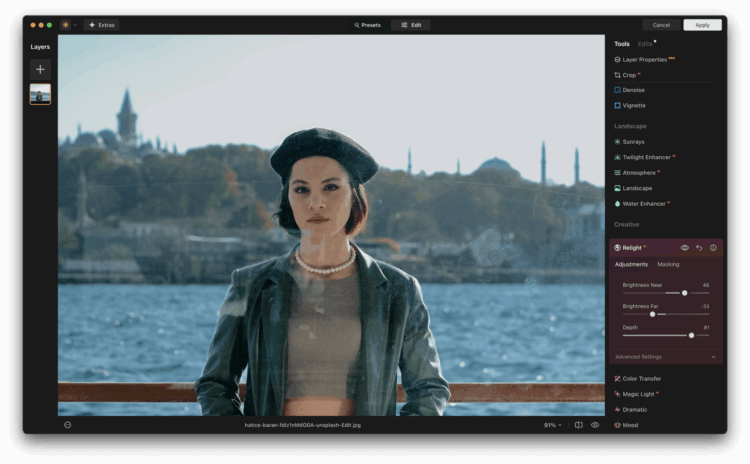
4. Relight AI Perhaps one of the most game-changing features, Relight AI separates your image into foreground and background lighting zones. You can fix underexposed subjects or creatively relight scenes to match mood and atmosphere.
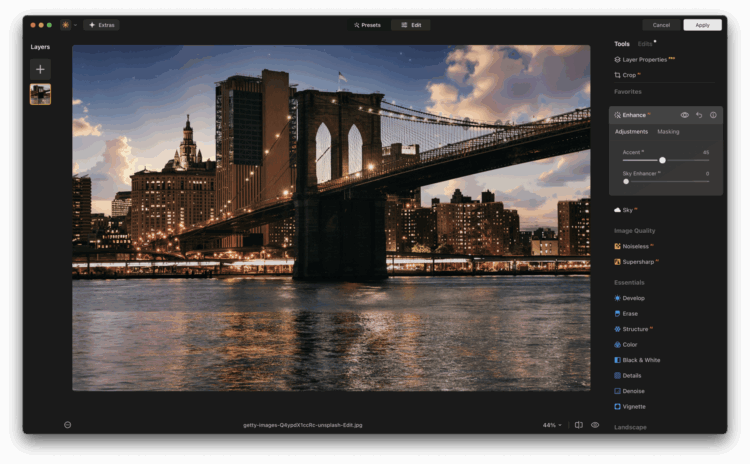
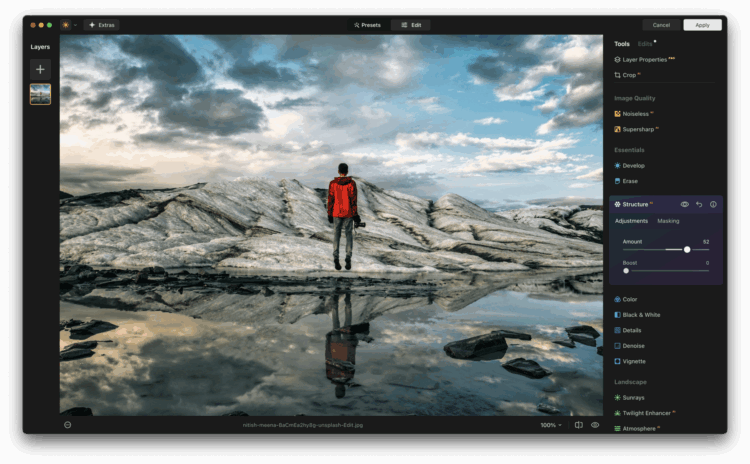
5. Structure AI and Enhance AI Structure AI adds intelligent detail and contrast without introducing unwanted noise or artifacts. Enhance AI gives you a one-slider improvement tool that adjusts contrast, clarity, color, and detail in a balanced way.
These tools are especially helpful for wedding, travel, and portrait photographers who need fast, beautiful results without hours of retouching.
Try This: Open a portrait photo in Luminar Neo from your Lightroom library. Use Portrait Bokeh AI and Face AI to quickly enhance the subject and soften the background. Compare it to what you could achieve with Lightroom alone. It’s a huge difference with minimal effort.
How To Integrate Luminar Neo Plugin with Lightroom?
Getting started with the Luminar Neo plugin for Lightroom is surprisingly straightforward, even if you’re not a tech wizard. Here’s how to set it up and start editing.
Step 1: Install Luminar Neo Download and install Luminar Neo from theofficial website. Make sure it’s the latest version to ensure plugin compatibility.
Step 2: Enable Plugin Support Once Luminar Neo is installed, launch it as a standalone app first. Then go to “File” → “Install Plugins.” A dialog will pop up showing all available host applications. Click “Install” next to Adobe Lightroom.
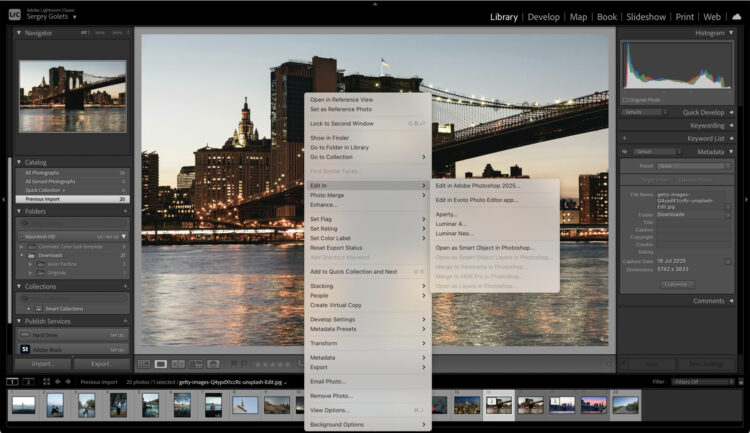
Step 3: Launch Lightroom and Access Luminar Open Lightroom Classic and right-click on an image. Go to “Edit In” and select Luminar Neo. Lightroom will send a TIFF (or another selected format) to Luminar Neo. Make your edits, hit “Apply,” and the finished image will appear back in your Lightroom catalog.
Step 4: Set Your Preferences In Lightroom, you can choose how your edited files are saved (TIFF, PSD, JPEG) and whether you want them stacked with the original. Tweak these settings to match your workflow for better file management.
Step 5: Create Presets and Streamline Workflow Once you find an edit style you love in Luminar Neo, save it as a preset. This allows batch processing of Lightroom images via Luminar’s plugin, especially helpful for event or wedding photographers dealing with large sets of similar photos.
Try This: Once the plugin is installed, send a landscape photo from Lightroom into Luminar Neo. Use Sky AI to replace a dull sky with something dramatic. Let the AI match the lighting and tone automatically, then hit “Apply” to send it back. It’s a fast way to see the power of Luminar Neo in action.
Let Your Edits Work Smarter, Not Harder
For photographers who want the best of both worlds, Lightroom’s robust cataloging and basic adjustments combined with Luminar Neo’s intelligent editing, this plugin integration is a perfect match. Whether you’re enhancing portraits, retouching skies, or exploring creative compositions, Luminar Neo doesn’t disrupt your Lightroom flow. It elevates it.
If you haven’t already tried it, give the Luminar Neo Lightroom plugin a spin. You’ll be surprised at how much time it saves and how creatively satisfying it can be. Want to make your edits faster and more artistic at the same time? Now you can, without switching programs or learning a new system from scratch. And now you can save 10% using the discount code KELBY10.
About the Author: Vanelli Vanelli is a passionate photographer, educator, and storyteller with years of experience behind the lens. He currently serves as the Director of Education for Skylum, where he helps photographers around the world improve their creative process through practical training and inspiration. Known for his energetic teaching style and deep love for visual creativity, Vanelli has spent much of his career helping photographers, from beginners to pros, build confidence and sharpen their skills. Whether he’s capturing dynamic portraits or leading workshops globally, he brings a unique blend of technical know-how and artistic intuition to every project. His approachable style makes complex concepts easy to grasp, and his mission is simple, to inspire others to create with purpose and passion.
If you’ve spent any time in the photography world over the past few years, you’ve probably heard the name Platypod tossed around in conversations about travel gear, tripod alternatives, or clever tools for tight spaces.
What started as a quirky, flat tripod base has evolved into something much bigger—a full ecosystem of smart tools that help photographers stay light, creative, and nimble in the field.
Several new products this year alone including Delta, Traveler, MagGrip and Tab—all to help get you started on your next photography journey.
Also, if you want to learn more about what we do and Photography in general, join over 7500 subscribers to our YouTube channel. Just search on YouTube for “platypod channel” (or click here) where we release a new video once a week to help you along with your imaging.
For more information on our products as well as helpful tutorials please visit us over at www.platypod.com











 Restoration Tool

 AI Assistant
 Volume Tool
 Luminar Neo Cross-Device Perpetual License (Neo + Mobile) for $159