Tutorial: How to Create a Space Illustration Using Adobe Illustrator

Space has and will probably always be one of those things that man has long dreamt of conquering. From the darkest corners of the Milky Way to the farthest region of the known Universe we will always poses that urge to explore and look for new worlds, worlds that could change what we know about life itself.

The recent space missions that NASA has successfully accomplished made me want to do a little tutorial that would pay homage to all the hard work that has been put into the deep exploration of these unknown regions surround our little blue home.

So, in the following lines, I’m going to walk you through the process of creating a neat looking illustration using Adobe Illustrator.

Adobe Illustrator Illustration Tutorial

1. Setting Up Our Document

This is probably one of those important things that you need to pay attention to when starting out a new project, since you’ll want to set up a correct working space from the start instead of having to fiddle with the settings later on.

So, assuming you already have Illustrator up and running, go to File > New, or use the Control-N keyboard shortcut, and let’s go through some of the settings for this project:

Number of Artboards: 1

Width: 800 px

>Height: 600 px

Units: Pixels

And from the Advanced tab:

Color Mode: RGB

Raster Effects: Screen (300 ppi)

Align New Objects to Pixel Grid: checked

2. Layering Our Document

Usually when dealing with a large composition, where you have a lot of elements I find it easier to layer the document so that if I need to edit a specific part of my illustrations, I can do that without having to worry that I’ll accidentally tinker with something else without knowing which could lead to issues later on. Also it’s far faster to have things separated on layers since you don’t have to create tons and tons of grouped objects and go back and forwards into Isolation mode since you can easily select and adjust the shapes and paths using far lesser steps.

Now, for our current project, I’ve created three layers and named them as follows:

  1. background
  2. satellite
  3. overlay

As you can see I tried to use easy recognizable key words so that there are directly referencing a piece / section of the illustration, thus letting me know exactly what I have on each of my layers.

2

3. Adjusting the Grid

If you’ve ever took a look at Illustrator’s Preference settings, you might have noticed that it gives you the option to set up a custom grid, which would allow you to fine tune the movement of your shapes once they are Snapped to the Grid. As you know, even though vectors are scalable they are still pixel dependent, which means that if you want to create crisp looking artwork you’ll have to snap your shapes and paths to the Pixel Grid. I won’t go over the process of creating pixel perfect artwork since I’ll be writing a separate piece on that in the following months, what I’ll do is show you the settings that I use on a daily basis.

First, let’s go over to the Edit > Preferences > Guides & Grid and as you can see a little popup window appeared giving us a bunch of options. The ones that we are interested are the Gridline Every and Subdivisions ones. These control the precision level that Illustrator uses to snap things to its pixel grid.

So what that means is that if we want things to be as crisp and sharp as possible we will have to go with the smallest values for the two options which is 1 px and 1 subdivision.

3

Once you’ve adjusted these settings, you’ll still have to go to the View menu and enable the Snap to Grid option which will make the Custom Grid active.

Also, if you’re used to moving things around using your keyboard’s directional arrow keys, you might want to took a look at the Keyboard Increment settings and adjust the default value to 1 px which will make things move with super high precision.

4

4. Creating the Illustration

At this point we should have a well-oiled machine which means we can leave all the technical stuff aside and get creative.

We will start by building the satellite segment of the illustration first, which means that we will start with the second (middle) layer, and lock all the other ones so that we won’t place parts of the composing elements on one layer and then a couple on the other two by mistake. Think of it as a general rule, every time you start working on a specific part, lock all the other layers so that you can focus only on what’s at hand at the present moment. Then, once you’ve finished working on that section, lock its layer, and then move on to the next section making sure to unlock its layer so that you can work on it.

4.1. Creating the Satellite Section

Step 1

First, make sure that you’re on the right layer, and let’s start by building the satellite’s main body. For that we will be using the Rounded Rectangle Tool, which can be found underneath the Rectangle Tool which is located on the left toolbar. Select it, and then click anywhere on your Artboard to create a custom sized shape with 56 px Width and a 92 px Height and a Corner Radius of 4 px. Color the shape using a dark grey (#D8D8D8) and then correctl position it onto the Artboard by entering the following coordinates into the Transform Panel’s X and Y value fields:

  • X: 400 px

Y: 336 px

5

By using these values, you will make sure that you’ll follow as close inside my footsteps as possible when it comes to creating and positioning your satellite, since at the end it will be positioned almost if not exactly as mine.

Also, since we want everything to be snapped to the Pixel Grid make sure to check the Align to Pixel Grid option found at the bottom of the little panel.

Step 2

Now that we have our main shape positioned, we can start adding details, and we will do so by first adding an outline.

With the shape selected, go to Object > Path > Offset Path > and enter 8 px into the offset value field from the pop window.

This will create a copy of your selected shape which will have both its Width and Height slightly increased by 8 px and will be automatically positioned underneath the original shape.

6

Step 3

Now, since this will act as an outline, we need to change its color to something darker so that it can reflect that visual function.

To do that simply select the shape and change its grey tint to a darker one using this hex value #363A3D.

7

Step 4

Since our satellite will have a couple of little detail elements such as the screws, vertical and horizontal delimiting lines, and highlights we have to plan ahead and think of how these elements will be layered. Now, since the highlights will actually go underneath the delimiting lines we will have to create them now, so that we won’t have to select things and send them to the back later.

So first create a copy (Control-C > Control-F) of your satellite’s fill shape (the grey one) and then create another smaller 48 x 84 px rectangle which we will position over the fill shape and use to create a cut out.

Once you have the rectangle in place, select both it and the grey copy and use Pathfinder’s Minus Front option to create the ring like shape that we will use as a highlight.

8

Step 5

Adjust the resulting shape by going over to the Transparency panel and setting its Blending Mode to Overlay while lowering its Opacity level to 60%. As you can see we now have a nice looking ring like highlight, which means that we can start adding the two vertical ones.

9

Step 6

Grab the Rectangle Tool (M) and create a wider 4 x 84 px rectangle and a narrower 2 x 84 px one which we will adjust by using the same Blending Mode and Opacity level. Distance the two at about 2 px from one another, and then position them towards the left side of the satellite’s body.

10

Step 7

We will continue focusing on adding the details and we will do so inside of the Pixel Preview mode, since it will allow us to see exactly where we position our shapes, giving us a better control over the spacing of our elements.

So, first go to View > Pixel Preview to turn it on, and then zoom in on your illustration, and using the Rectangle Tool (M) draw a 4 x 76 px shape (#363A3D) which we will position towards the right side of the main body, since it will act as the vertical delimiter. Make sure that the top section of the delimiter touches the top side of the main body’s outline.

Then, add a 56 x 4 px rectangle (#363A3D) which will act as the horizontal delimiter, which we will position just underneath our vertical one, making sure to horizontal align it to the main body.

11

Step 8

Next, let’s add the little screws, by creating nine 4 x 4 px circles (#363A3D) which we will distance at 4 px from one another, and then position onto the left side of the vertical delimiter, leaving a gap of 2 px between them.

12

Step 9

Add a little pocket right underneath the horizontal delimiter by creating a 16 x 8 px rounded rectangle (#363A3D) with a Corner Radius of 4 px which we will horizontal vertical align it to the top side of the horizontal line. Once you have all the elements of the satellite’s main body, it might be a good idea to group them so that you won’t accidentally move them around. To do that, simply select them all, and then use the Control-G keyboard shortcut.

13

Step 10

Move a little towards the bottom and start working on the satellite’s rear section by creating a 32 x 4 px rectangle (#9B9B9B) and then giving it a 8 px outline to keep things consistent. Make sure to position the two so that the outline overlaps the one of the satellite.

14

Step 11

Add a subtle shadow to the top section of the smaller satellite component, by creating a 32 x 2 px rectangle which we will color using black (#000000) and then adjust by lowering its Opacity level to 40%.

15

Step 12

Continue adding details to this part of the illustration by creating five 4 x 4 px squares (#363A3D) which we will position over the fill shape and shadow, at a distance of 2 px from one another.

16

Step 13

Start adding some color to the illustration, by creating the gold plated bottom section of the satellite using a 24 x 16 px rounded rectangle with a 4 px Corner Radius which we will color using #E5CF76. Then give it an 8 px outline and position both it and the outline underneath the previously created section of the satellite (select them > right click > Arrange > Send to Back), so that the two outlines overlap.

17

Step 14

Add a shadow and two vertical highlights using the same process that we followed for the satellite’s main body, only this time instead of using white for the highlights and adjusting the Blending Mode and Opacity simply use a lighter gold color (#FFE67D).

Then once you’re done with this section, group all of its elements using the Control-G shortcut.

18

Step 15

Let’s move on up towards the top section of the satellite and start building the actual parts and pieces responsible for the transmission and reception of the data.

First, grab the Rectangle Tool (M) and draw a 40 x 24 px shape, which we will color using #BCBCBC and then position just above the main outline of the satellite’s body. Then give it an 8 px outline, so that it won’t fall flat.

19

Step 16

Next, add a horizontal delimiter line towards the top side of the new segment, by creating a 40 x 4 px rectangle (#363A3D) and positioning it so that you have a gap of 4 px between it and the top main outline.

20

Step 17

Start adding a couple of highlights and a bottom shadow in order to give it some more depth.

21

Step 18

Add a couple of decorative elements by creating ten 2 x 2 px circles (#363A3D) distanced at 2 px from one another, which you will position in-between the top side of the satellite’s segment and its horizontal delimiter. Then add five 4 x 12 px rounded rectangles (#363A3D) with a 2 px Corner Radius, distance them at 4 px from one another, and then position them underneath the horizontal delimiter.

As with the previous segment, don’t forget to group all of its elements together using the Control-G command.

22

Step 19

Add another gold plated segment by creating a 24 x 4 px rectangle (#E5CF76), give it an 8 px outline, and then add a top and two vertical highlights (#FFE67D).

23

Step 20

In the next part, I’m going to let you get a little creative and come up with an antenna system of your own. So, take your time and build something cool and interesting to give the illustration a little personal touch.

24

Step 21

Next, we will start working on the satellite’s solar “wings” by creating the arms that hold them in place.

So, grab the Rectangle Tool (M) and create a 8 x 8 px rectangle (#9B9B9B), then give it an 8 px outline and position the two on the left side of the satellite making sure to vertical center align them to its main body.

25

Step 22

Add a couple of side shadows and a top highlight to the little arm section.

26

Step 23

Now since we can’t start working on the metal grid system that adds extra structure to the solar panel’s arm, until we have the solar panel itself, we will have to start working on that segment.

First, create a 64 x 48 px rounded rectangle with a 2 px Corner Radius, color it using #E5CF76 and then give it an 8 px outline using the Offset Path tool, making sure to align the two shapes to the satellite’s main body.

27

Step 24

Start adding some details to the panel by creating the ring like highlight (#FFE67D), and then adding a couple of vertical and horizontal delimiters to create six smaller solar sections. Once you have the delimiters in place start adding some more highlights so that each of the six solar section is lighten on each side.

28

Step 25

Next, start adding six 4 x 4 px squares to each of the six solar sections coloring most of them using #C6AF4E, and a just a couple using #A08C38 to give them a little visual pop.

Then, finish the panel by adding a vertical highlight to each of the six segments and grouping all of its components together (Control-G).

29

Step 26

Now that we have the solar panel, we can start working on the metal grid that adds to the stability of the satellite’s arm.

Using either the Pen Tool (P) or Rectangle Tool (M) draw a couple of lines (#363A3D) that would look strong enough to hold that solar panel.

Once you’ve done that, select both the solar panel and the arm and its grids and group them together, since in the next step we will create the right solar “wing” using a copy after it.

30

Step 27

Select the left solar “wing” and create a copy (Control-C > Control-F) and then reflect that copy by right clicking and then going to Transform > Reflect and choosing Vertical from the Axes option.

Then simply drag the shape to the right side of the satellite and position it in place.

31

Now, as you can see at this point we’re pretty much done with the satellite section of the illustration, which means that we can now move on to building the little background.

4.2. Creating the Little Background

So, assuming you’ve already locked the previous layer and positioned yourself onto the background one, we can now start by creating the little background depicting a little red planet and some far distanced stars.

Step 1

32

Step 2

Add an all-around circular highlight to the fill section of the background, using Overlay as the Blending Mode and an Opacity of just 20%.

33

Step 3

Start working on the little red planed by drawing a 174 x 124 px ellipse which we will color using #BF5858 and then give it both an outline and a circular highlight making sure to position the three composing shapes towards the bottom section of the little background.

34

Step 4

Now as you can see, the planet actually goes outside of the background’s surface, which is something that we would prefer it to not. To fix this, we will have to create a copy (Control-C) of the background’s fill shape (the purple-ish one) and paste it (Control-F) over the three grouped shapes. Then with both the red planet and the copy selected right click and select Make Clipping Mask to hide all the parts that we don’t want to show.
36

As you can see, we now have our little planet perfectly tucked inside the background circle.

37

Step 5

Once you have planet, we can start adding a bunch of little starts around the satellite’s antenna communication system. Take your time, and build a couple of size variation which you will color using the same tint that we’ve used for the outlines (#363A3D).

38

Step 6

To give the illustration more depth, we will create a shadow around the section of the satellite that overlaps the circular background. To do that, simply select and create a copy after those shapes and then paste them over to the satellite layer and give them a 4 px outline. With all the shapes still selected, unite them using Pathfinder’s Unite function, and then change their color to black (#000000) and set the resulting shape’s Opacity to 20%.

Then as with did with the red planet mask it so that the shadow won’t go outside of the circular background.

39

Step 7

Add a little movement to the illustration by adding a couple of lines underneath the solar panels and the bottom golden plated section of the satellite.

40

At this point we’re pretty much done with the illustration itself. All there is to do now, is add the little overlaying gradient to give it that nice visual effect.

4.3. Adding the Subtle Overlaying Gradient

Step 1

In order to add the gradient we must first, grab a copy of the main shapes of our illustration (usually the outlines) and paste them onto the gradient overlay layer. Then select all the shapes and create a Compound Path by going to Object > Compound Path > Make. Since the gradient needs to be uniformly applied using a Compound Path is a must.

41

Step 2

Once you’ve created your compound, all there is to do is go to the Gradient panel and create a Linear gradient with a -90 angle, and select orange (#F15A24) for the left color and blue (#0000FF) for the right one.

42

Step 3

Finally, change the gradient’s Blending Mode to Lighten and lower its Opacity to 30% in order for the illustration to come to life.

43

It’s a Wrap!

44

That was it guys! If you’ve followed my steps you should have created a pretty nice looking illustration that you can use in future projects. Thanks for attention and see you next time!

The post Tutorial: How to Create a Space Illustration Using Adobe Illustrator appeared first on Go Media™ · Creativity at work!.

https://gomedia.com/zine/tutorials/adobe-illustrator-illustration-tutorial/


Alexa for hotels lets guests order room service, control in-room smart devices [Updated]

Enlarge (credit: Amazon)

Hotel rooms will serve as the newest homes for Amazon’s Alexa starting this summer. Amazon announced a special version of its virtual assistant, Alexa for Hospitality, that will live across Echo devices placed in hotels, vacation rentals, and other similar locations.

Alexa in these devices will be able to do special things for both hospitality professionals and their customers. Amazon claims its Alexa for Hospitality experience will let hotel professionals “deepen engagement” through its voice controls that customers can use. Hotels can also customize some of the experience that they want their customers to have by choosing default music services, creating special Alexa Skills that only their guests can use, and monitor device online status and other connectivity issues.

Guests staying in a room with an Echo device will likely find the experience either convenient or invasive. Guests can ask Alexa to do things like order room service, answer questions about hotel services, control some in-room connected devices like lights and blinds, and more. Alexa Skills will also be available, so guests can use a Skill such as Flight Tracker to check the status of their flight before checking out.

Read 6 remaining paragraphs | Comments

https://arstechnica.com/?p=1333711


The take-over of augmented and the future possibilities

The vast potential to create, interact and educate with augmented reality (AR) is quickly gaining popularity. In the past, AR gained media attention for simply existing, but recently, companies have been applying the strategy to their marketing campaigns and reaping the rewards.

As we move further into the digital world, the benefits of implementing AR are staggering. For instance, AR has an average dwell time of 75 seconds – affording companies an unprecedented chance to appeal to their consumers. Flow Digital, a Newcastle-based digital marketing company, are sharing why 2018 is the takeover of the media channel, and what it means for the future.

The statistics driving AR

In the past 2 years, the AR industry has experienced unprecedented growth. We can largely attribute the early success to the pioneers of AR, Pokémon Go which became the most downloaded app in 2016 with over 750 million to date.

By 2020, the number of AR users is expected to surpass one billion and by 2021, the market for AR, and VR, is estimated to reach $215bn. The benefits of implementing AR are reason enough in these statistics – particularly for ecommerce, marketing and automotive brands which are the industries that experience the largest growth with the communication tool.

Ecommerce uses

Ikea Place demonstrated the potential for the natural partnership of AR and retail. Since launching in 2017 – using Apple’s ARKit tech – the Ikea Place has been downloaded two million times. The potential for allowing users to actually see what items look like in their home will significantly boost revenue.

Similarly, AR provides companies with the opportunity to target impulse shoppers. If you can showcase how their life can vastly improve with this cactus plant on their new coffee table (no doubt that it will), you can catch them before they even realised the need for such a product.

Estée Lauder recently rolled out AR into their marketing campaign – adopting the ‘try before you buy’ method. Users could ‘try’ various makeup products using their Facebook messenger chatbot, with the company experiencing a rise in social media engagement.

However, it’s important to note the limitations in an AR world for both ecommerce and marketing. While we can certainly appeal to more consumers and provide the ‘wow factor’ so many prospects look for, we must take into account the lack of adverts. Marketing ads and header bidding do not have a place in augmented reality, so companies will have to get creative.

Take the example of Pepsi, turning the average bus shelter into a fake window. Relying on a camera to capture people and vehicles in the street, they showcased images of crashing comets, a rogue cheetah and a man flying away while holding onto balloons. While it may not have been your ‘typical’ advertisement for the drink, the ad certainly proved engaging.

Future of video content

Video content has certainly seen a boom – particularly because of an increasing number of Facebook, Twitter, Snapchat and Instagram users. Today, there are more than 22m daily views on Facebook, Snapchat and YouTube, with the number continuing to grow.

360-degree views are universally appealing, enabling users to go behind-the-scenes with the brand. If there’s anything we can guarantee, it’s that consumers love a nosy. Typically, videos afford companies 2.5 seconds to catch the attention of their prospects. However, AR provides brands with an average of 75 seconds dwell time, offering a staggering amount of time to share relevant content.

Implementing AR

We have touched on implementing AR above, and the reasons for doing so are almost endless. Essentially, you are bringing your products and services to life. A static digital advert becomes an interactive catalogue or brochure. In doing so, you are improving the experience of communicating with your brand, leaving more information at their disposal and helping them to make informed decisions. In return, you should see a substantial lift in consumers trusting your company, word-of-mouth sales and potentially ROI.

Social media will only benefit from AR. It’s likely that consumers will share their interactions with your brand on their social platforms – particularly with a specific hashtag – and thus build your following. There is also the opportunity for partnerships with social media platforms. For example, Fanta partnered with Snapchat for their Halloween campaign, offering users a unique Snapchat filter if they scan their limited edition cans.

In simple terms, using AR helps to build transparency. All successful relationships start with trust, and you can even take your customer behind-the-scenes with this communication channel. Share how the product was made, guide them through the delivery process and we can guarantee you will see an increase in interaction.

Partnership of AR and PR

There is a natural partnership between AR and the PR industry, for which we could see an increase in the use of the marketing channel for events. Something as small as including a QR code to your event invite – producing a unique illustration or even animated brand logo – creates a layer of interest. Similarly, product launches can experience the benefit. If you can take your audience into the augmented world, highlighting the key features of your product, you will likely see results. Perhaps, rather than share the product in detail, you could leave a trail of breadcrumbs. Each time a QR code is scanned, more is revealed about the product.

AR transforming other industries

Ecommerce and marketing are industries experiencing a boom due to AR, but the medical sector is also seeing the technological advancements. Go Surgery, the brainchild behind Touch Surgery, offers step-by-step guides to performing surgical procedures, as if in real time. The procedure is holographically projected onto a screen. Likewise, the Microsoft HoloLens AR glasses have been used to aid in reconstructive surgery.

One industry in particular which should reap the benefits from the rise of video content is hospitality. For example, guests can explore the rooms before booking and companies can even go so far as to allow guests to review the room when using the app. Likewise, restaurants can share the experience of dining with the through AR.

Companies, such as WayRay, are offering Navion, a system that directs you while you drive. Basically, it’s like Google Maps on the road, but you don’t have to keep looking at the Sat Nav. Navion shows exactly where you want to go, continually adjusting to anything in front of the car.

Ultimately, AR spells the dawn of a different age. Those companies that embrace and adapt will certainly see the rewards, especially when labelled pioneers of the channel.

https://searchenginewatch.com/2018/06/19/the-take-over-of-augmented-and-the-future-possibilities/


Training a neural network in phase-change memory beats GPUs

Enlarge (credit: Miguel Navarro / Getty Images)

Compared to a typical CPU, a brain is remarkably energy-efficient, in part because it combines memory, communications, and processing in a single execution unit, the neuron. A brain also has lots of them, which lets it handle lots of tasks in parallel.

Attempts to run neural networks on traditional CPUs run up against these fundamental mismatches. Only a few things can be executed at a time, and shuffling data to memory is a slow process. As a result, neural networks have tended to be both computationally and energy intensive. A few years back, IBM announced a new processor design that was a bit closer to a collection of neurons and could execute neural networks far more efficiently. But this didn’t help much with training the networks in the first place.

Now, IBM is back with a hardware design that’s specialized for training neural networks. And it does this in part by directly executing the training in a specialized type of memory.

Read 15 remaining paragraphs | Comments

https://arstechnica.com/?p=1322933


Mysterious Amazon.com page hints at forthcoming Fire TV Cube

Signs point to the rumored Amazon Fire TV Cube being a real device that may debut soon. AFTVNews first spotted a new page on Amazon.com that promotes the device with the slogan, “What is Fire TV Cube?” The page provides no other details about the device, but it allows those interested to sign up to receive more information as it becomes available.

Last September, AFTVNews also first leaked images of what we now refer to as the rumored Fire TV Cube. The renders make it look like a cube-version of an Echo Dot, with mute, action, and volume buttons on the top and edges covered with strips of blue light. As part of the Fire TV family, the Cube could be a set-top box of sorts that lets users stream video, music, and other content provided by Amazon and the Fire TV platform.

Amazon still sells the Fire TV stick and released the new Fire TV with 4K HDR support shortly after the image of the Fire TV Cube leaked (those leaks incidentally also included a render of the new Fire TV with 4K HDR). All Fire TV devices can make use of Amazon’s Alexa, but they need an Echo device or a compatible remote to do so. The Fire TV Cube is rumored to eliminate the need for the Echo device or the remote by having Alexa built in, which would cement its existence as a streaming-capable, Echo Dot-like hybrid device.

Since we don’t know more details, the true nature of the Fire TV Cube remains unknown for now. Amazon is capable of building Alexa into all sorts of devices, so it would make sense for it to combine its popular AI assistant into a streaming device. Competing companies with streaming devices including Apple, Roku, and TiVo still take the remote route for voice commands. Amazon’s expertise in the voice recognition and AI assistance may give Fire TV devices an advantage if Amazon can integrate Alexa properly, giving customers a convenient way to search for content.

We’ll keep our eyes peeled for official news about the Fire TV Cube—whatever it may be—since Amazon may be gearing up for a release soon.

https://arstechnica.com/?p=1298905


Google works out a fascinating, slightly scary way for AI to isolate voices in a crowd

Enlarge / One voice is amplified, the other is muted.

Google researchers have developed a deep-learning system designed to help computers better identify and isolate individual voices within a noisy environment.

As noted in a post on the company’s Google Research Blog this week, a team within the tech giant attempted to replicate the cocktail party effect, or the human brain’s ability to focus on one source of audio while filtering out others—just as you would while talking to a friend at a party.

Google’s method uses an audio-visual model, so it is primarily focused on isolating voices in videos. The company posted a number of YouTube videos showing the tech in action:

[embedded content]
Looking to Listen: Stand-up
[embedded content]
Looking to Listen: Sports debate

The company says this tech works on videos with a single audio track and can isolate voices in a video algorithmically, depending on who’s talking, or by having a user manually select the face of the person whose voice they want to hear.

Google says the visual component here is key, as the tech watches for when a person’s mouth is moving to better identify which voices to focus on at a given point and to create more accurate individual speech tracks for the length of a video.

According to the blog post, the researchers developed this model by gathering 100,000 videos of “lectures and talks” on YouTube, extracting nearly 2,000 hours worth of segments from those videos featuring unobstructed speech, then mixing that audio to create a “synthetic cocktail party” with artificial background noise added.

Google then trained the tech to split that mixed audio by reading the “face thumbnails” of people speaking in each video frame and a spectrogram of that video’s soundtrack. The system is able to sort out which audio source belongs to which face at a given time and create separate speech tracks for each speaker. Whew.

[embedded content]
Looking to Listen: Video conferencing
[embedded content]
Looking to Listen: Noisy cafeteria

Google singled out closed-captioning systems as one area where this system could be a boon, but the company says it envisions “a wide range of applications for this technology” and that it is “currently exploring opportunities for incorporating it into various Google products.” Hangouts and YouTube seem like two easy places to start. It’s not hard to see how the tech could work when applied to a pair of smart glasses, à la Google Glass, and voice-amplifying earbuds, either.

Aiding smart speakers like the Google Home in their ability to recognize individual voices seems like another use case, but because this model is focused on video, it would likely work better with a speaker with a display, like Amazon’s Echo Show. Earlier this year, Google opened up the Google Assistant to “smart display” devices like the Echo Show, but the company hasn’t released one itself.

In any case, the privacy ramifications of this kind of tech seem just as obvious as the potential use cases. Google’s voice isolation is far from bulletproof in the examples above, but with some more fine-tuning, it could make for a powerful eavesdropping and surveillance tool in the wrong hands.

That’s a lot of speculation for now, though. Here’s hoping this research at least lessens the need to shout at Google Home in the future.

https://arstechnica.com/?p=1293251


Grab the March 2018 Arsenal Product Bundle

Graphic Design Bundle

It’s a great month to be a member of Go Media’s Arsenal subscription. Not only do you have access to our entire library for only $15/mth, but you are able to download this month’s special graphic design bundle of products at no extra charge.

Members: Download now (no extra charge)

Not an Arsenal Member yet? Join now and gain instant access to our entire library, including this bundle, for only $15.

Get it for $15 when you subscribe

Not interested in our membership? No worries. You can still purchase this bundle at a discount – or the individual products inside of it, on their own.

What’s Included in this Graphic Design Bundle by Go Media’s Arsenal:

Graphic Design Bundle

Graphic Design Bundle: March 2018 Arsenal Product Bundle

Members: Download now (no extra charge)

Get it for $15 when you subscribe

Grab the March 2018 Arsenal Product Bundle


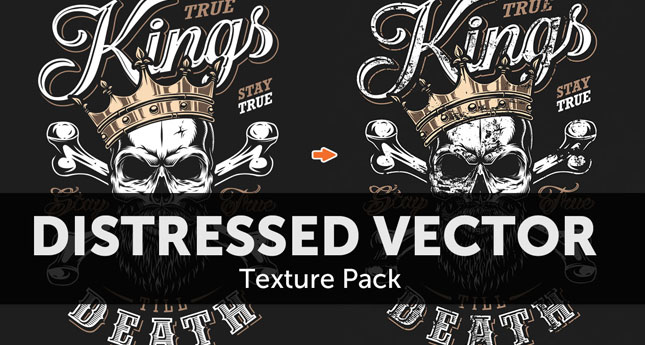
Tutorial: How to Use Vector Textures in Adobe Illustrator to Distress Your Logo/Design

We are so excited to announce the release of a new vector set, the Fistful T-Shirt Design Graphic Vector Set.

How to Use Vector Textures

This new vector set was created by new Arsenal Artist, Dedda Sutanto, and can be found over on our Arsenal for purchase now. This set is exclusive to our Arsenal and includes 43 individual elements, plus the fully completed design. These elements include a fantastic array of frames, crests, wings, borders, bullets, stars, ornate elements, and more. A gun and fist are extra elements that complete this unique set.

Purchase the Fistful Vector Set now

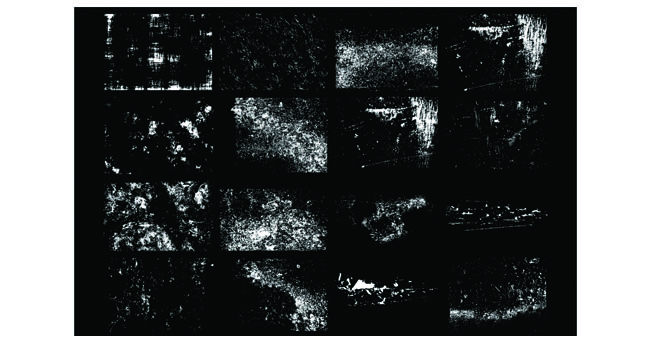
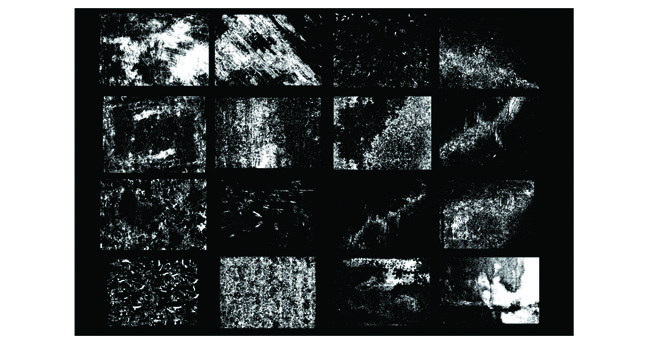
We’ll be using elements from this pack, along with free distressed vector textures, to create a distinct weathered design. So, in order to follow along, you will need to purchase the set, as well as to download the free set of distressed vector textures we’ve made available for you here:

Download now: GoMedia_Vector_Freebie_Distressed-Vector-Texture

How to Use Vector Textures

Step One: Come Up with Your Own Design in AI.

Use the elements from the Fistful T-Shirt Design Graphic Vector Set to create your own unique design. (Or, if you choose, use the fully completed design provided in the set.)

Here’s the design I’ll be using for the purposes of this tutorial:

Step Two: Select (Ctrl + A) and Group (Ctrl + G) all of the elements together. Make sure your design is centered horizontally and vertically within your artboard. This will come into play later.

Step Three: Select (Ctrl + A), then make a copy your design (Ctrl + C). Place your copy next to the original. Then go to Window > Pathfinder to pull up your Pathfinder Window.

Step Four: Making sure your copy is selected, press UNITE on your pathfinder tool. Your copy should merge into one solid shape. Well done!
Let’s leave it there for a moment and go back to our original design.

Step Five: It’s time to paste our vector texture over our original design! Open the vector texture of our choice up in AI.
Copy (Ctrl + C), then (Ctrl + V) to paste the vector texture over top of your design. Head over to your swatch panel in order to change the vector texture from black to white and place your texture where you think it looks best.

Step Six: Add the copy (i.e. the black shape) over top of the original design (and, of course, the vector texture you’ve added to it).

Just like the original design, you’ll want to center this shape to the artboard. You’ll also want to make sure that this shape is indeed at the top of the pile so to speak. You can do this by making sure it’s selected and going to Object > Arrange > Bring to Front.

Step Seven: Next, select all (Ctrl + A) and head back to your Pathfinder Tool. Hit CROP.

Purchase the Fistful Vector Set now

Step Eight: and you’re done! But wait!

Step Nine. Let’s see how your newly distressed design looks on one of our mockups!  (I’m going to use one of our Men’s Ghosted Pullover Hoodie Mockup Templates featuring displacement maps.)

Hope you guys found that helpful. See you all very soon!

Purchase the Fistful Vector Set nowAccess our full library, only $15 per month

Tutorial: How to Use Vector Textures in Adobe Illustrator to Distress Your Logo/Design


Fast talker: Alexa may offer speedier answers with Amazon-made AI chips

Amazon wants to cut the lag time between your asking Alexa a question and the virtual assistant giving you an answer. According to a report by The Information, the online retailer is developing its own artificial intelligence chips to be used in Echo devices and other hardware. If successfully created and deployed, these AI chips would allow more voice-based requests to be processed on-device rather than going to the cloud.

Currently, Alexa needs to contact the cloud to interpret commands. That’s why there’s a short delay after you ask the virtual assistant a question—she needs to analyze the command and gather an answer with help from the cloud. A dedicated AI chip in a device like an Echo would allow Alexa to process certain requests more quickly, decreasing the delay that lies in between your question and Alexa’s answer. While complex inquiries will likely still be handled with help from the cloud, more simple commands could be processed all on the device itself.

Amazon reportedly has 450 people with chip knowledge on staff now, many of which came via recent acquisitions. The company bought the Israeli chipmaker Annapurna Labs in 2015 for $350 million and the security camera company Blink for a reported $90 million at the end of 2017. It’s believed that Amazon bought Blink specifically for its low-energy chip expertise; the company’s smart home security cameras use these chips to extend the battery life of its camera modules to at least two years.

These plans and acquisitions show that Amazon wants to stay competitive in the smart home space, dedicating a lot of resources to improving its Echo devices to be faster and more useful. Echo devices and Alexa also heavily integrate with Amazon’s retail business—the faster Alexa can respond to inquiries, the easier it will be for customers to use the system as a way to place orders on Amazon. In addition, Amazon producing its own chips could cut costs and make Echos and other smart home devices more affordable for the company to produce.

Amazon joins the likes of Apple and Google with its new AI chipmaking efforts. Apple recently deployed a new “neural network” in its A11 Bionic chip used to process machine learning algorithms involved with FaceID and ARKit computations. Google is no stranger to developing its own AI hardware, having done so for years and most recently outfitting the new Clips camera with its own AI chip.

https://arstechnica.com/?p=1259175