Grab a camera. Look at its design and horizontal layout. Makes one wonder, were modern cameras designed to make it easier to take mainly horizontal pictures?
Let’s turn things 90 degrees. Why? To portray strength, height, and depth in a photograph, we might want to turn our cameras vertically. Vertical landscapes and seascapes emphasize the height of structures, a perspective that can be lost in horizontal compositions.

When I first started photographing, I took all my pictures holding my camera horizontally. Later on, I began to look at what celebrated landscape photographers were doing. I studied the way they composed. I still peruse their print books to learn from the work of David and Marc Muench, Elliot Porter, Freeman Patterson, Sherman Hines, Philip Hyde, John Sexton, William Neill, Galen Rowell, and Art Wolfe. All of these photographers make vertically-framed landscapes.
Now, turning our cameras vertically is just the beginning. I tell my adventure photo students that our fun begins when we work with key elements of design. Here are a few of these elements that will enhance our vertical compositions.
Creating Vertical Landscapes: 7 Ideas
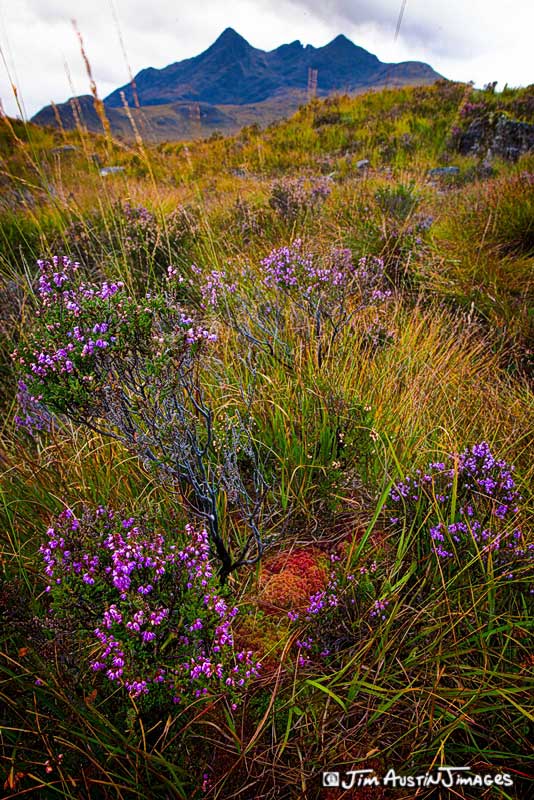
1: Balance
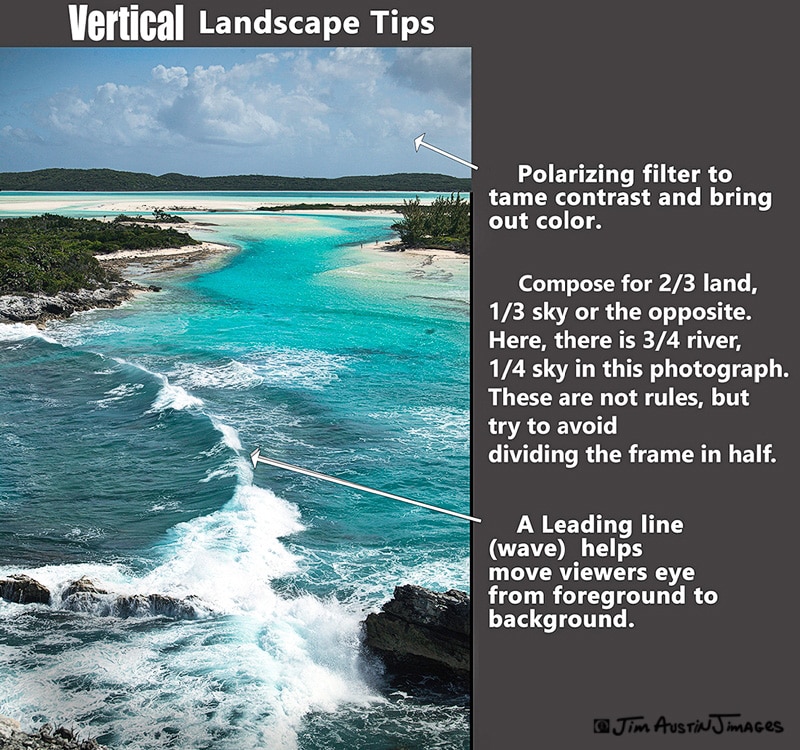
Avoid dividing the frame in half. Doing so gives viewers a static feeling. A centered horizon makes the image look like two rectangles stuck together. While not a rule or guideline, try an unequal division of your frame in proportions of 1/4 to 3/4, or 1/3 to 2/3. These unequal sky to ground relationships create more movement and are less static.
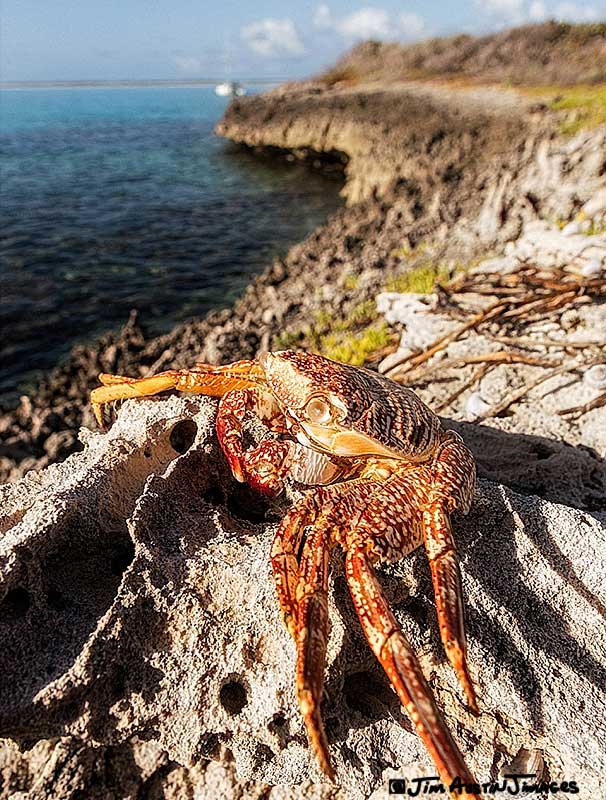
2: Emphasize Foreground
Compose with a strong foreground element, like this colorful rock crab molt. When a large format camera or camera with a tilt-shift lens is used with its tilt method, the resulting depth makes viewers feel they are right there. The object in the image foreground feels, perceptually, like it’s right “under our feet.”
In general, to create a sense of depth, we move the camera in small shifts and short distances to make our foreground element larger, to change its relationship to the frame, and select out distracting forms and tones.
How far away should the foreground element be? My measure for a reasonable distance between lens and foreground, depending on the lens focal length, is close enough that I can reach out and touch the object with the hand that is not pressing the shutter. Wide angle lenses are an excellent choice to bring a foreground in close, then get the middle ground and background in focus for depth.
3: Green
A green color in the foreground works well and is often a sign of Spring and of renewal.
4: Edges
The frame makes up the edges of a photograph. The four edges are a vital composition element, and we don’t want them too bright. We must keep the edges lively, but eliminate visual elements that do not belong. A balance of tones within the frame is a key to a well-composed picture. Successful landscapes rarely have very bright highlights or objects touching the frame’s edge. A slight vignette helps darken areas near the frame edges and direct the viewers gaze to the center.
5: Filter
To achieve a balance of tones when photographing a bright sky or sea is a challenge. A Neutral Density filter or circular polarizing filter can be added to change the contrast and balance highlights, mid-tones, and shadows.
6: Tripod
A tripod helps us compose. To get foreground to background entirely in sharp focus, focus on objects 1/3 of the way up from the bottom of the frame. Choose an F-stop with more depth of focus like F/8. Older lenses have small nominal markings in color that will tell you the closest distance you can focus the lens and still keep far away objects perceptably sharp (hyperfocal distance). For instance, 5.5 feet is the hyperfocal distance for a 28-millimeter focal length lens set to an aperture of F/16 when photographing with a 35mm camera.
TIP: A tip to remember get your camera lower is to imagine seeing the world with the vision of a child or a Hobbit.
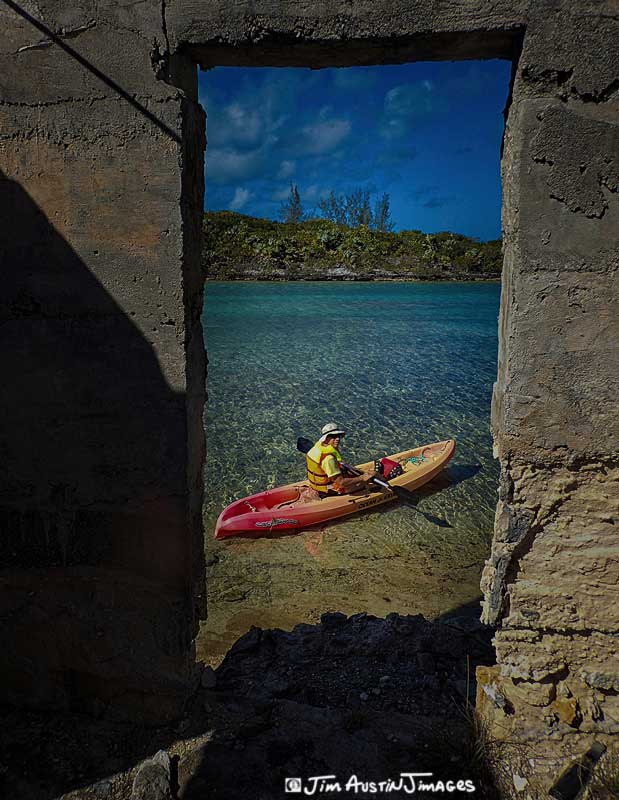
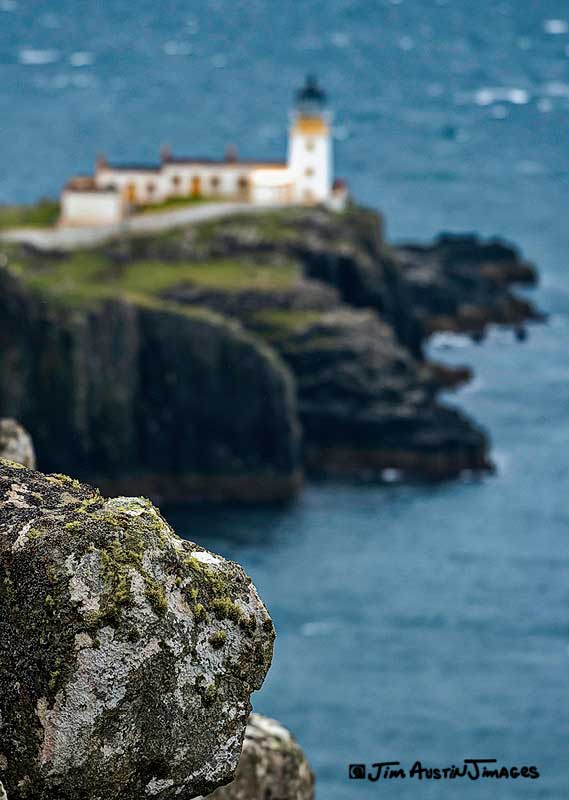
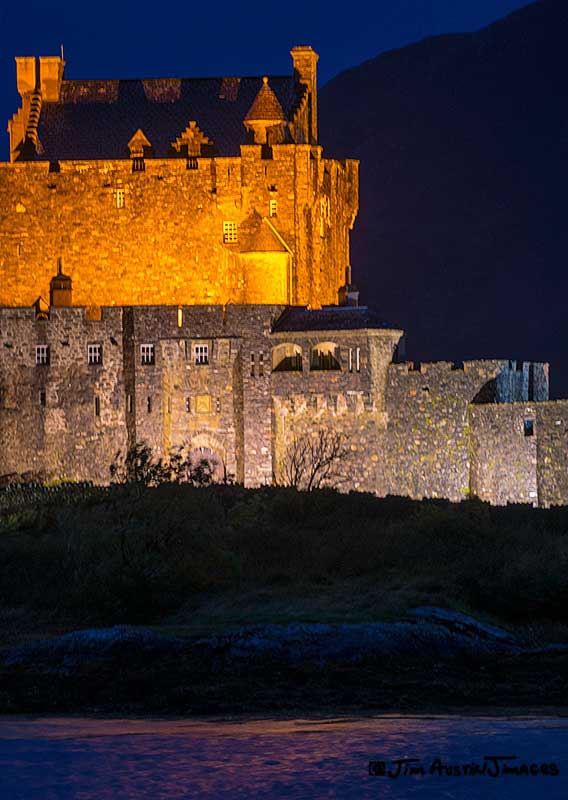
7: Depth
Depth is lost by seeing the world horizontally in two dimensions. Turning our cameras vertically, we face a challenge of how to enhance the perception of depth. We do this by having a foreground, middle ground, and background and by balancing light and dark. Here, if the lighted castle by itself had been shot horizontally, it would appear as a flat plane, but by including darker elements of water, rock and moat, all of the lower visual elements add height and depth.
Wrap Up
Use these seven elements of design. I find it helps to work deliberately, with a tripod, and lower the camera-mounted tripod closer to the ground, and include more of the foreground. Composing for a vertical landscape will expand your vision.