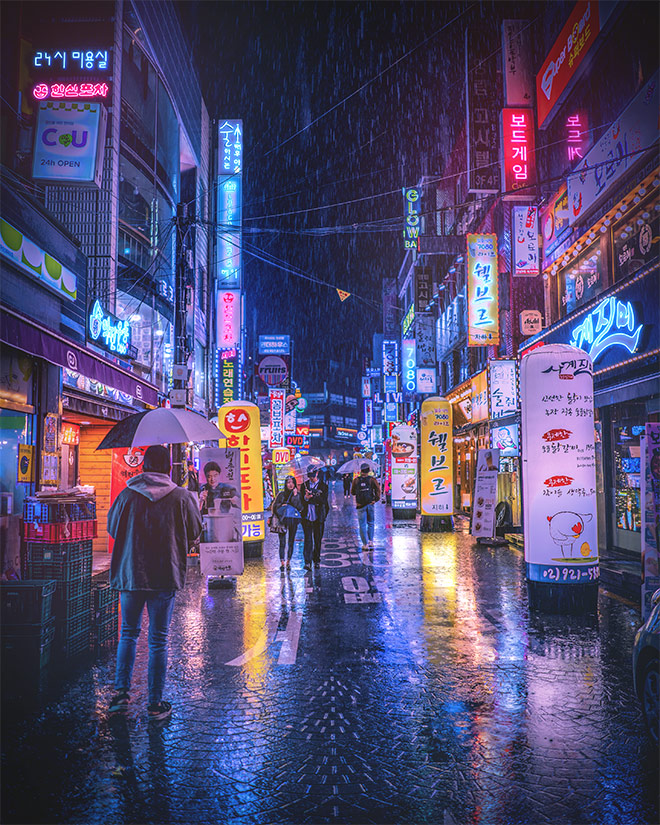
The cyberpunk aesthetic is commonly associated with densely populated, futuristic cities illuminated by bright neon signs and advertisements. Follow these steps in Adobe Photoshop to transform a regular street photograph into a neon-noir scene by applying heavy colour grading with bright blues and hot pinks, as well as neon sign effects to create a colourful yet moody atmosphere within the image.
In this Photoshop tutorial I’ll show you how to enhance a night-time street photo to give it a vibrant cyberpunk effect. We will begin with some image adjustments to produce a hyper-realistic appearance, before manipulating the colours with a split toning effect. Enhancements to the neon signs and some subtle mist effects will then finish off the image with a stylised look as if it’s a scene from a futuristic neon-noir movie.
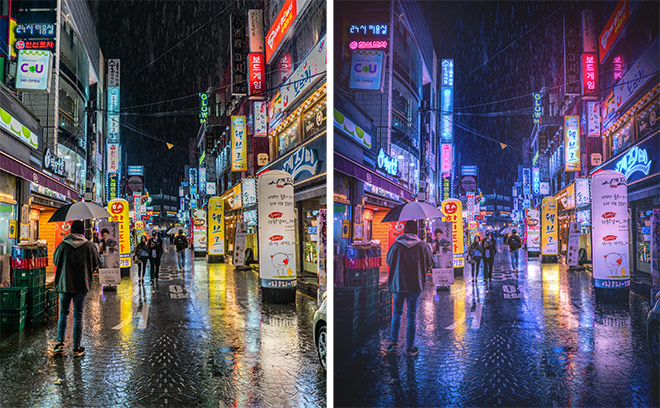
Street scene images from busy cities in the far-east, such as Seoul, Tokyo, or Hong Kong provide the perfect backdrop to complement the cyberpunk style. I will be using this free image by Ethan Brooke on Unsplash.com.
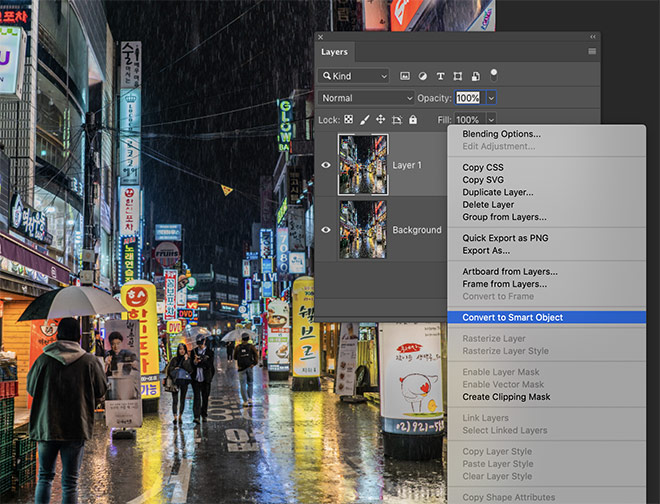
Open the image in Adobe Photoshop, but before continuing, duplicate the background layer (CMD+J) to preserve a copy of the original, and convert the new layer into a Smart Object so the filters and effects are applied non-destructively.
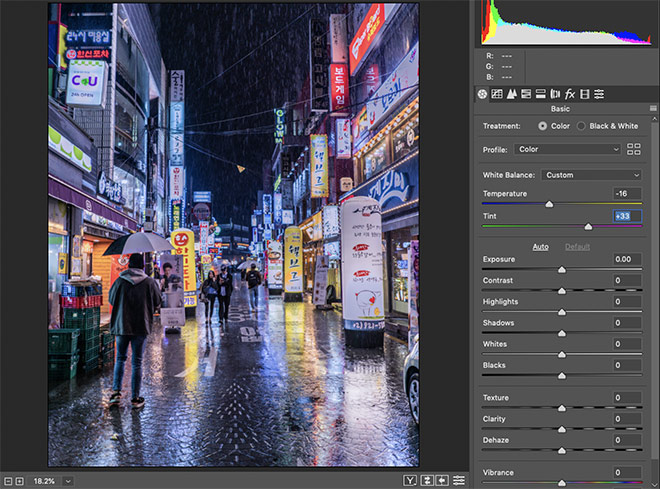
Go to Filter > Camera Raw Filter to apply a series of adjustments to enhance the image. The Temperature and Tint sliders can be used to introduce the pink and blue colour scheme that is a core component of the cyberpunk style.
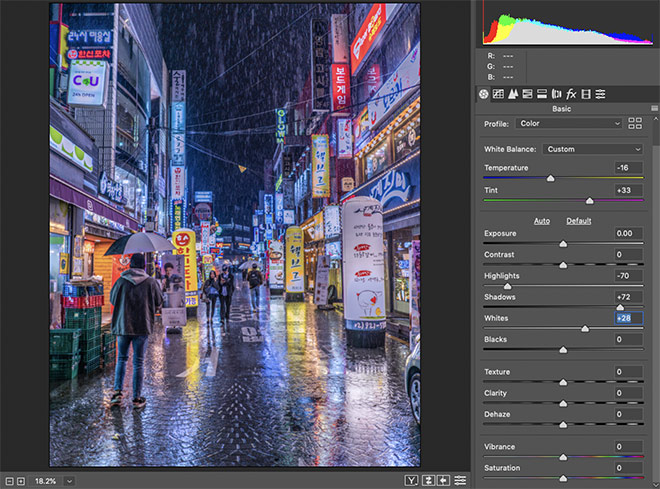
Decrease the Highlights and increase the Shadows slider to control the overall brightness and contrast of the image and bring out the details with a HDR-style appearance.
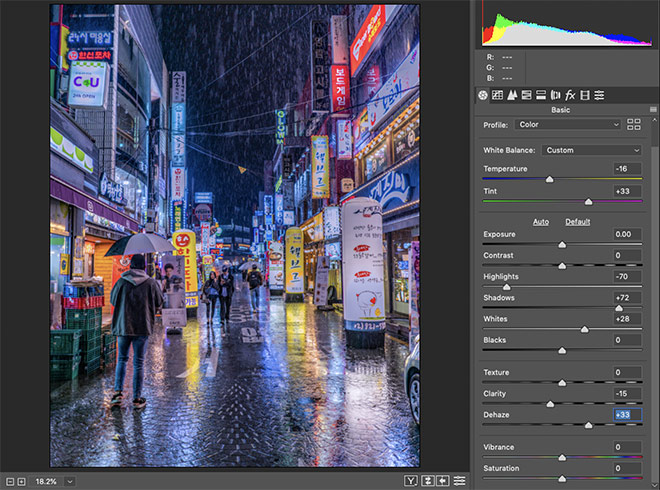
Reduce the Clarity slider slightly to soften the glow of the lights, then boost the Dehaze amount to bring back some contrast to the image.
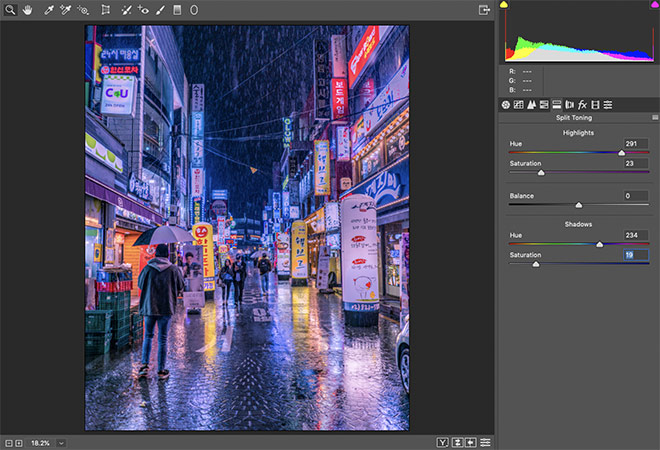
Switch over to the Split Toning section of the Camera Raw filters. Temporarily max out the saturation sliders to then find a suitable Hue—a bright pink for the highlights and a rich blue for the shadows—then bring down the saturation values to reduce the vibrancy of the effect.
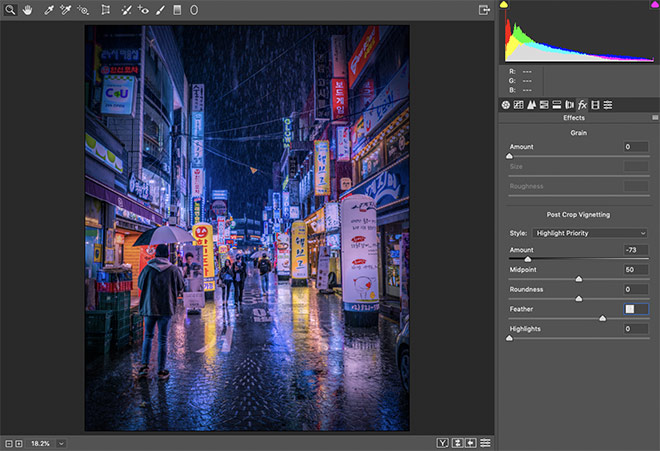
Under the Fx tab, add a Vignette to darken the edges of the image. Bring up the Feather value slightly so the vignette smoothly fades out.
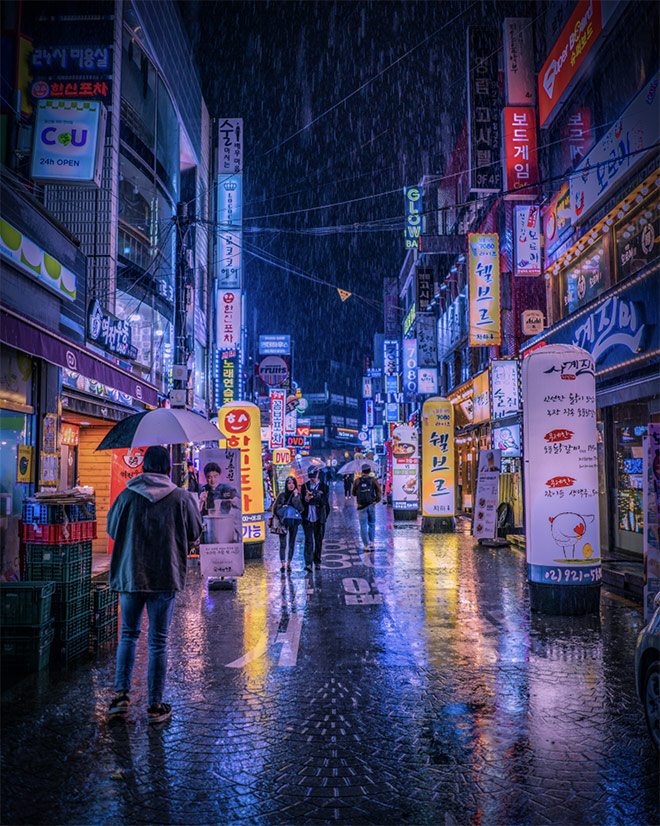
These Camera Raw adjustments alone completely transform the appearance of the original photo, giving it a stylised and colour-graded appearance, but we can enhance the cyberpunk effect further with additional adjustments.
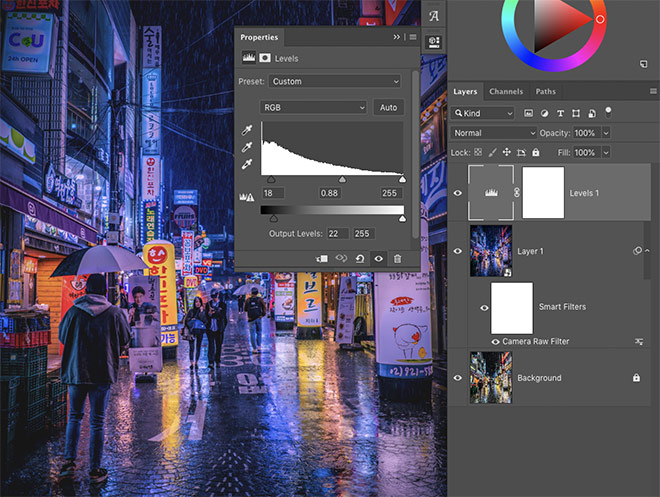
Add a Levels adjustment layer, then bring in the Output Levels slider for the shadows, which will alter the black point to wash out the darkest areas of the image. Darken those areas slightly using the regular shadows levels slider.
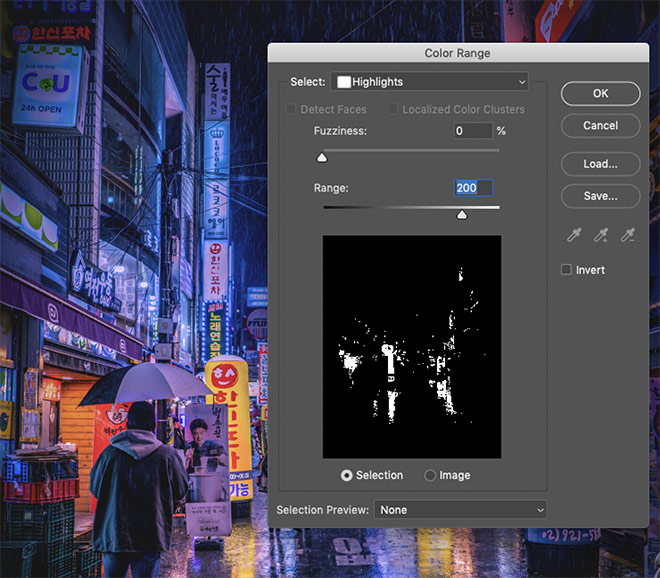
Next, we’ll use the Select > Color Range command to make a copy of the brightest areas of the image. Choose Highlights, then adjust the Range to around 200. Use the Copy & Paste commands to place a copy of the highlights on a new layer.
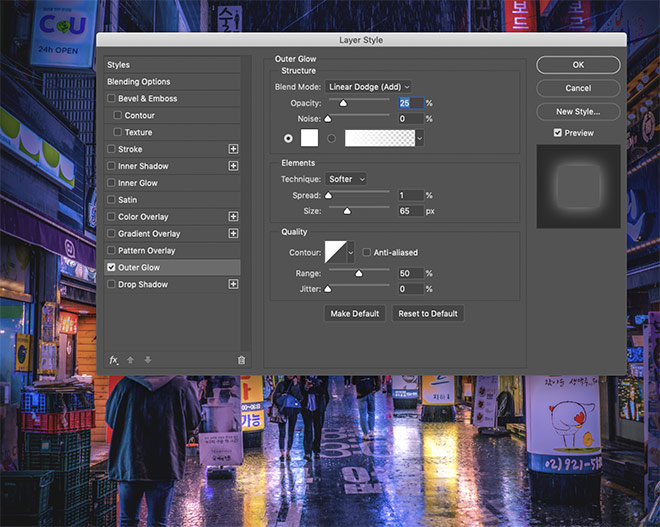
Double-click the new highlights layer and add an Outer Glow layer style. Configure the settings to Linear Dodge with white, a minimal Spread value but adjust the Size to produce a soft glow, then reduce the Opacity to reduce the prominence of the effect.
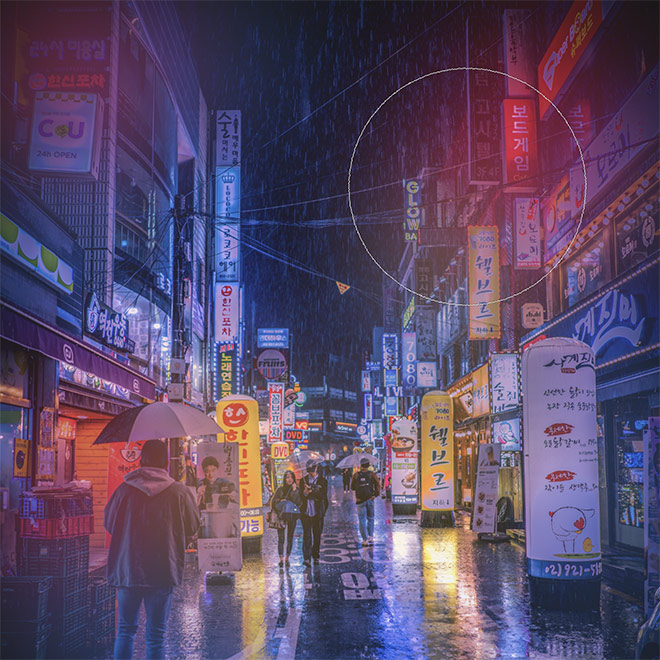
Add a new layer, then set up the brush tool with zero hardness. Reduce the Flow value in the toolbar, then sample colours from the photograph by holding the ALT key to toggle the eyedropper tool. Place dabs of colour around the image that correspond to the hues of the photograph.
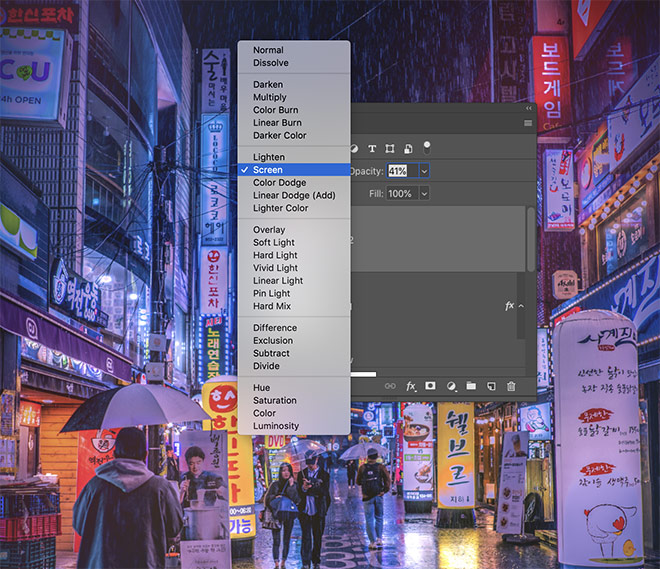
Change the blending mode of this layer to Screen, then reduce the opacity to around 40% to leave an array of subtle colour casts.
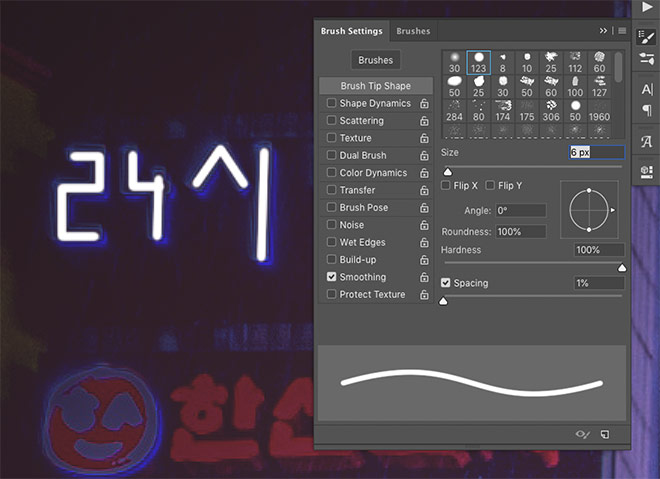
Converting any existing signs or advertisements within the photograph to neon lights is a great way to illuminate the scene. Add a new layer and set up the brush tool with a small tip and 100% hardness. Enable Smoothing in the brush settings and set the value to around 50% in the top toolbar to make it easier to trace letters within the image. Don’t forget to bring the Flow value back to 100%.
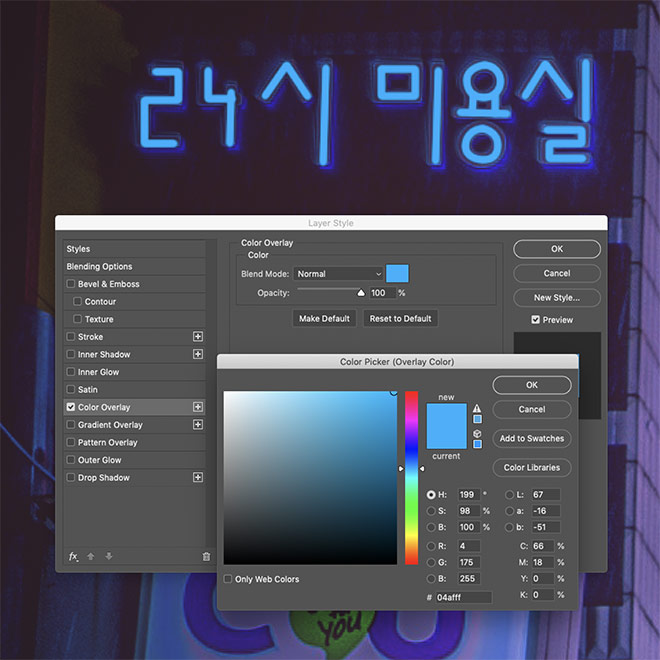
Double-click this layer to apply some Layer Styles to transform the basic brush lines into neon tubes. Begin with a Color Overlay, using a blue hue as the base colour of the neon light.
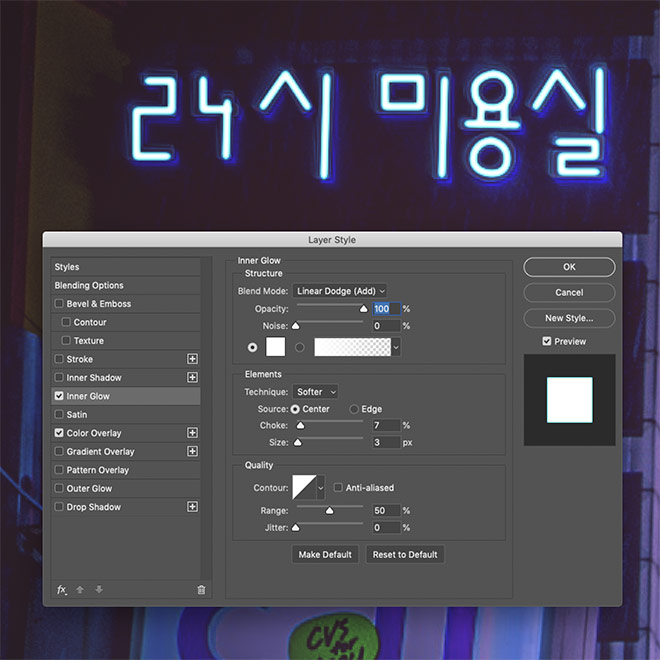
Add an Inner Glow next, with the settings Linear Dodge, white, and Source set to Center. Adjust the Choke and Size values to generate a white centre that fades to a blue outline towards the edge of the tube.
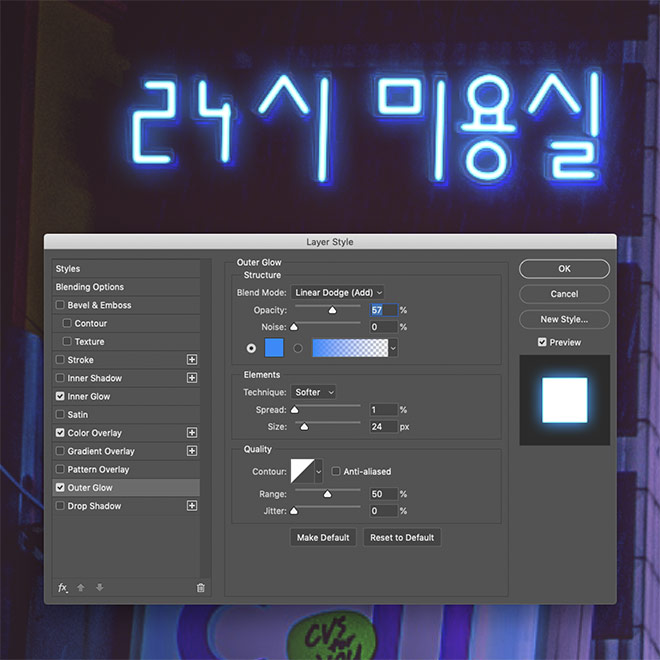
An Outer Glow effect helps to illuminate the neon light. Use the Linear Dodge blend mode with a similar blue hue. Use minimal Spread for a smooth glow, then adjust the Size value to suit.
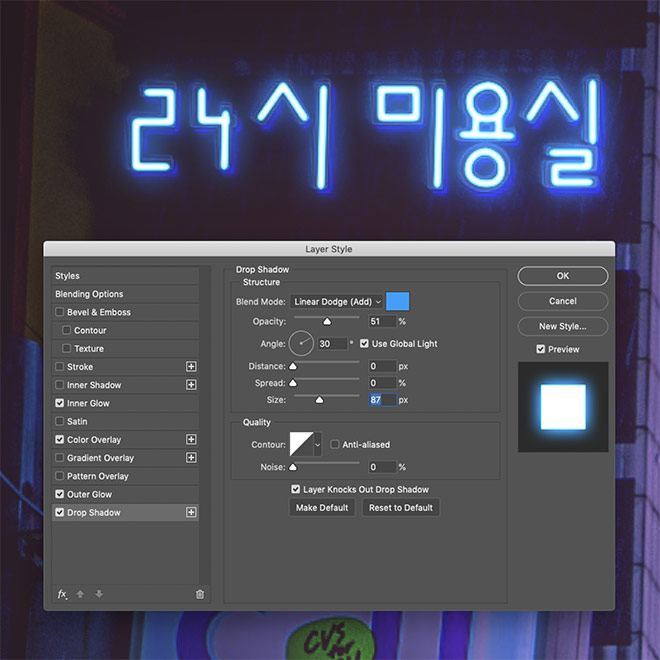
It isn’t possible to duplicate the Outer Glow effect, but a Drop Shadow can be configured in the same way. Use similar settings of Linear Dodge and a blue hue, then reduce the Distance and Spread to zero, but increase the Size to produce a larger ambient glow around the neon lights.
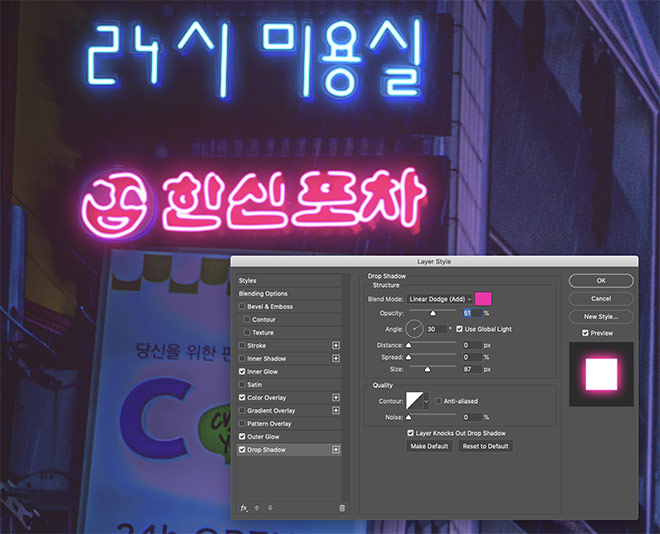
Trace any neon lights in other colours on a new layer. Right click and copy the layer style of the blue neon lights and paste the them on the new layer to replicate the glow effects. Edit the hue settings to produce other neon colours.
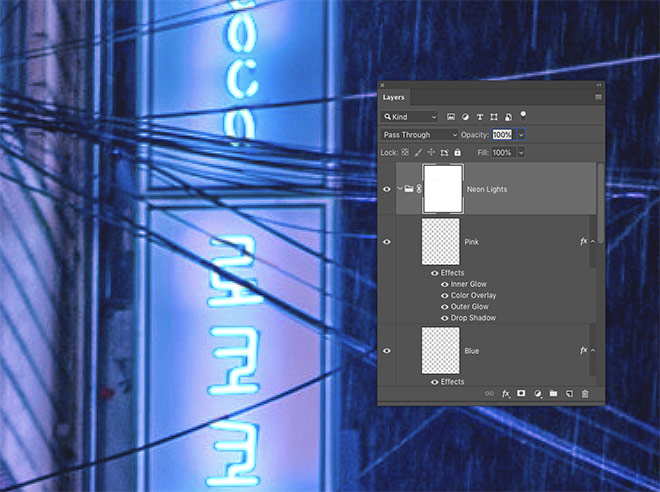
If any of the neon signs have been traced over to the top of power cables or other obstructions, group the elements, then add a layer mask. Use a small black brush to erase the relevant areas.
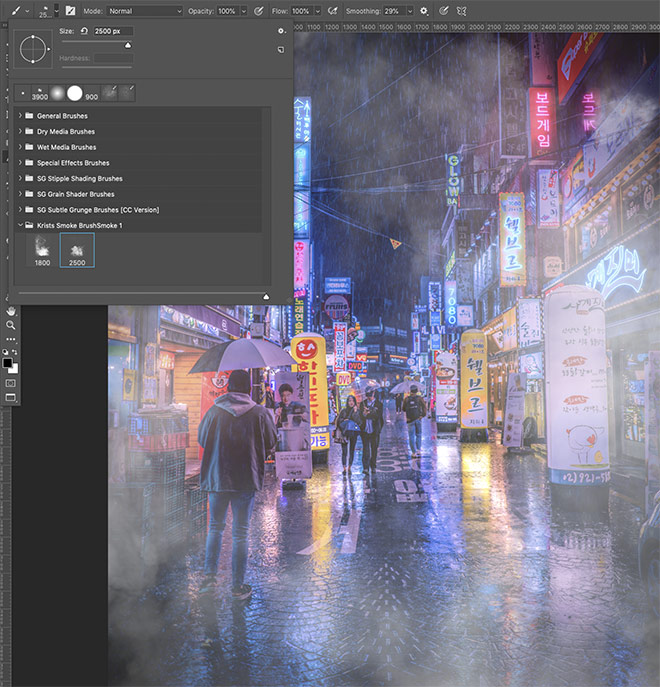
As a finishing touch, add a new layer and apply some mist effects using this free set of smoke brushes.
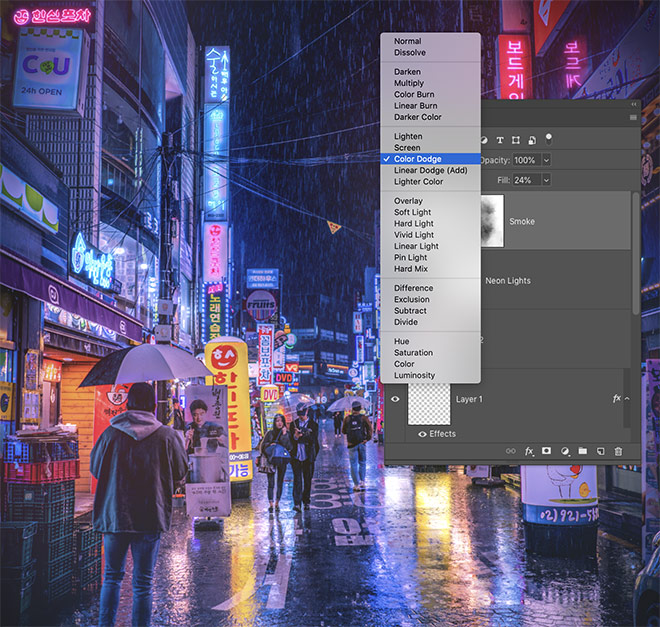
Set the blending mode of the smoke brush layer to Color Dodge and reduce the Fill value to allow the colours to interact, producing a vivid mist effect.
The final result is a vibrant cyberpunk photo effect with blue and pink color grading and intense neon signs. The initial Camera Raw adjustments transformed the original photograph with HDR-style contrast and split toning colour effects, then the addition of extra neon lights and misty light effects enhanced the futuristic mood of the scene.
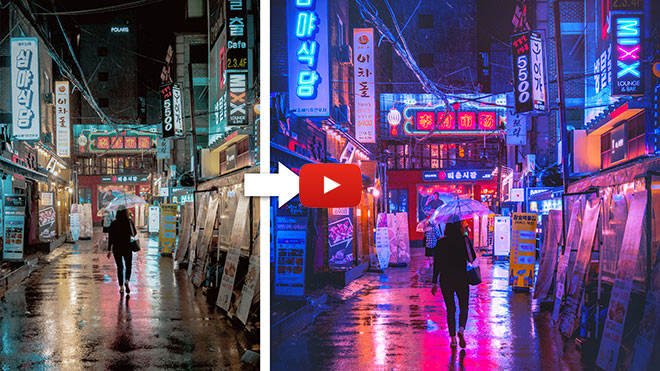
To see this effect being created in real-time follow along with this tutorial in video format, where you can watch a similar street scene being given the cyberpunk look with the same Photoshop adjustments.
How to Apply Cyberpunk Style Color Grading & Neon Effects to Your Photos


