Windows 11 may not be exactly revolutionary, but there are some features that are just plain useful, and snap layouts are one of them. Replacing the drag-and-drop snap assist feature of Windows 10, snap layouts let you arrange your apps quickly and neatly on your desktop, making it much simpler to see all and use all at once. (Certainly, it’s a lot better than the constant Alt-Tab switching between apps that many of us are used to.)
Here’s how you set it up:
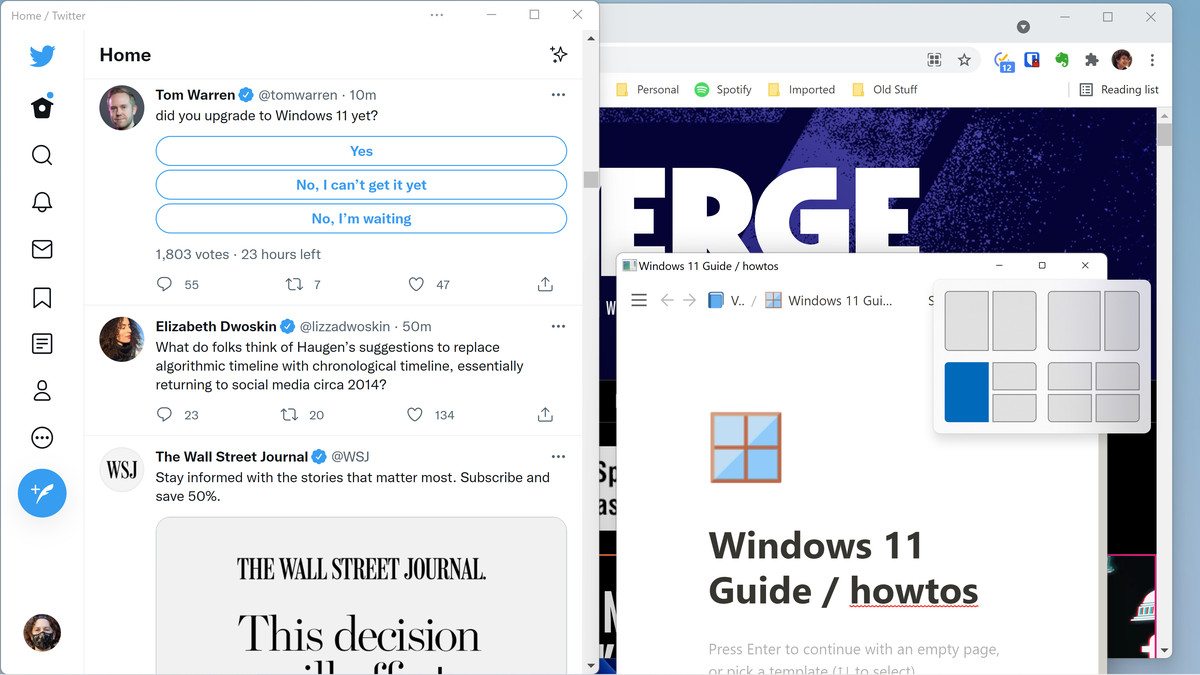
- Hover your cursor over the maximize icon in the upper right corner of an app or press Win-Z. You’ll see four (or six if you have a large monitor) different grid layouts that you can choose from. Each layout will have several zones in a different configuration.
- Choose a layout and hover over the zone you want your active app to be in. That zone will turn blue; click on it. Your app will then snap into that position.

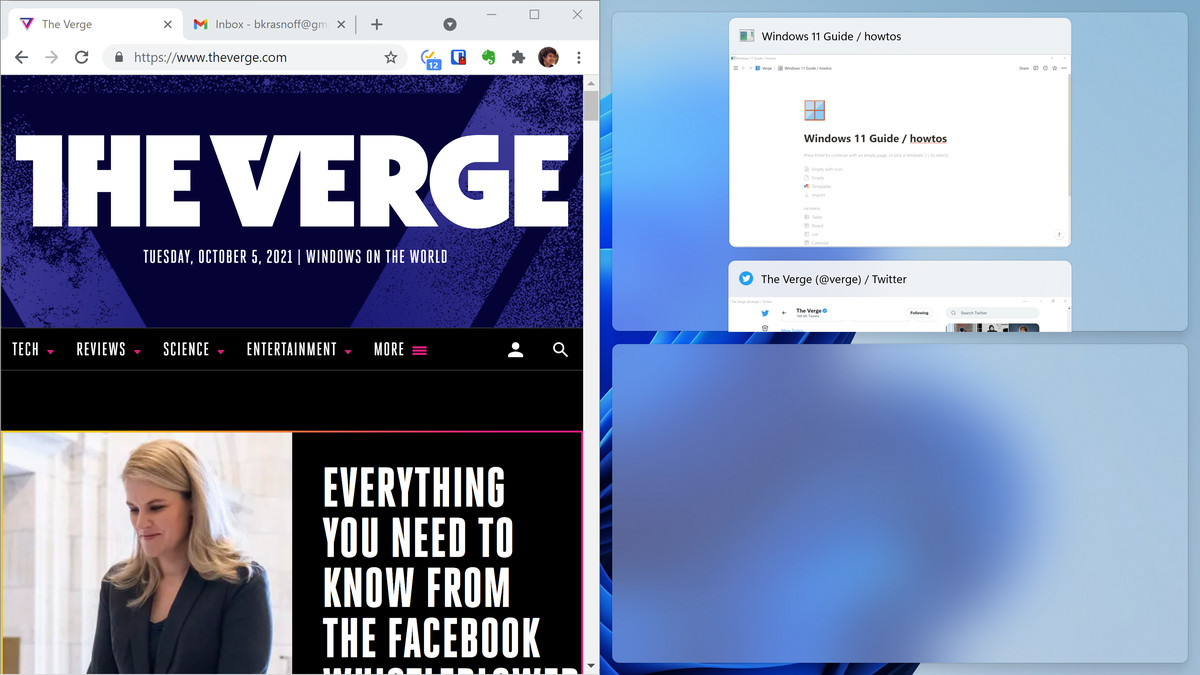
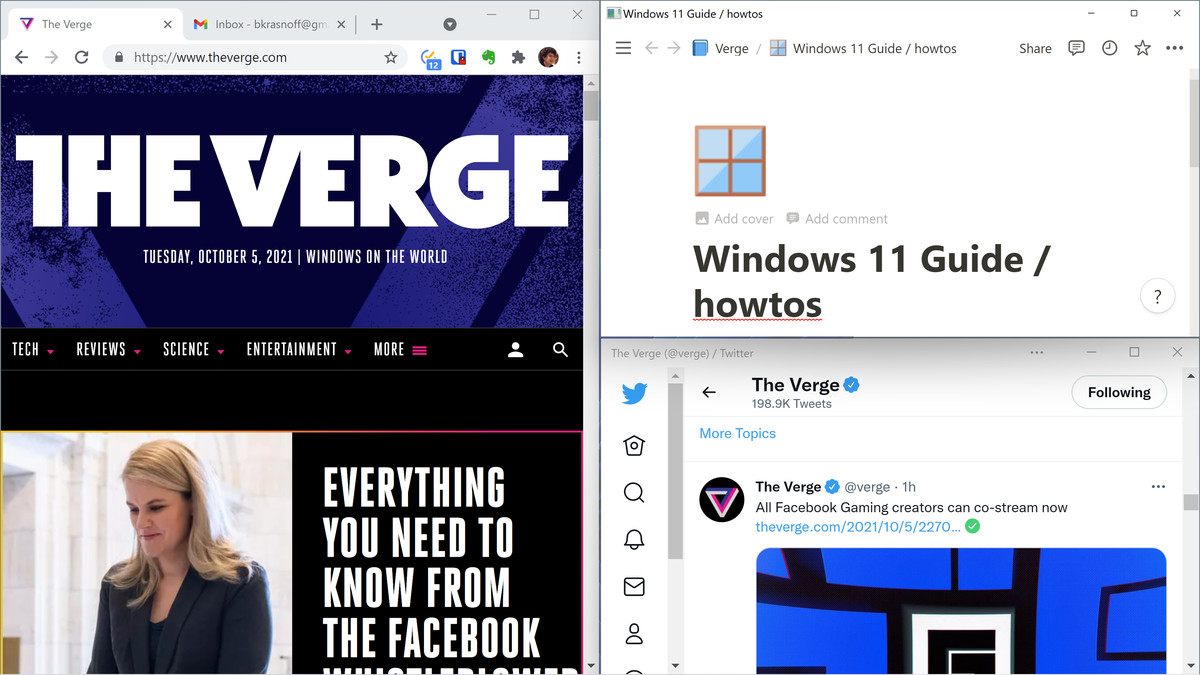
- If you had other apps open, they may appear as thumbnails in another of the zones. Alt-Tab to each open app, and choose which zone you want that app to be in. You can also simply click on the app if it’s in the zone you want it to be in.

(Note: Sometimes, while you’re rearranging, one app can overlap the other. If things get confusing, use Alt-Tab to see where each app is or find them in the taskbar.)
And you’re ready to go!

Your snap layout will be reflected in the taskbar as well. If you go to the taskbar and hover over the icon for one of the apps in your layout, you will see a thumbnail for both the app and for the layout group it’s part of; you can click on either.

Need to maximize an app? Just click on the maximize icon. Click on it again, and the app will snap back into its former configuration.
Adjust layout settings
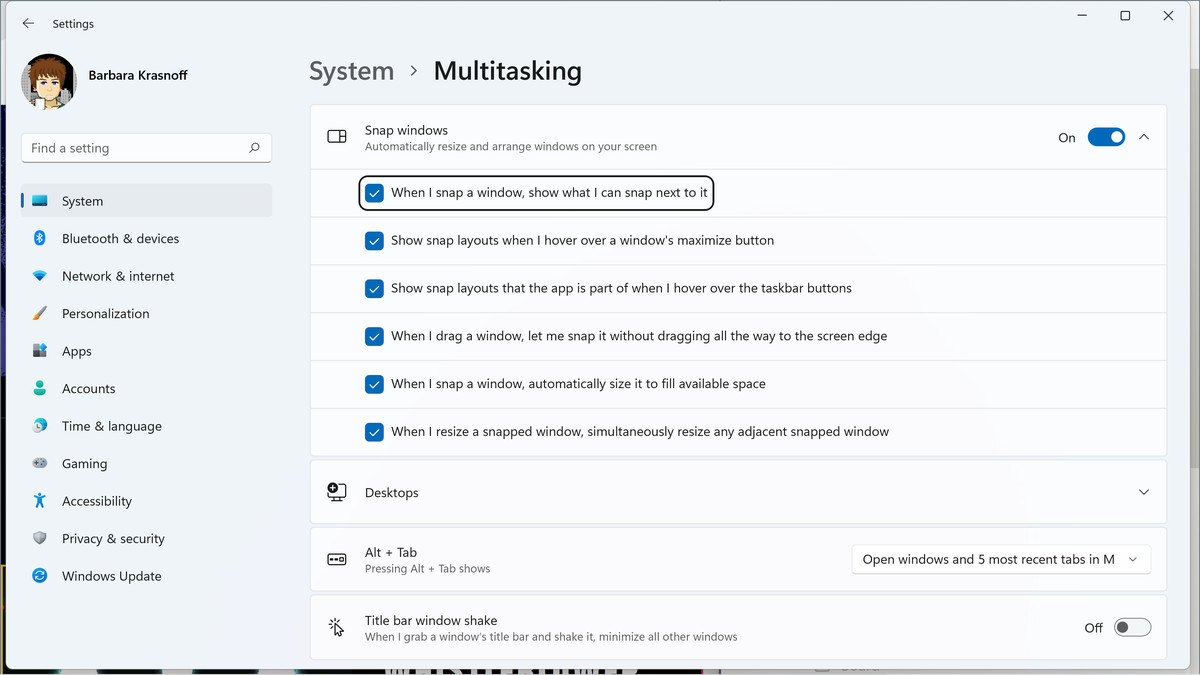
You can adjust the snap layouts by going to “Settings” > “System” > “Multitasking.” You have a variety of options that you can enable or disable. For example, you can choose not to have the snap layout feature appear when you hover over the maximize symbol or when you hover over your app icon in the taskbar. You can arrange for the other windows to automatically resize when you manually resize one. And, of course, you can disable the feature entirely.

Learn how to use it
When you first start to use snap layouts, it may take a little getting used to, especially when it comes to deciding which app goes where. Once you’re set, however, you may find that snap layouts make it a lot easier to, say, monitor your Twitter or Slack account while working on a document or watching a video. Admittedly, if you have a smaller display, having more than two apps open at the same time could make things a bit crowded, but it’s worth experimenting a bit to see what works for you.
https://www.theverge.com/22710511/windows-11-snap-layouts-how-to

