 In this tutorial we will be creating a cute smiling heart with floral decorations, that can be easily turned into a postcard by adding text to the composition. We’ll be using basic shapes and tools for creating the smiling heart itself and adding details. Let’s get started!
Tutorial Details
- Program: Adobe Illustrator CS6 – CC
- Difficulty: Intermediate
- Topics Covered: Shape Building, Stroke Panel, Direct Selection Tool, Curvature Tool
- Estimated Completion Time: 15 minutes
Step 1
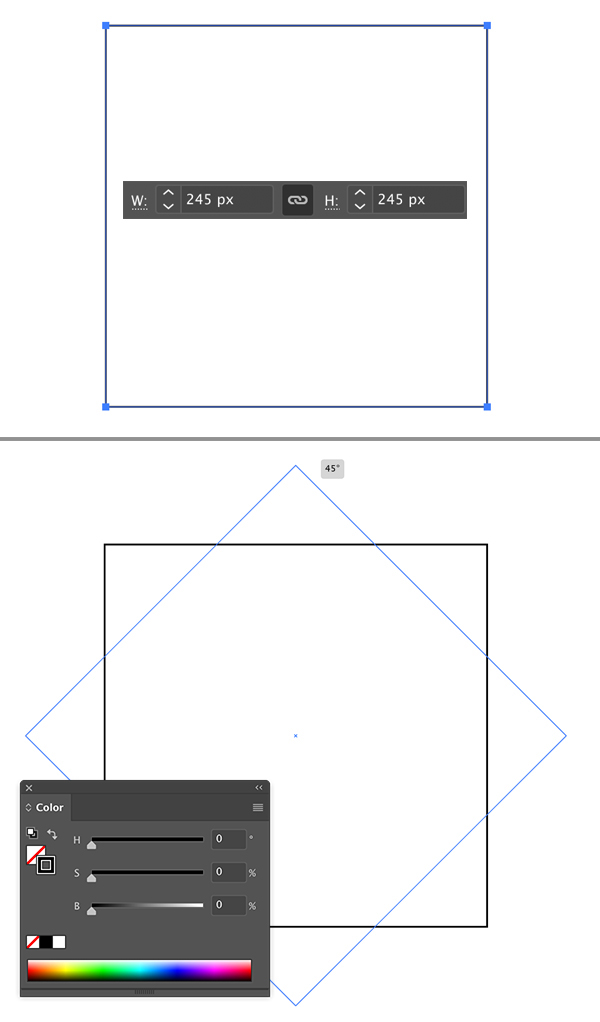
Take the Rectangle Tool (M) and let’s start shaping the heart! Hold down Shift and make a 245 x 245 px square with black Stroke and no Fill. Use the Selection Tool (V) to rotate the square 45 degrees.
Step 2
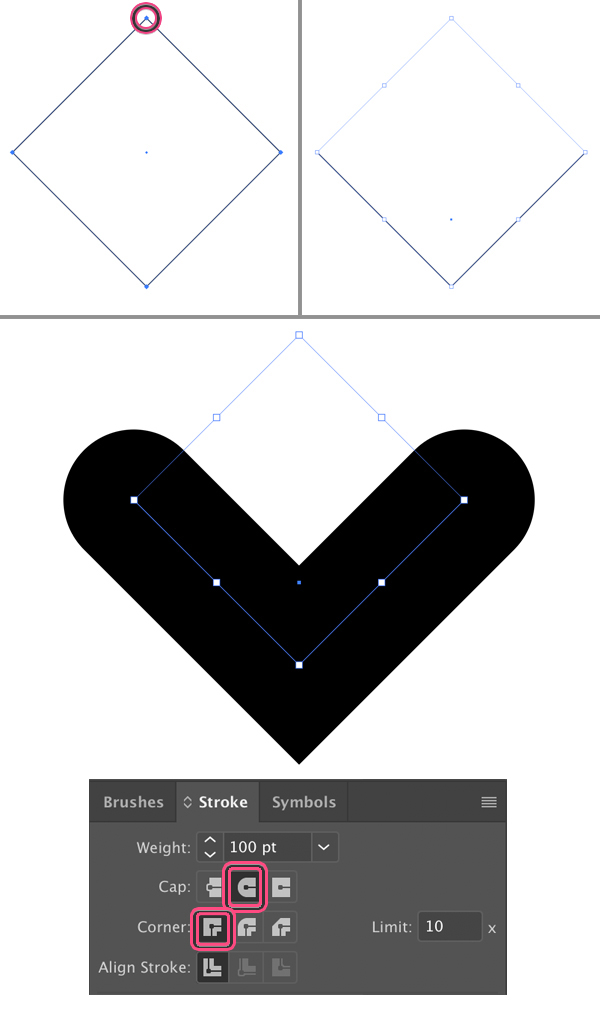
Now take the Direct Selection Tool (A), click the top anchor point and press Delete (Backspace on Mac) to remove the top part of the square. Now we have only the V-shape left.
Open the Stroke panel (Window > Stroke) and set the Cap to Round cap, Corner to Milter Join. Set the Weight to 100 pt for now to check out how it looks.
Step 3
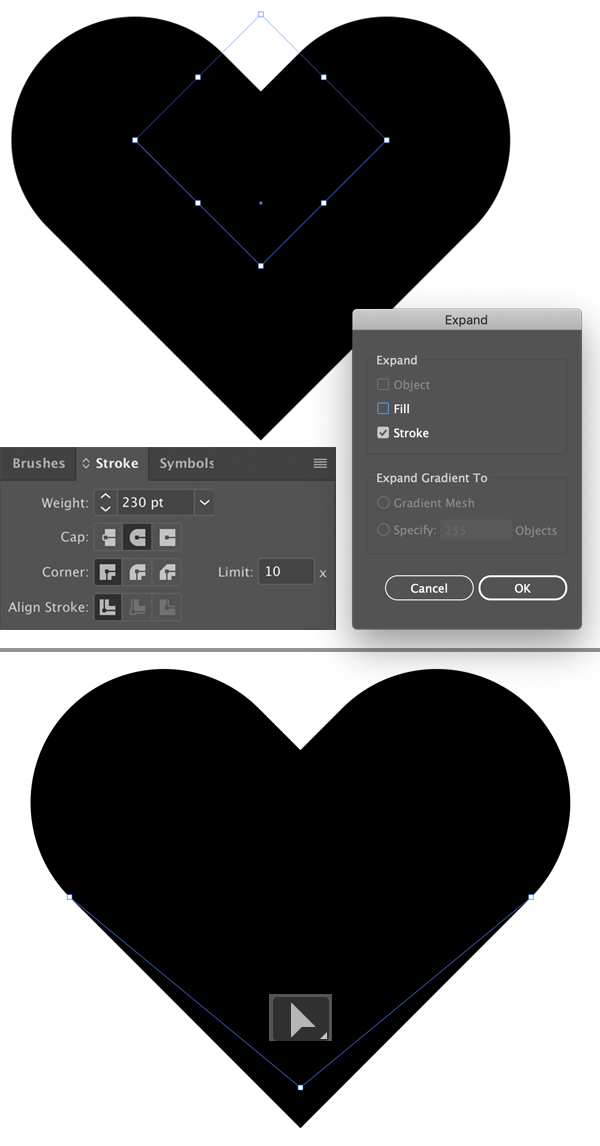
Let’s increase the Weight parameter up to 230 px to make it look like an actual heart-shape.
Go to Object > Expand > Expand Stroke and click OK to turn the stroke into an object.
Select the bottom anchor point with the Direct Selection Tool (A) and pull it up a bit to shrink the heart.
Step 4
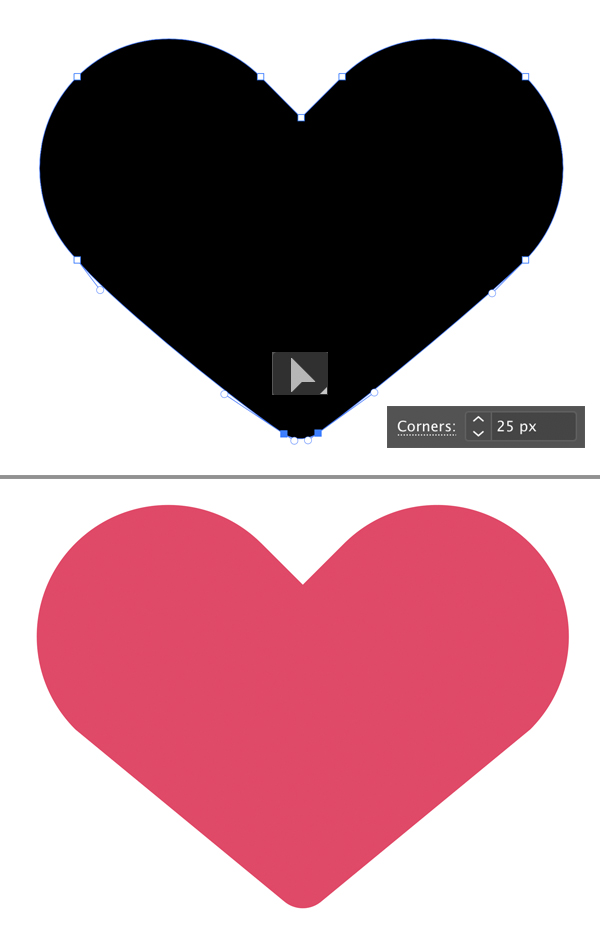
Let’s make the bottom part a bit rounded. Keeping the bottom anchor point selected with the Direct Selection Tool (A) pull the Live Corner marker up, rounding the corner. You can also set the Corner value manually from the control panel on top. Let’s set it to 25 px.
Let’s change the Fill color to pink in the Color panel.
Step 5
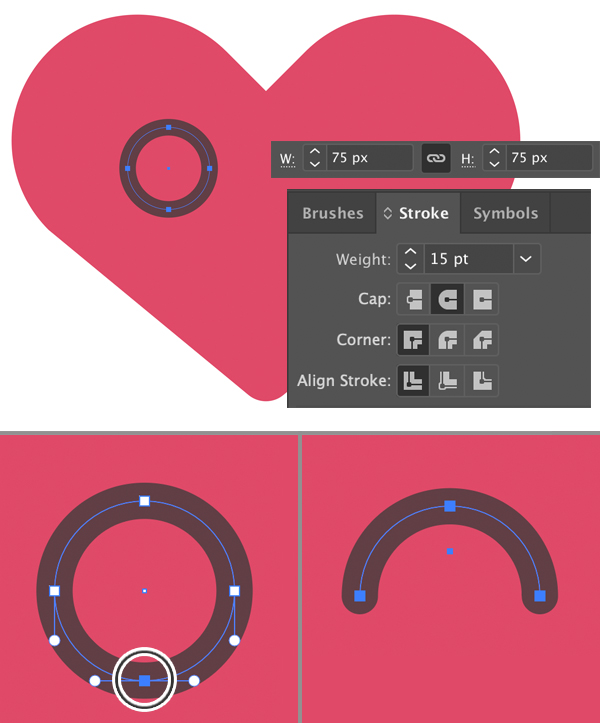
Take the Ellipse Tool (L) and let’s create the eye. Hold down Shift and make a 75 x 75 px circle with brown Stroke and no Fill.
Set the Stroke Weight to 15 pt, Cap to Round Cap.
Select the bottom anchor point with the Direct Selection Tool (A) and delete it. Now we have the upper half of the circle, looking like a closed eye.
Step 6
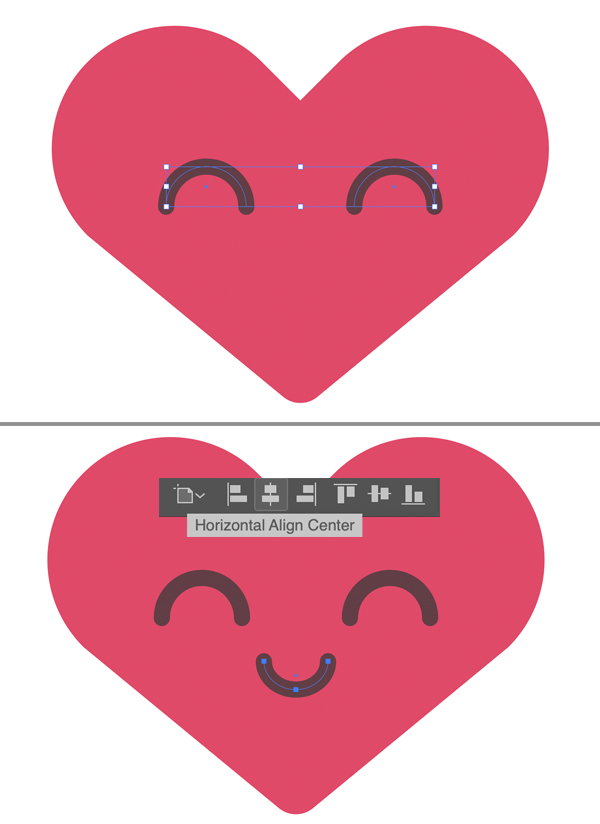
Select the created eye with the Selection Tool (V), hold down Alt-Shift and drag to the opposite side of the heart, creating a copy. Now we have two eyes. Let’s Group (Control-G) them.
Use the same technique to create the smiling heart’s mouth, placing it in the center of the heart.
Let’s make sure that everything is perfectly centered. Select all the shapes we have and click Horizontal Align Center in the control panel on top. This way we align everything to the centre of the Artboard.
Step 7
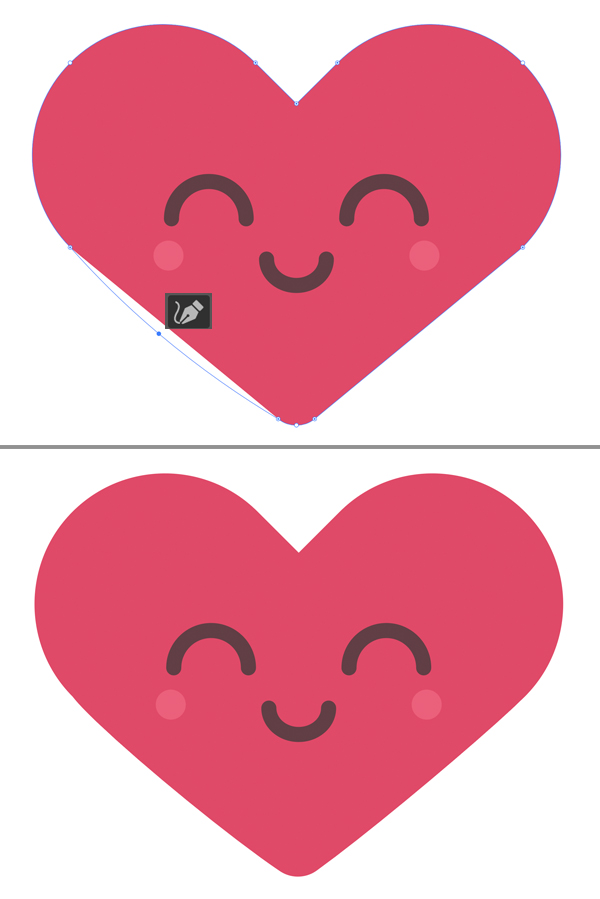
Let’s make the sides of the smiling heart more bulged and rounded. Take the Curvature Tool (Shift-`). Select and drag the left side of the heart down, making it more curved. Repeat the same for the opposite side.
Use the Direct Selection Tool (A) to adjust the shape if needed by moving the anchor points or their handles.
Use the Ellipse Tool (L) to create two little spots for the blush on the smiling heart’s cheeks.
Step 8
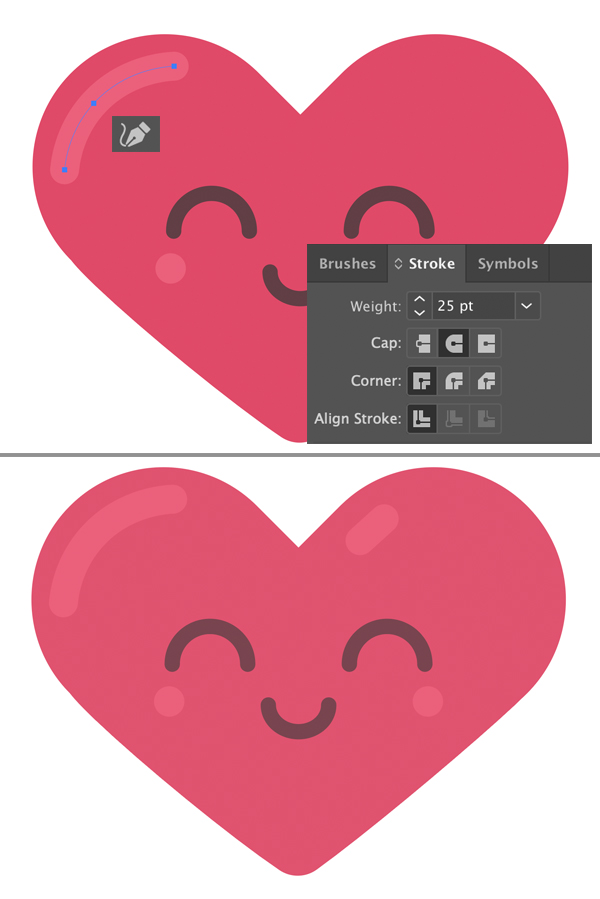
Let’s add some highlights on top of the heart. Use the Pen Tool (P) to create a straight line and then switch to the Curvature Tool (Shift-`) to bend it. Set the Stroke color to light-pink and increase its Weight to 25 pt in the Stroke panel.
Step 9
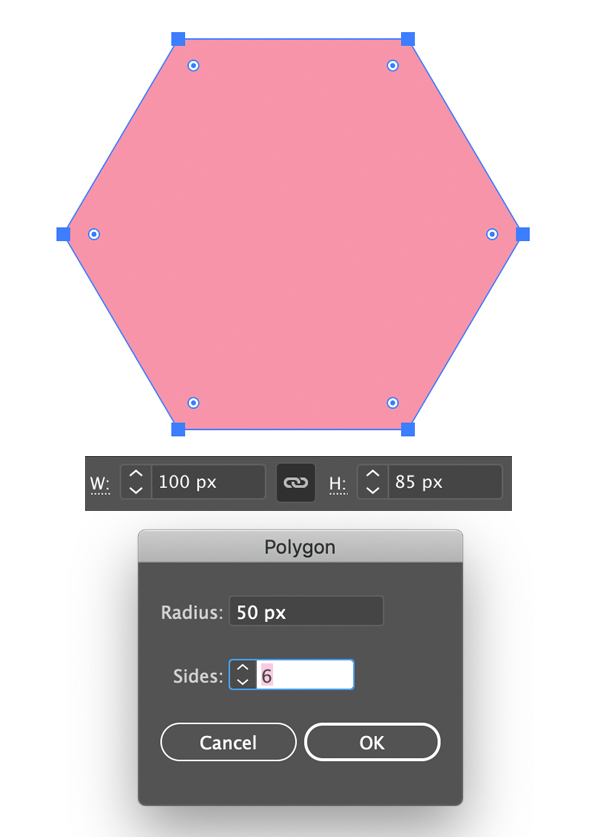
Now we’ll add some flowers. Find the Polygon Tool in the Tools panel. It is located in the same drop-down menu as the Rectangle Tool (M). Click the Polygon Tool icon twice and set the number of Sides to 6 in the pop-up window.
Create a 100 x 85 px hexagon.
Step 10
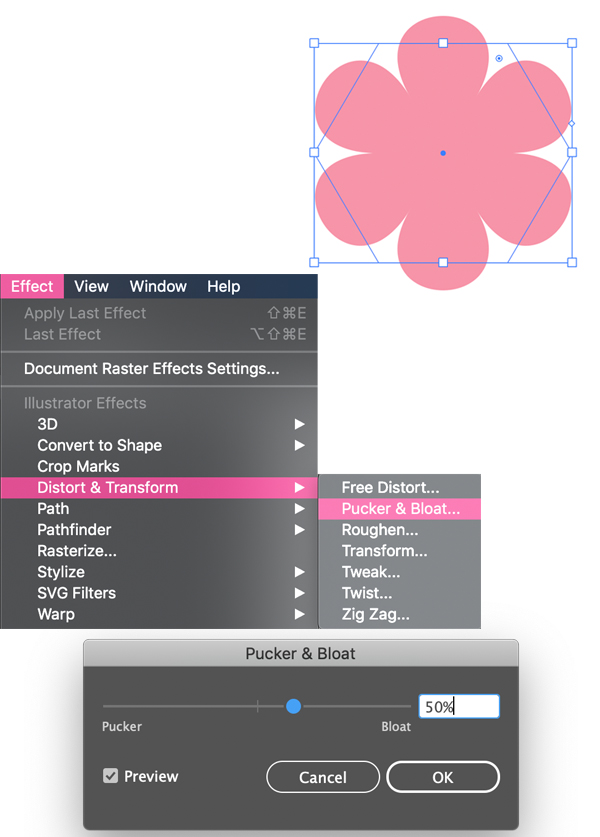
Keeping the shape selected, go to Effect > Distort & Transform > Pucker & Bloat.
Move the slider to 50% (Bloat) and click OK.
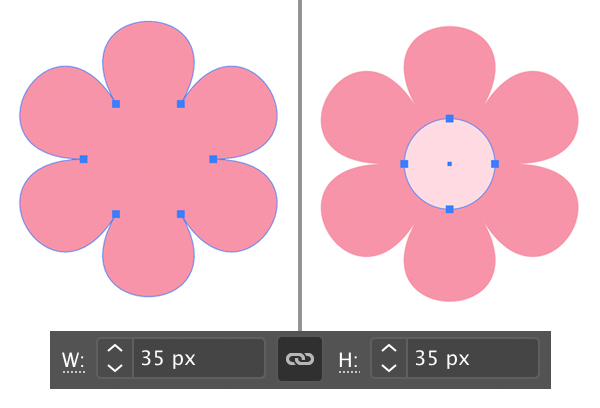
Go to Object > Expand Appearance to apply the effect, turning the hexagon into a flower.
Step 11
Use the Ellipse Tool (L) to create a 35 x 35 px light-pink circle for the center of the flower.
Use the Align option in the control panel on top to center both shapes and then Group (Control-G) both elements of the flower.
Step 12
Place the flower on top of the smiling heart.
Create multiple copies (Control-C > Control-V), changing the size and color of the petals. Arrange the flowers, creating a balanced composition.
Congratulations! The Smiling Heart Card is Finished!
Great work, guys! Now we can finish up by adding a 600 x 600 px light-yellow square for the background and speckling some white circles around the heart to fill in blank spaces.
Add any text in the bottom by using the Type Tool (T) – and there you have it! A romantic card with a loving heart is ready to be sent.
Have fun!
How to Draw a Smiling Heart for St. Valentine’s Day in Adobe Illustrator


